Microsoft Word allows us to insert images easily and without reducing any resolution. We might come across a situation where we want to share only images and not the entire document, or you might have deleted all images from your Windows PC and want to get them back from the Word document. Normally, everyone would right-click on the image and select “Save image as”, but that is a time-consuming and tedious task. In this article, I will explain three easy ways to extract all images from Word documents without the need for any special tools or 3rd-party software.
Extract Images from Word Document
There may be other ways to extract all the images from a Word document, but here are the three best ways to do it. So, let us start without any ado.
1] Save the Word Document as Web Page
This is one of the easiest methods to extract all images from a Word document. We will save the Word document as a Web Page and it will extract all images as a batch.
Open the Word document from which you want to extract all images. Now, click on the “File” button on the top left of the document and select “Save As”.
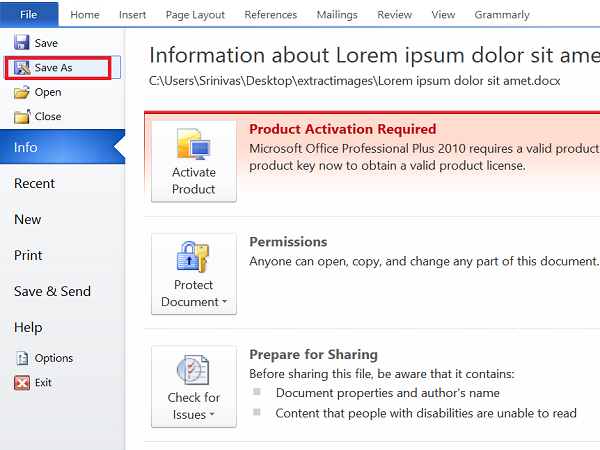
Select the location where you want to save and give the meaningful name. Now, under “Save As” dropdown, select “Web Page”.
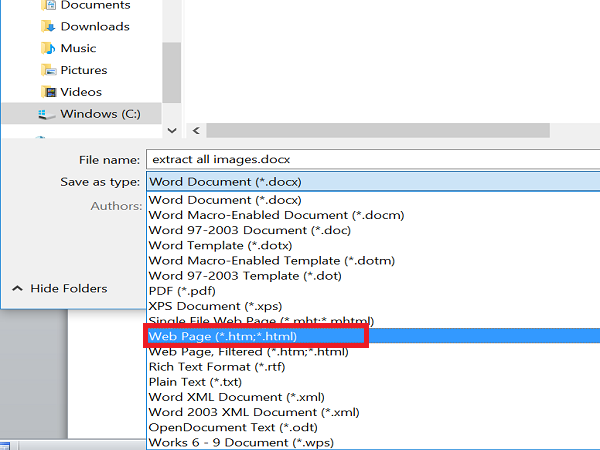
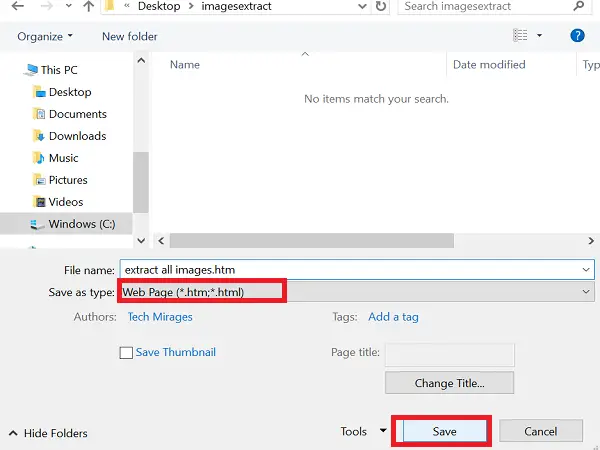
You will also see “Web Page, Filtered” but do not select it as it may reduce the resolution of images. Click on “Save” button to save the Word document as the Web Page.
Go to the location where you have saved the document and you would see ‘.htm’ file and the folder with the given name will be created.
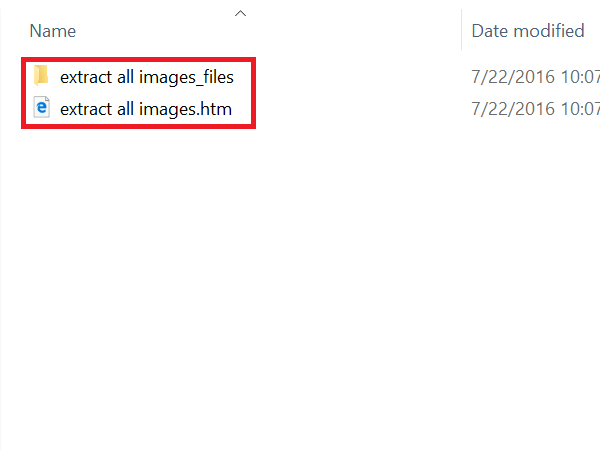
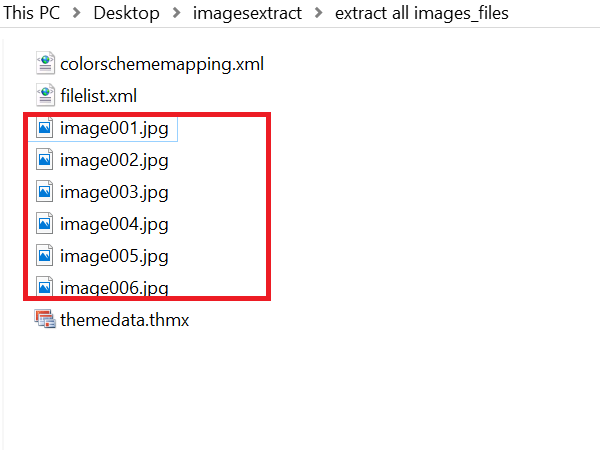
Open the folder and you could see all the images listed there. Copy all these images to any folder you like.
2] Change the extension from ‘.docx’ to ‘.zip’
This method to extract all images as a batch from the document is so simple that all you need to do is rename the extension of the file from ‘.docx’ to ‘.zip’.
Select the required document, right-click on it and select “Rename”.
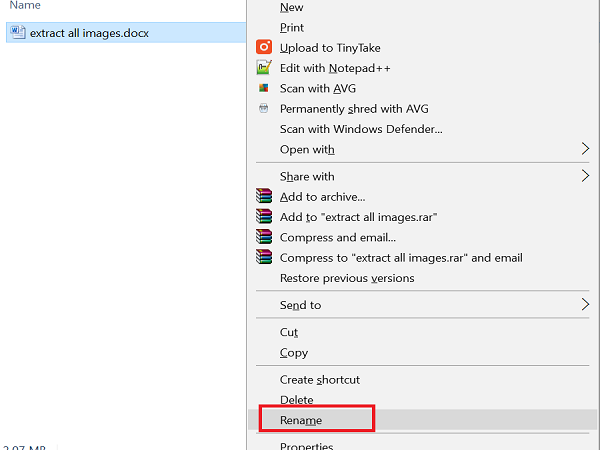
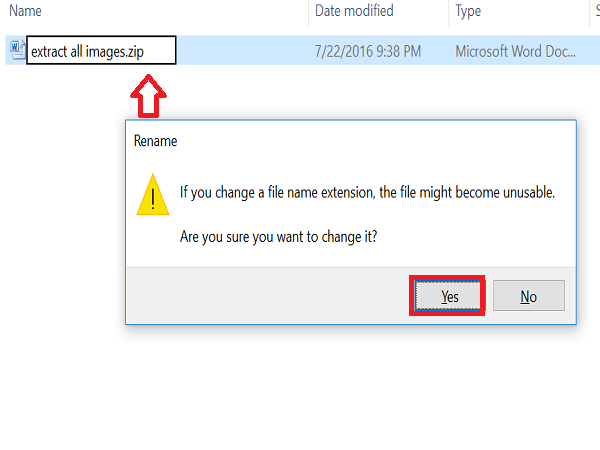
Now, change the extension from ‘.docx’ to ‘.zip’ and hit Enter. It will show you this dialog box, but do not worry and click “Yes”.
Use any of the zip extraction software like 7-Zip, WinRAR, etc, to extract this zip file. Give the location where you want to extract the zip folder.
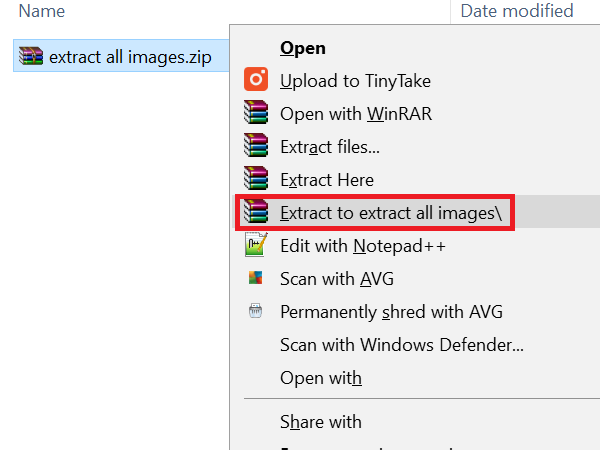
Now, open the folder you have extracted and go to Word > Media.
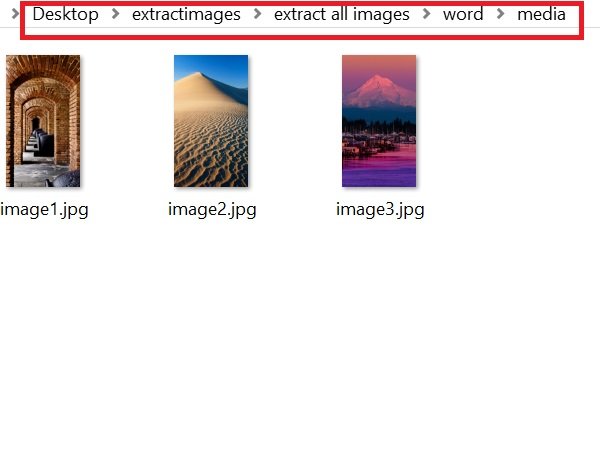
Now, in the ‘media’ folder you will find all images which you can copy to another folder if you want.
UPDATE: You may just right-click the Word file and use 7-Zip to extract the images.
3] Copy and Paste Method
This method is not as good as the above two, but it would be very helpful when you want to extract one or two images only.
Right-click on the image and select “Copy” from the options. The size and resolution of the copied image will not be affected.
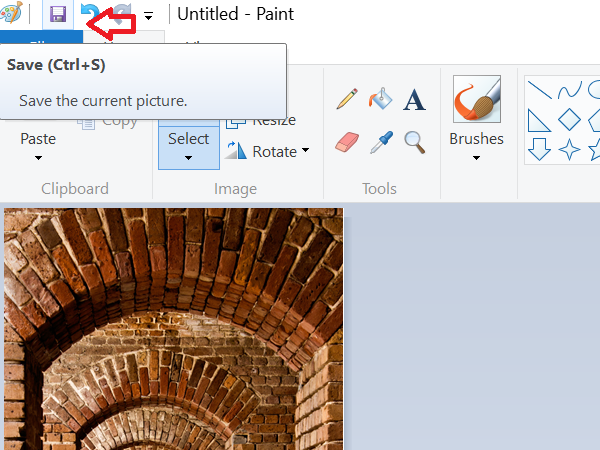
Now, open any image processing tool like Paint, Photoshop or GIMP, but here I would use the default tool called “Paint”. Open Paint, paste the image and press “CTRL+S” or click Save button to save the image.
These are some of the ways to extract images in a Word document as a batch.
If you are looking for a freeware to easily batch extract and save images from any Office document use the Office Image Extraction Wizard.
Also read: How to Find and Replace all Images in Word at once.
It is not necessary to change the extension from .docx to .zip. Just open the .docx file directly with 7-Zip.
Yes @jonezrin:disqus You are right. Thanks for that :)
This is nice but to open docx file with winrar is the best way dude.
waiting for this article for my whole life! and OMG it’s amazing to found one. My life as a graphic designer has been more meaningful now hahahah. For people like to put images on Word and sent it. THANKS A LOTTTTTT!!!!!!!!!
Happy that you liked it and it is helpful for you!