There is a way by which one can browse the contents of a system image and extract individual files in Windows 11/10. You need not restore an entire system image for getting or extracting few important files. The procedure to extract individual files from the system image differs for Windows 11/10/8 and Windows 7. Moreover, neither of these will work on Windows Vista, as it does not have the option to attach VHD files nor does it use the wim archive.
This article will show you how you can extract and restore particular or select or individual files in Windows 11/10/8, followed by, how to do the same in Windows 7.
Extract specific files from Windows System Image Backup
In Windows 11/10, it is easy to extract specific files from a system image. The system image backup file is saved as a wim archive.
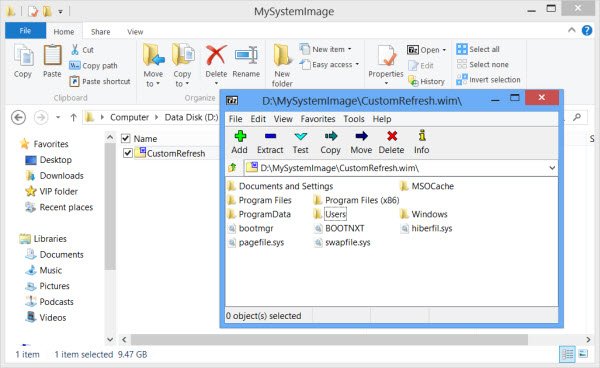
If you have created a Custom System Image for use, you will be able to browse and copy the files using any file extraction utility.
You know the location where you have saved the custom image, so simply open the location and use any file extraction tool like 7-Zip to open the archive.
You will be able to browse the contents and even Copy the file or carry out other operations on the contents.
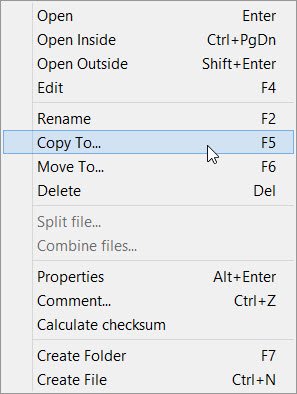
To extract any particular file, simply right-click on any file and exercise the Copy To option.
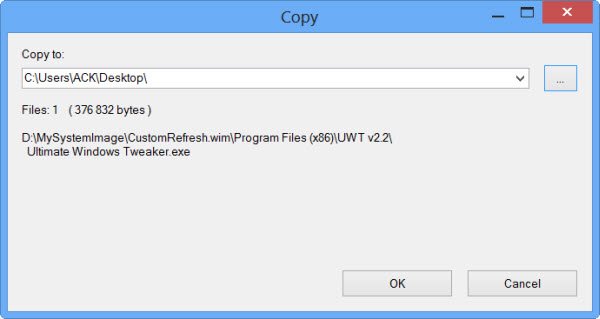
The context menu also offers other options like Calculate checksum, which can be quite useful to check the integrity of your backed-up files.
Read: How to restore or create System Image in Windows 11/10.
Extract specific files from Windows 7 System Image Backup
In Windows 7, things are not so easy, but there is a way that has been suggested on TechNet. For that, you will have to know the location where your system backup file has been saved.
System images are saved at: Drive\WindowsImageBackup\(YourPC Name)\Backup. You will see the files arranged by year-month-day-hours-minutes-seconds. Identify the latest image where your file may be saved and present.
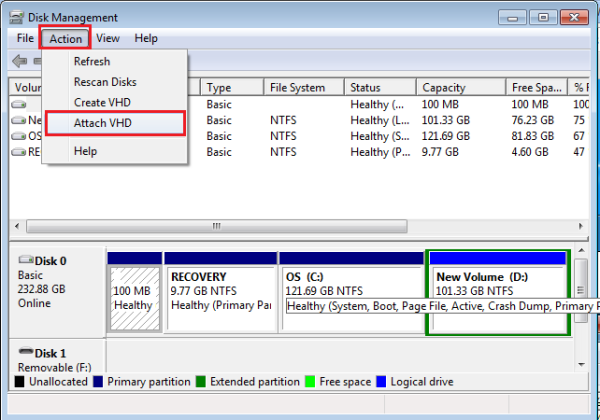
Now go to the Start Menu and in its search field type Disk Management and hit Enter. Choose the ‘Action’ menu and click on ‘Attach VHD’ option.
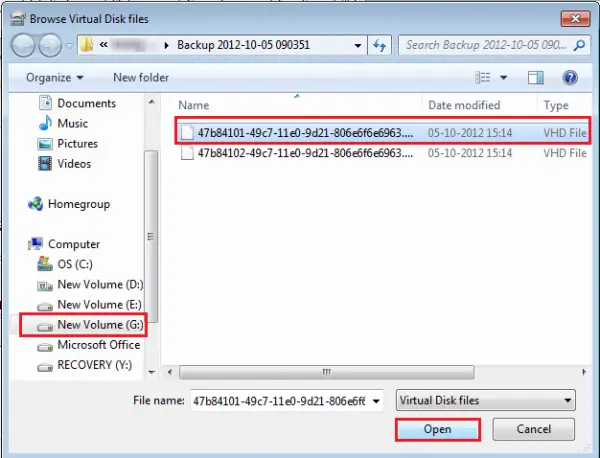
Next, a window will pop up on your computer screen. Click on its ‘Browse’ button and search for the system image back up file that has the .VHD file extension. Keep the Read Only box unchecked.
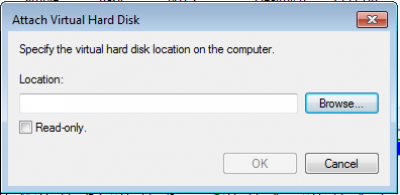
Here, the system images have been saved to drive G:\ so, the backups would be inside G:\WindowsImageBackup\.
Next, click on Open > OK. At this point, do not check the ‘Read Only’ option.
An AutoPlay window may now appear on your computer screen. You will also notice the VHD file attached as a separate virtual disk having its own drive letter in the Disk Management window.
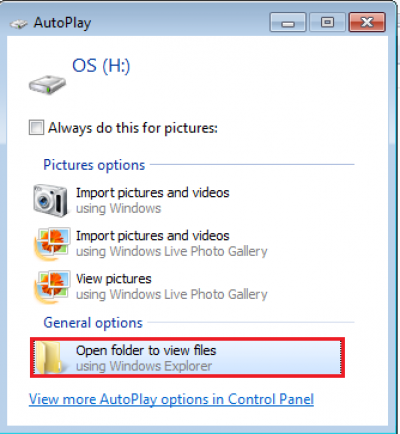
You can also open it via your Computer folder. When the dialog appears on your computer screen, choose ‘Open folders to view files’ option.
You can browse and copy any file/s you want from the attached system image VHD disk.
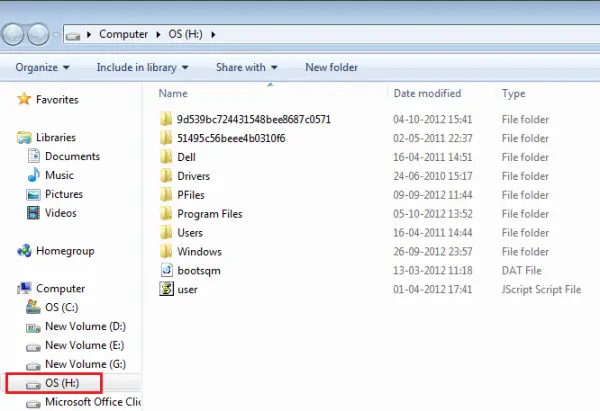
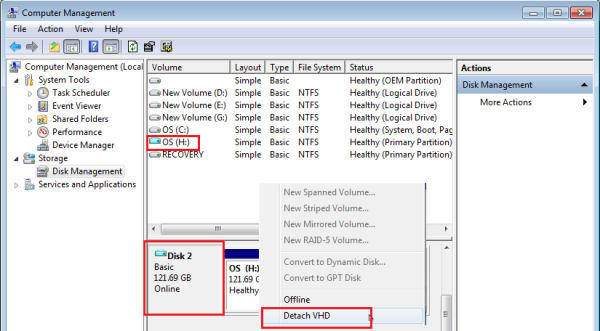
When you have finished the copying work, right-click the box that corresponds to VHD in the Disk Management. Doing so, brings up a list of actions to carry out, choose ‘Detach VHD’.
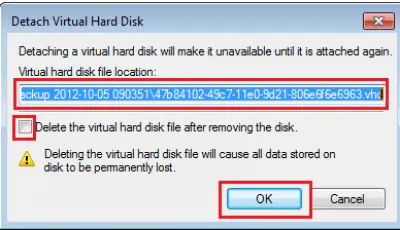
Detaching a virtual hard disk makes it unavailable until it is attached again. Keep the Delete virtual hard disk file box unchecked. Click on OK and exit.
To follow this complete procedure you will need to have created a system image backup earlier on your Windows computer.
How to extract individual files from a Windows 11/10 system image backup?
In order to extract files from a Windows 11 or Windows 10 System Image Backup, you need to open the location where you saved the backup first. You need to use the Windows File Explorer to get to it. Next, install the 7-Zip and right-click on the backup file. Once done, open the archive, find the file, and copy it to another location where you want.
How do I select a system image backup?
To create a System Image Backup, you need to use the File History option on Windows 11 or Windows 10 computers. You can find it in the Control Panel or Taskbar search box. Once done, you can go through this article to create a System Image within moments.
Hope this helps.
