You may have encountered an error when opening a VMware virtual machine that says failed to connect pipe to the virtual machine. There are various instances of this error and we will cover solutions that can resolve all of them. So, if you have encountered this error, this post is for you.

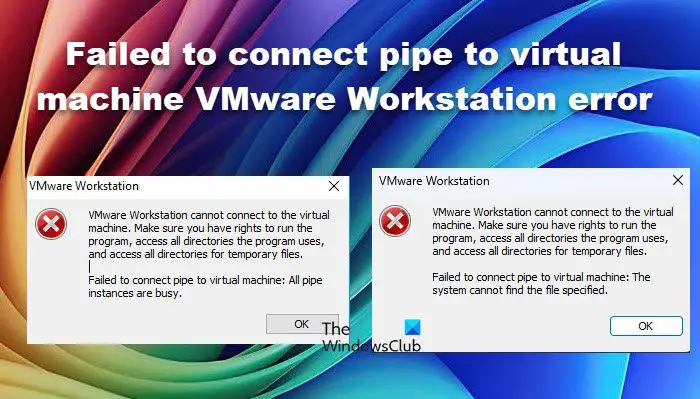
VMware Workstation cannot connect to the virtual machine. Make sure you have rights to run the program, access all directories the program uses, and access all directories for temporary files.
Failed to connect pipe to virtual machine: All pipe instances are busy.
VMware Workstation cannot connect to the virtual machine. Make sure you have rights to run the program, access all directories the program uses, and access all directories for temporary files.
Failed to connect pipe to virtual machine: The system cannot find the file specified.
Fix Failed to connect pipe to virtual machine VMware Workstation error
If your VMware Workstation VM failed to connect pipe to the virtual machine, follow the solutions mentioned in this post.
- Terminate all the virtual machine process
- Check the VMware Workstation Services
- Repair Microsoft Visual C++ Redistributable
- Make sure that the Hyper-V is turned off
- Uninstall VMware Workstation and install its latest version
Let us talk about them in detail.
1] Terminate all the virtual machine process
First, we are going to terminate all the virtual machine processes and then start the VM back up. To do so, you need to shut down your virtual machine, then open Task Manager, right-click on the process, and select End Task. You need to do this to all the processes. After terminating all of them, open the VMware Workstation and start your VM. Hopefully, this will do the job for you.
2] Check the VMware Workstation Services

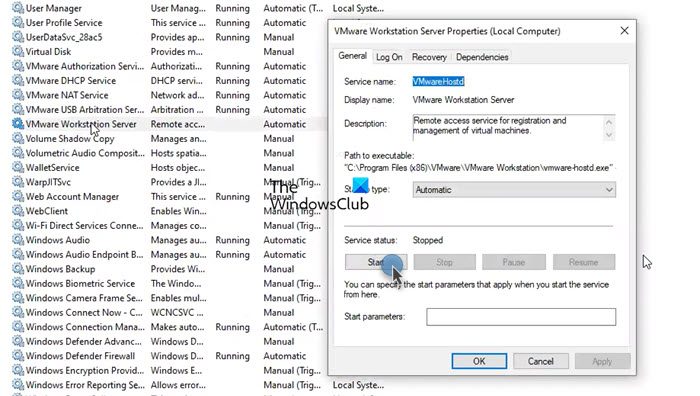
Next, we need to check and make sure that the VMware Workstation services have been set to Automatic and are running. These services are essential to creating an environment for your VM to run. To check and configure the service, follow the steps given below.
- Open Services by searching it out of the Start Menu.
- Now, look for VMware Workstation Server service, right-click, and click on Properties.
- Check if the service’s status is Stopped. If it not running, change the Startup type to Automatic and click on Start.
If the service starts, you can reboot the host computer and see if the issue is resolved.
Many users failed to start the service; when trying to do so, they encountered the following error.
Windows could not start the VMware Workstation Server service on Local Computer.
Error 1053: The service did not respond to the start or control request in a timely fashion.
In that scenario, move on to the next solution.
3] Repair Microsoft Visual C++ Redistributable

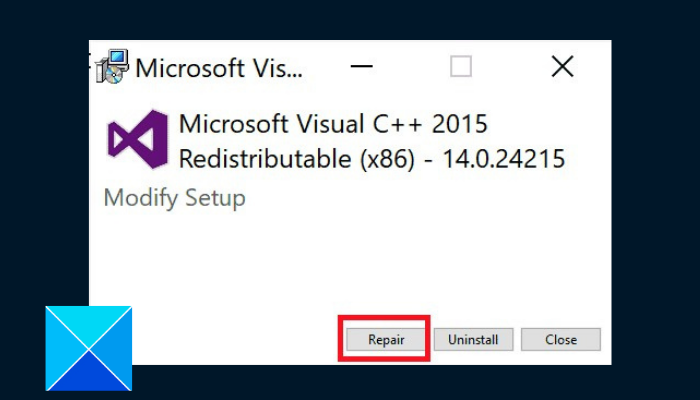
The Microsoft Visual C++ Redistributable packages install runtime components of Visual C++ libraries. Since VMware Workstation is written in C and C++, we need to the utility to create the environment where VMware can start its services. To do so, you can follow the steps mentioned below.
- Open Control Panel.
- Go to Programs > Programs and Features.
- Then, search for “Microsoft Visual C++ Redistributables”, click on Change, and then select Repair.
If you have multiple Visual C++ Redistributables installations available, repair all of them. It might take some time, but it will be worth it. After repairing the tool, you need to start the VMware Workstation service as shown earlier, reboot the host computer, and start the VM.
4] Make sure that Hyper-V is turned off

Hyper-V is a Microsoft’s proprietary hypervisor. However, it does have some issues running alongside other VMware services. That is why, we recommend you disable Hyper-V when using this tool or check our guide on how to run Hyper-V, VirtualBox, and VMware on the same computer.
To disable Hyper-V, follow the steps given below.
- Open Control Panel.
- Navigate to Programs > Programs and Features.
- Click on Turn Windows features on or off.
- Look for Hyper-V and untick its checkbox.
- Finally, click on Ok.
After disabling Hyper-V, check if the issue is resolved.
5] Uninstall VMware Workstation and install its latest version
If all else fails, our last resort is to remove VMware Workstation completely along with the registry. Then, download the latest version of the VMware workstation on your computer. You don’t have to get rid of your VMs; after downloading, all of them will be added back.
Hopefully, you can resolve the issue using the solutions mentioned in this post.
Could not connect to the virtual machine. Try to connect again.?
This error message can occur due to various issues, such as network connectivity problems, incorrect credentials, or wrong settings in Hyper-V Manager. In order to resolve this, you should first try rebooting the host system, if that doesn’t work, check our guide to know what to do if cannot connect to the virtual machine.
Why is my VM not connecting to the network?
To connect your VM to the network or the Internet, you need to change the machine’s settings. For example, in Hyper-V, you are required to create an external switch. If you are using VMware, we urge you to check our guide if the machine is not connecting to the Internet.
Leave a Reply