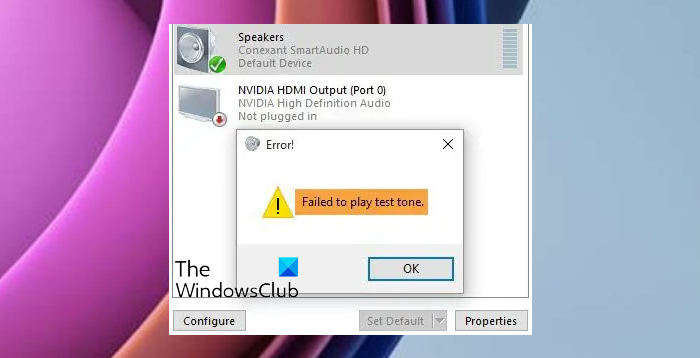
If you see Failed to play test tone error while testing your speaker or headphones, here are some solutions to fix the problem. People often use the test tone to check the right-left balance of speakers and headphones. But, if you cannot do so, then this article will help you.

Failed to play test tone on Windows 11/10
If you receive Failed to play test tone error on Windows 11/10, the following suggestions would fix the issue:
- Restart Windows audio-related services
- Change the default test tone rate and bit depth
- Disable Audio Enhancements
- Run the Audio Troubleshooters.
A detailed guide is mentioned below, and it is recommended to follow them.
1] Restart Windows Audio related services
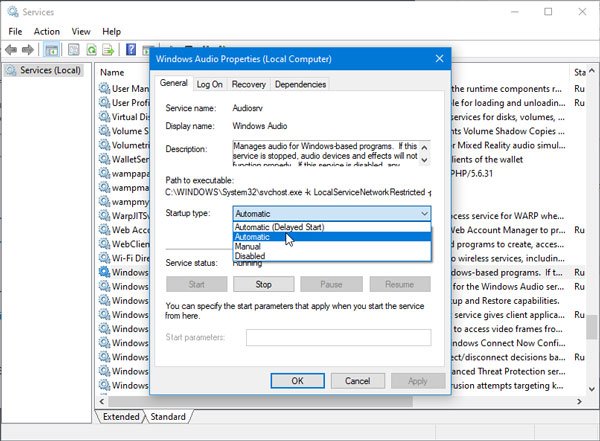
Windows starts the Audio services on every boot. But if this Service fails to start, this problem could arise. You need to start it manually.
For that, open the Services Manager and locate the following two Sevices:
- Windows Audio
- Windows Audio Endpoint Builder
Double-click on one and check if the Service status is set to Running or not – and if its Startup type is set to Automatic. If it is not, then press the Start button and select Automatic from the drop-down menu.

Click Apply and exit.
You need to do the same for both the Services.
2] Change the default test tone rate and bit depth
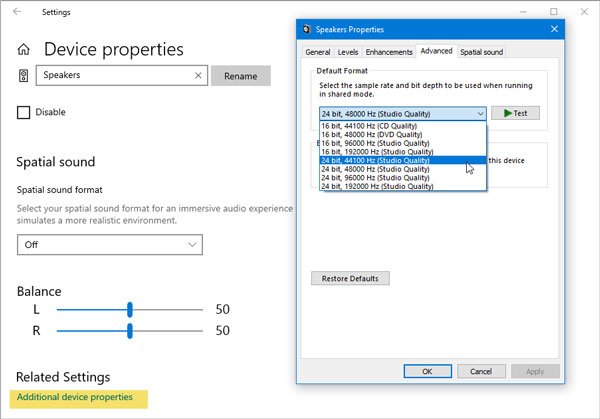
Depending upon your speaker or headphones, Windows chooses a default test tone rate and bit depth. It lets you find the best sound quality from your audio output device. If your speaker or headphone has some issues with the default settings, you might see the error. To fix it, change it once and check if the problem remains or not.
To do so, open the Windows Settings panel and go to System > Sound.
On your right-hand side, you can find an option called Device properties.
Click this option and select Additional device properties to open it.

From here, go to the Advanced tab, select a different rate and bit depth, and click the Test button.
See if this helped.
3] Disable Audio Enhancements
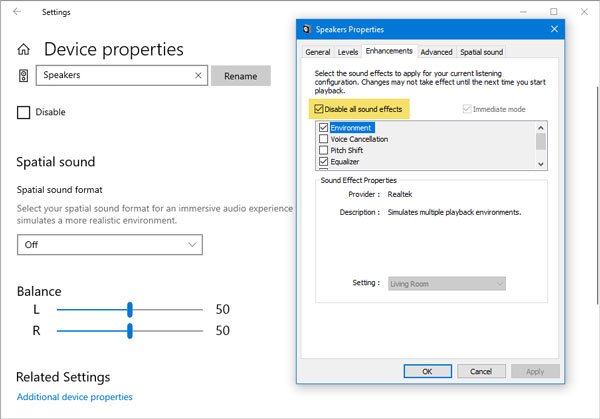
Windows sometimes uses various sound effects according to your requirements. You can disable all sound effects and audio enhancements to check if it can fix your problem or not.
To do that, you need to open the Speakers Properties window as you did in the last trick. After opening this window, go to the Enhancements tab, and make a tick in the Disable all sound effects checkbox.

After that, go to the Advanced tab, and try to play the test tone.
4] Run the Audio Troubleshooters
Run the Playing Audio Troubleshooter and Recording Audio Troubleshooter and see if they help. You will be able to access them from the Troubleshoot Settings page.
I am sure something will help, but if it does not, then here are some more suggestions:
- Restart computer
- Use System Restore point
- Run SFC scan
- Check the wire that connects the speakers to your PC.
Further reading: