During any software or program installation on your Windows 11/10 PC, you may encounter the Feature transfer error, which basically prevents you from proceeding further with the installation. In this post, we will identify the potential cause, as well as provide the most suitable solutions to this software installation error.
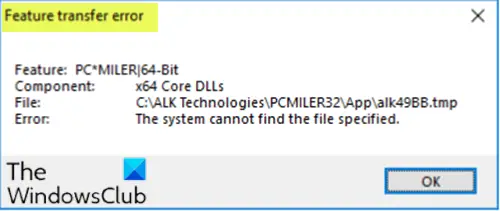
Depending on the software you’re trying to install, when encountering this issue, you’ll receive a similar error message as follows:
Feature transfer error
Feature: PC’MILER|64-Bit Component: x64 Core DLLs
File: C:\ALK Technologies\PCMILER32\App\alk49BB.tmp
Error The system cannot find the file specified
The Feature transfer error could also be accompanied by these messages:
Access is denied
Catastrophic Failure
Cyclic redundancy check
These errors are typically caused by missing system files, permission issues, or broken system registry structures.
Feature transfer error – The system cannot find the file specified
If you’re faced with this issue, you can try our recommended solutions below in no particular order and see if that helps to resolve the issue.
- Run the Program Install and Uninstall Troubleshooter
- Run SFC scan
- Temporarily disable security software
- Install the software in Compatibility Mode
- Install the software in Clean Boot state
- Repair Windows Registry
Let’s take a look at the description of the process involved concerning each of the listed solutions.
1] Run the Program Install and Uninstall Troubleshooter
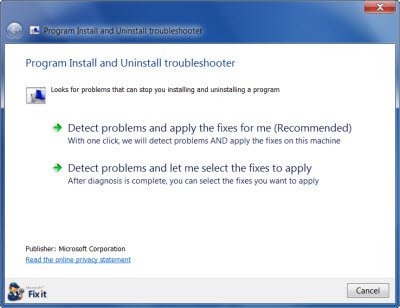
This solution requires you to run the Program Install and Uninstall troubleshooter. The wizard helps you automatically repair issues when you’re blocked from installing or removing programs on your Windows device.
2] Run SFC scan
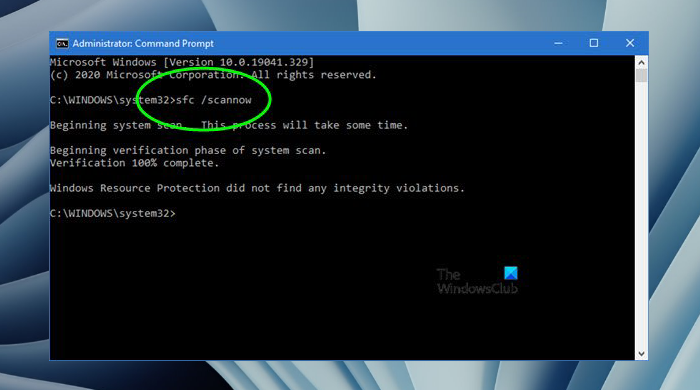
If you have system file errors, you may encounter this Feature transfer error during software installation. In this case, you can run SFC scan and see if that helps.
3] Temporarily disable security software
For third-party security software, this largely depends on the security software you have installed. Refer to the instruction manual. Generally, to disable your antivirus software, locate its icon in the notification area or system tray on the taskbar (usually in the lower right corner of the desktop). Right-click the icon and choose the option to disable or exit the program, then retry the software installation.
You can turn off Windows Defender and also disable other components of Windows Defender including, Firewall & Network Protection and App & Browser Control.
Turn on Windows Defender protection or third-party security software once the software installation is complete.
4] Install the software in Compatibility Mode
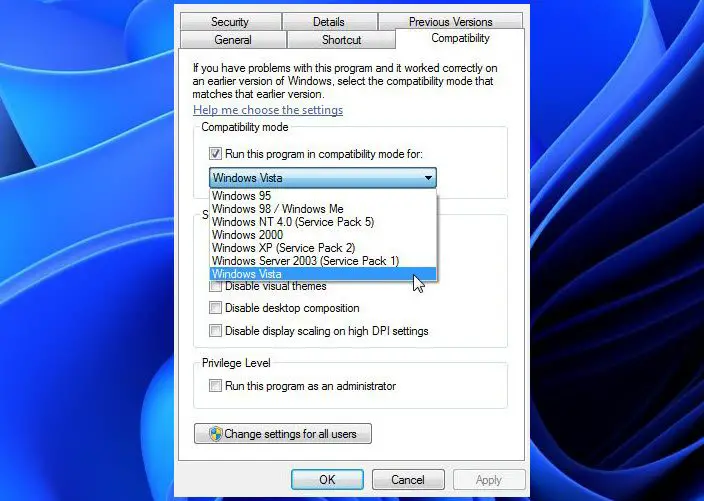
To install the software in Compatibility mode, do the following:
- Right-click on the software installation file and select Properties.
- Tap or click the Compatibility tab.
- Check the Run this program in compatibility mode box.
- Tap or click the drop-down box and select a previous Operating System.
- Tap or click OK to save changes.
Run the software installer again and see if the issue at hand is resolved. If not, try the next solution.
5] Install the software in Clean Boot state
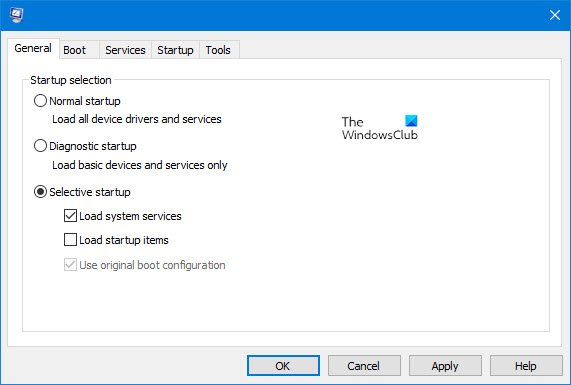
This solution simply requires you to clean boot your Windows PC, and then retry the software installation in that state.
6] Repair Windows Registry

As already pointed out, broken system registry structures can also trigger this error. In this case, you can repair the Registry, then try the software installation again.
Any of these solutions should work for you!
Leave a Reply