Error Code 0x80072af9 can be seen when you use a VPN, Mail app, or Windows Update. The Windows Time Service can also throw up this error. This error typically appears when attempting to launch Windows Defender or when you check for Windows Updates. It prevents VPN connections or the installation of the most recent definition update. If you face this issue, then this post may be able to help you.

Fix Error Code 0x80072af9 on Windows 11/10
Here is the list of suggestions you can follow to resolve the 0x80072af9 Error Code. Please go through the list and see what may apply in you case:
- Clean up Junk & Temporary Files
- Use the Network Reset option
- Run System File Checker & DISM Tool
- Use System Restore and then run Windows Update
- Manually update Windows Defender
- Reinstall the program that may be throwing up this error.
You will need an admin account to execute these suggestions.
1] Clean up Junk & Temporary Files
Cleaning up junk and temporary files will help smooth system restoration and update. Follow the given steps to clean up.
- Press shortcut Win Key + R to open the Run command dialog box.
- Type cleanmgr in the given space box and click OK.
- Now, select the drive that you want to clean up
- Click OK.
It will remove junk and temporary files.
2] Use the Network Reset option

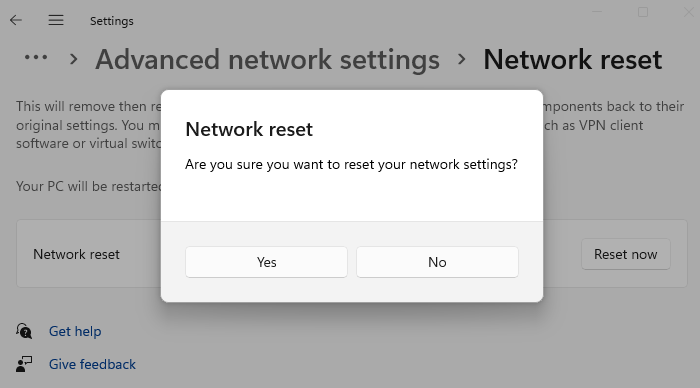
Use the Network Reset option and see if that works for you. This option in Windows Settings will reinstall Network adapters and reset Networking Components to default.
3] Run System File Checker (SFC) & DISM Tool
SFC command tries to repair damaged system files from the Windows Component Store, while the DISM command tries to repair damaged system files via Windows Update. Running these commands may help eliminate the error code on your windows.
- Right-click on the Start menu.
- Click on Windows Terminal (Admin) to open it
- Type the following and press Enter.
SFC /scannow
- It takes about 10 to 15 minutes for the command to finish running.
Once it fixes the files, it’s time to run the DISM command to repair damaged system files. Type the following in the same Windows Terminal, and press the Enter key.
DISM /Online /Cleanup-Image /RestoreHealth
Once the scan is complete, verify whether the issue has been resolved or not.
4] Use System Restore and then run Windows Update
System Restore enables you to fix installation issues or data corruption without having to reinstall the operating system and restore a system to its previous state. The files and settings saved in the restore point are retrieved, which fixes the Windows environment.

- Click the Start button.
- Type the phrase “system restore” in the search column.
- The Create a restore point option will appear under Settings at the top of the start menu.
- In the window, System Properties, click the System Protection tab and select System Restore. Click Next when the System Restore window appears.
- Choose the preferred restoration point in the next window and click Next.
- To finish the procedure, adhere to the instructions on the screen.
The next step is to update Windows. How to check for Windows Update?
- Use the shortcut Win Key + I to open the Windows Settings.
- Select the Windows Update or Update & Security option.
- Click on Check for updates under the Update Status section on the left pane.
- If updates are available, update.
5] Manually update Windows Defender
First, clear the WinSXS folder. The folder keeps old components when new components appear with a Windows update. Reducing the size may help. The best way to do this is to use the Windows Update Cleanup option in the Disk Cleanup Tool.
You can also run the DISM StartComponentCleanup command to remove old components
Dism /Online /Cleanup-Image /StartComponentCleanup
To clean up more disk space, you may run the following command in the Run prompt for more options in the Disk cleanup tool.
%SystemRoot%\System32\Cmd.exe /c Cleanmgr /sageset:35 & Cleanmgr /sagerun:35
After this, try to install the Windows Defender definition update manually when you’re finished.
6] Reinstall the program that may be throwing up this error
If there is any VPN program that is throwing up this error code, then you could uninstall and then reinstall the program that may be throwing up this error.
It is crucial to follow these steps to get rid of the error so after restoring your PC, check if the error code 0x80072af9 still appears. Since System file corruption can also cause a 0x80072af9 error, a refresh or a repair install is usually effective in resolving this problem. It would help if you only attempted this when nothing else worked.
How to manually download and install updates from Microsoft Server?
You can download the Windows Update by searching the KB number on the Microsoft Catalog website. Once downloaded, you can double-click to start the installation and restart if required. If you are unsure of Windows updates, check the Update history for failed updates.
How to uninstall Windows Updates?
Go to Settings (Win+I), open Settings, click Update & Security and press Windows Updates on the left pane. Next, click Advanced options and choose to View your updates history. To uninstall the Windows Update, click on Uninstall Updates at the top of the page, right-click on the relevant update, and then choose Uninstall from the menu.