In this post, we will see how to fix 0x800F080C .NET Framework error on Windows 11/10. which you may face while installing or setting it up. The error indicates that there may be some corrupted files or corrupted .NET Framework dependencies in the system. Users facing this issue are not able to install the missing .NET Framework packages and run some specific program files on their system.
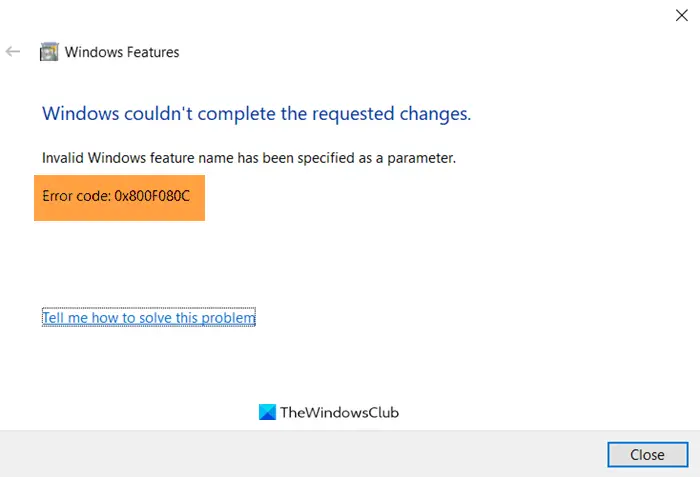
Windows couldn’t complete the requested changes, Invalid feature name has been specified as a parameter, Error code 0x800F080C

Fix 0x800F080C .NET Framework error
If you face this issue, try the following methods to solve it:
- Enable .NET Framework in Clean Boot State.
- Run the .NET repair tool.
- Run SFC scan.
- Run DISM scan.
- Download .NET Framework offline installer.
1] Enable .NET Framework in the Control Panel

Many apps or software require a specific version of the .NET Framework. Sometimes, users encounter a message while running an app or software, “This application requires .NET Framework to run, but that version is not installed on your system.”
You can enable the .NET Framework version in the Control Panel – even better – do it in Clean Boot State.
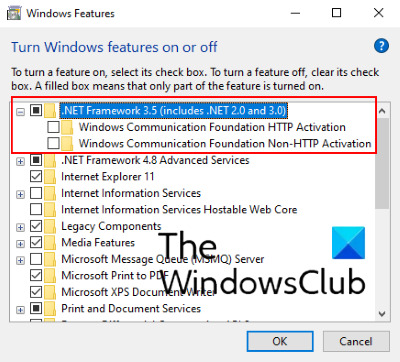
Type Windows Features in the Windows search box and click “Turn Windows features on or off.” Now, select the required version checkbox and click OK.
This will install the .NET package on your system. You should be connected to the internet while enabling the .NET Framework using Windows Features. If you get such a prompt message on the screen, reboot your device.
Please note that you need not select the checkboxes for Windows Communication Foundation (WCF) HTTP Activation and Windows Communication Foundation (WCF) Non-HTTP Activation, as developers or service administrators require these features.
2] Run .NET Framework Repair Tool by Microsoft

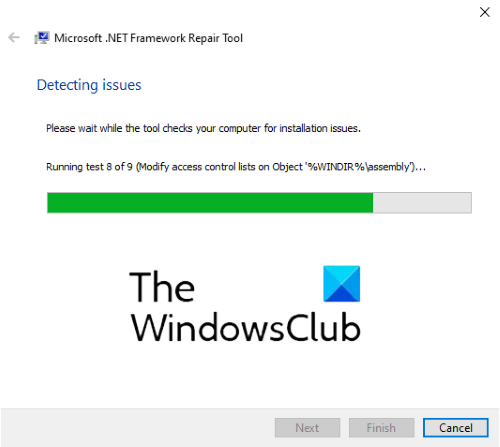
Microsoft Corporation provides a .NET Framework Repair Tool to Windows users. This tool scans the system for corrupt .NET dependencies and repairs them. It is a portable software that means you need not install it on your PC. Simply double-click on the downloaded file and it will run on your PC. Click Next to start the tool to repair the corrupted .NET dependencies. When the repair process is completed, click Finish and restart your computer.
If this method did not work for you, move ahead to the next one.
3] Run SFC scan on your PC
SFC or System File Checker is a utility for Windows computers provided by Microsoft. It scans the system for corrupted files and repairs them. To perform an SFC scan on your computer, launch the Command Prompt as an administrator and type sfc /scannow, and press Enter.
It may take some time to scan the entire system for corrupted files. When the scan gets completed, restart your computer.
4] Run the DISM scan on your PC
You can deploy .NET Framework 3.5 on your system using the DISM scan. The DISM command-line tool will create a modified image on your system to deploy the .NET Framework version. Launch the Command Prompt as an administrator and type the following command and press Enter.
DISM /Online /Enable-Feature /FeatureName:NetFx3 /All
The above command will install the .NET Framework 3.5 files from the Windows Update.
Hence, make sure that you are connected to the internet while executing the above command. When the command gets completed, restart your computer.
Similar: Fix 0x800f080c Hyper-V error
5] Download .NET Framework offline installer
You can also download .NET Framework offline installer service pack from the Microsoft website. After downloading it, install it on your PC.
We hope one of the above solutions helps you fix the error.
Related links that may interest you:
Leave a Reply