Deployment Image Servicing and Management (DISM) helps Windows users repair, update, manage, and modify system images by running commands on the elevated Command Prompt. Like any other system component, DISM is prone to some issues. In this article, we will focus on how to fix the 0x800F082F DISM error on Windows 11/10. The error occurs when a user tries to run the DISM commands on CMD.
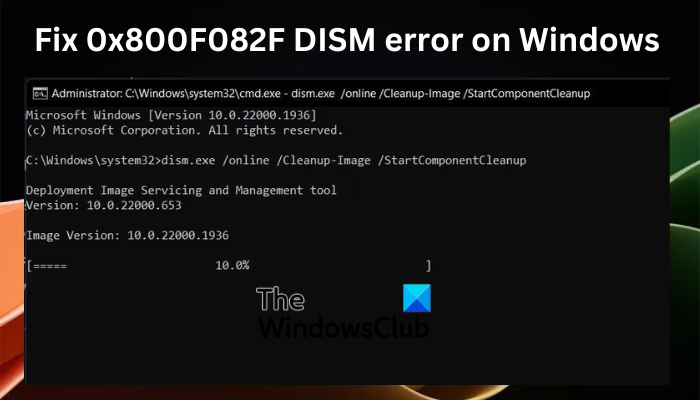
The 0x800F082F DISM error is quite disturbing, as it can reoccur after successful troubleshooting. Some users report that they applied the same solution to fix the error the second time, but it didn’t work. We run DISM commands to fix an issue, but when it’s not working properly, it means you have two issues to fix on your Windows PC. Luckily, this guide has what you are looking for to resolve the issue.
Why do I get 0x800F082F DISM error?
There are several possible reasons for the 0x800F082F error when deploying the DISM tool on Windows 11 or Windows 10. The most common causes of this error are:
- Windows app conflicts. If you recently installed or updated a certain program on your system, there could be some issues between the program and DISM. This can trigger the error, and the session will not be completed.
- Driver issues. Drivers can lead to a 0x800F082F DISM error if they are damaged, missing, or outdated.
- Lack of necessary access permissions or privileges. If you try to deploy the DISM on Command Prompt with insufficient permissions, you can get the 0x800F082F error, and the tool might not even work at all.
- Windows system file issues. Sometimes, the system files might be missing or corrupted. This can definitely cause issues on your PC, including DISM issues.
Let us now look at how we can fix these issues.
Fix 0x800f082f DISM Remove Package error on Windows 11/10
If you get the 0x800F082F DISM error when running DISM command lines on the Command Prompt in Windows 11 or Windows 10, try the following solutions to fix the issue:
- Perform general fixes
- Switch to an admin account and run CMD as admin
- Tweak SessionsPending registry settings
- Repair Component Store in Safe Mode with Networking
- Troubleshoot in Safe Mode with Networking
Let us now delve into these solutions one by one.
1] Perform general fixes
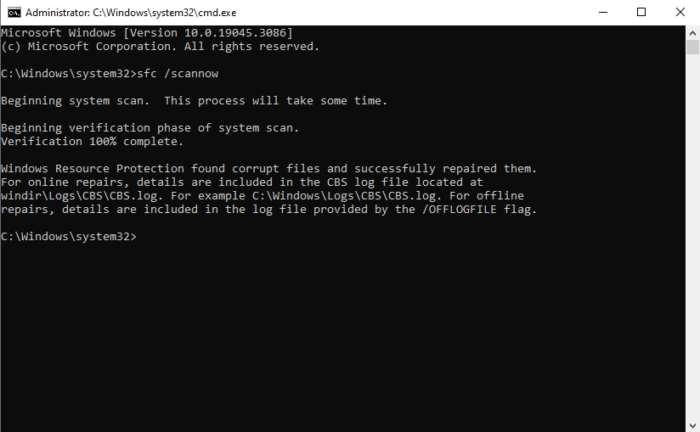
There are some general workarounds that have worked for some users, and we find it important for you to try them before heading to other solutions. So, try the following general fixes and see if they will fix the DISM error:
- Check if you have a stable network connection. You can test the Internet speed and, if it is extremely slow or unstable, remove and reconnect routers, and Ethernet cables, reset Network settings, or contact your ISP.
- Check for updates. Ensure that your Windows operating system and drivers are up-to-date. We recommend checking for updates in the Windows Update settings for the drivers and OS, or other optional updates.
- Run the SFC scannow tool. The tool can detect and fix system files that may have caused the DISM error.
If none of the general fixes work for you, try the following solutions.
2] Switch to an admin account and run CMD as admin
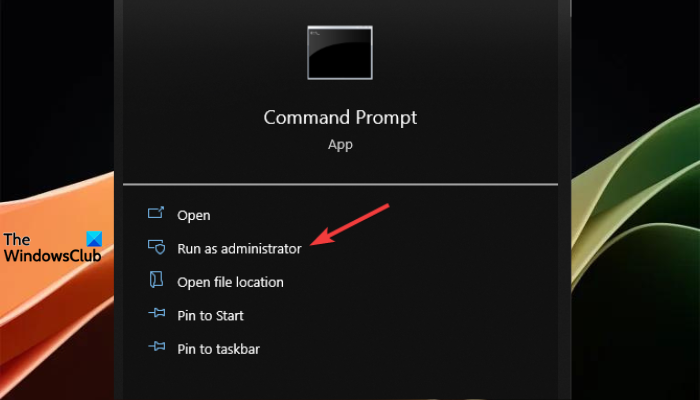
Switching to the administrator account ensures that you access Command Prompt with the necessary permissions, which is a requirement while deploying DISM. To do this, search for cmd in the search box and select Run as administrator. Alternatively, you can type cmd in the Run dialog box and press Ctrl + Shift + Enter to open the elevated Command Prompt. After that, run the DISM commands and see if the issue is resolved.
3] Tweak SessionsPending registry settings
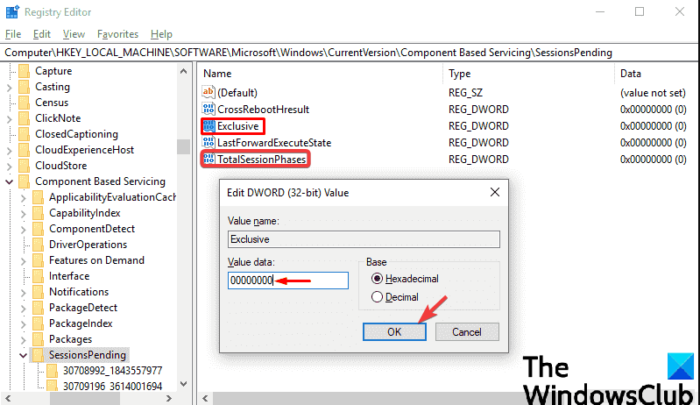
Making changes to the SessionsPending registry value seems to work for the majority of the affected users, and we recommend you give it a try. To do this, follow the steps below:
Press the Windows button + R, type regedit in the Run dialog box, and then press Enter on the computer keyboard.
Click Yes when you get the User Account Control prompt.
Follow the following Windows Registry path:
HKEY_LOCAL_MACHINE\SOFTWARE\Microsoft\Windows\CurrentVersion\Component Based Servicing\SessionsPending
On the right side, double-click on the Exclusive option, and the Edit DWORD (32-bit) Value wizard will show up.
Change the Value data number from 00000000 to 00000004 and select OK to save the changes.
Next, double-click on the TotalSessionPhases and change 00000001 to 00000000, and then press OK to save the changes.
Restart your computer and check if you have resolved the 0x800F082F DISM error.
4] Repair Component Store in Safe Mode with Networking
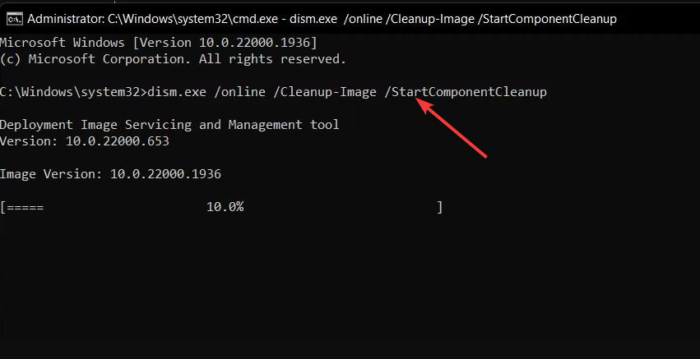
Cleaning and repairing the component store fixes any corruption issues that may have triggered the 0x800F082F DISM error.
See if you run the DISM Tool without any error in Safe Mode with Networking. If you can do so, then good! Run the DISM cleanup command and then perform the SFC scan. Use the steps below:
- Open the Run dialog box, type cmd, and then press Ctrl + Shift + Enter.
- You will get the User Account Control prompt, click Yes to continue.
- Once the elevated Command Prompt is open, copy and paste the following command lines, one at a time, and press Enter:
dism.exe /online /Cleanup-Image /StartComponentCleanup
sfc /scannow
This should fix the DISM error.
Related: DISM fails, The source files could not be found, Error 0x800F081F
5] Troubleshoot in Safe Mode with Networking
Generally, this is not a solution, but it’s a step to determine if there are any conflicts between the apps leading to the error code 0x800F082F. DISM may not work properly if there are background processes interfering with how it works.
Boot your computer into Safe Mode with Networking and then run the DISM commands. If it works, then you need to disable the process you think is affecting the tool. Read the following posts to understand how to start Windows in Safe Mode:
- How to boot or start Windows in Safe Mode
- How to directly reboot in Safe Mode
- How to boot in Safe mode while dual booting Windows 11 with Windows 10
We hope something here works for you.
If nothing helps, you may have to use the Reset This PC option.
Read: Fix DISM Unable to access the Image Error 2 on Windows
Does DISM work on Windows 11?
Yes. You can deploy DISM commands on Windows 11 and on Windows 10. However, it’s good to note that you can use DISM with older system image files, but you cannot use DISM with newer versions of system image files than the current DISM on your PC. DISM is a great tool for Windows 11 users who want to manage, modify, and repair system images.
Fix: DISM Errors 87, 112, 11, 50, 3, 87,1726, 1392, 1393, 1910, etc.
How do I repair Windows 11 with DISM?
To repair Windows 11 image files using the DISM tool, search for Command Prompt in the search box and select Run as administrator. Put the command DISM /Online /Cleanup-Image /RestoreHealth and then press Enter on your computer keyboard. Allow the tool to complete the process and automatically fix issues, if any.
Leave a Reply