This post explains how to fix Windows Update error 0x80243FFF. Error 0x80243FFF is a system-level error that occurs during an automatic Windows Update. The complete error message says:
WE_E_AUCLIENT_UNEXPECTED 0x80243FFF
There was a user interface error not covered by another WU_E_AUCLIENT_ error code.
The error may occur due to generic unexpected UI [AU Client] failures, file corruption while the update was downloading, or a malware attack on a Windows system. It may also occur when an automatic update received from Microsoft doesn’t work.
If error 0x80243FFF prevents you from installing an update patch on your Windows 11/10 PC, keep reading the post to know how to fix the error.
Fix 0x80243FFF Windows Update error the right way
Use the following solutions to fix the 0x80243FFF Windows Update error:
- Run Windows Update troubleshooter.
- Repair Windows Update client using DISM.
- Reset Windows Update Components.
- Install Windows Update in Clean Boot.
- Download Update manually and install it via the Catalog website.
Let us see these in detail.
1] Run Windows Update troubleshooter
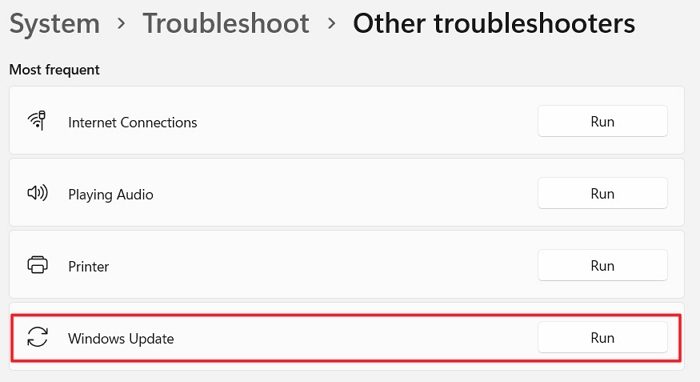
Start by running the Windows Update troubleshooter. It will identify any problems that may be preventing your system from downloading or installing the update, and attempt to fix them automatically.
Right-click on the Start button icon and select Settings. Scroll down a bit and click on the Troubleshoot option. Then click on Other troubleshooters. On the next screen, click on the Run button next to the Windows Update option. Windows Update troubleshooter will run. Follow the on-screen instructions for troubleshooting and see if it helps.
2] Repair Windows Update client using DISM
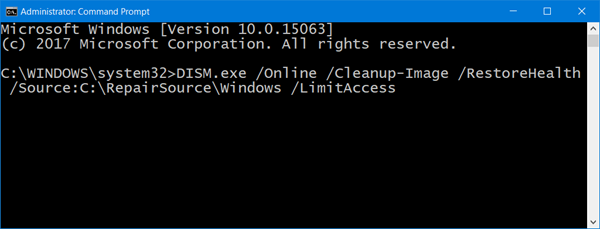
If the Windows Update troubleshooter could not fix the error, try repairing the Windows Update client using DISM.
DISM is a built-in command line tool used to service or repair a Windows image. To find and repair corrupt or missing system files on your system, run Command Prompt using administrator privileges and type the following command in it:
DISM.exe /Online /Cleanup-image /Restorehealth
The /Restorehealth switch tells the DISM tool to scan your system for corrupt system files and repair them automatically.
Now run the following command in the same Command Prompt window:
DISM.exe /Online /Cleanup-Image /RestoreHealth /Source:C:\RepairSource\Windows /LimitAccess
The above command tells the DISM tool to repair the system image using your own repair sources (a running Windows installation, a Windows folder from a network share, etc.) instead of the Windows Update.
After running the above two commands, close the Command Prompt window. Now again try to install the update and see if it works this time.
3] Reset Windows Update Components
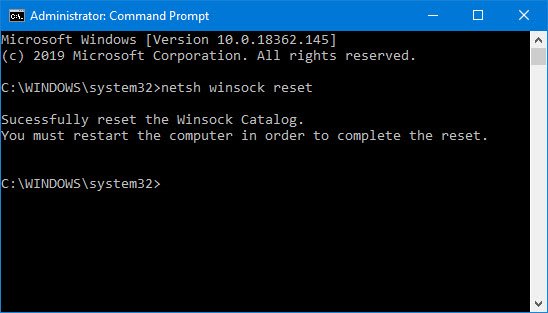
If the issue persists, reset Windows Update components to default. Resetting the Windows Update components requires you to run a series of commands in the Command Prompt window. So you have to be careful while running each command. Once the process completes, Windows Update would reset and work again, and the stuck updates would install on your Windows 11/10 PC.
4] Install Windows Update in Clean Boot
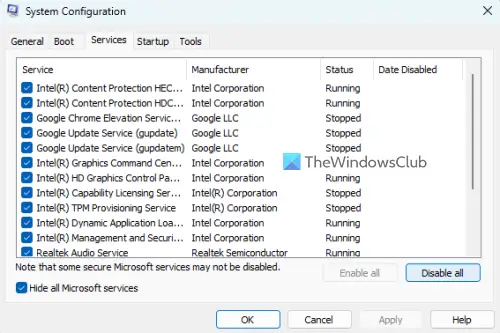
When Windows load normally, several applications and services start running in the background. These applications and services may cause software conflicts when you try to install a Windows update. Clean boot refers to the process of starting Windows with a minimal set of drivers and startup programs to eliminate such software conflicts.
To perform a clean boot, you need to disable all non-Microsoft services and startup items, and then restart your PC. After the restart, your system will enter the clean boot environment. Now try to install the update. If the installation succeeds, you can move ahead and start Windows normally (re-enable the services and startup items and restart the PC).
5] Download Update manually and install it via the Catalog website

If the update fails to install in the clean boot state, download and install it manually via the Microsoft Update catalog.
Note down the KB number associated with the update and search for it on the Microsoft Update catalog home page. Download the required update and install it on your system following the on-screen instructions. Reboot your PC once to finish installing the update.
I hope this helps.
Also Read: Fix 0x80242FFF Windows Update failed error.
How do I fix Windows Update installation error?
There are some general fixes that will help you resolve Windows update installation errors. Make sure you’ve enough space on the hard drive, unplug any extra hardware, disable non-Microsoft security software, perform a clean boot, repair system files using SFC and DISM tools, repair hard drive errors using the Check Disk tool, etc.
How to fix Windows Update error 0x800F0805 in Windows 10?
Run the Windows Update Troubleshooter (System > Settings > Troubleshoot > Other troubleshooters > Windows Update). If the error continues to show up, clear the SoftwareDistribution folder. This folder contains temporary files that are used to install updates on a Windows PC. Also, restart Windows Update Services.
Read Next: Fix 0x80240FFF Windows Update Error.
Leave a Reply