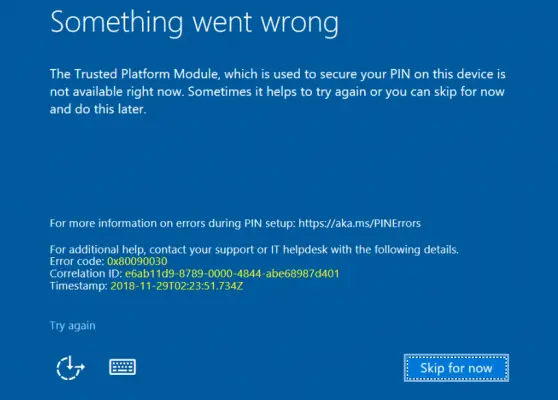
The PIN feature on Windows 11/10 is a fast way to log in yourself to your computer. However, it is still a bit slower than biometric logins like Fingerprint and Iris scanning that come under Windows Hello. However, just like any other module of software, it is prone to errors. Errors like 0xd00000e5, 0x8007139f, 0x80090030 for Windows 11/10 log in PIN are one such errors. They can be caused at different points in time like when creating or changing a PIN or while logging in to your computer. In this article, we will check how to get rid of these error codes.

Fix 0xd00000e5, 0x8007139f, 0x80090030 PIN errors
Our following suggestions will help you fix error codes 0xd00000e5, 0x8007139f and 0x80090030 for PIN on Windows 11/10:
- Empty contents of NGC Folder.
- Use Group Policy Editor.
- Remove and Change the PIN or the Password.
- Reset ACLs on Ngc folder.
- Use System File Checker and DISM.
1] Empty contents of NGC Folder
First, boot Windows into Safe Mode.
You need to delete all the contents of the NGC Folder – for that you will need to take ownership of this folder first-
C:\Windows\ServiceProfiles\LocalService\AppData\Local\Microsoft\
Once done, just permanently delete all the contents of that folder and reboot your computer normally.
The AppData folder might be hidden so you may need to show hidden files & folders.
2] Use Group Policy Editor
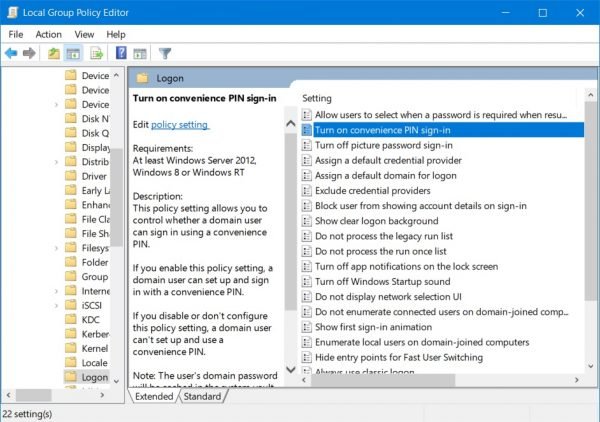
Hit the WINKEY + R button combination to launch the Run utility, type in gpedit.msc and hit Enter. Once Group Policy Editor opens, navigate to the following setting-
Computer Configuration > Administrative Templates > System > Logon

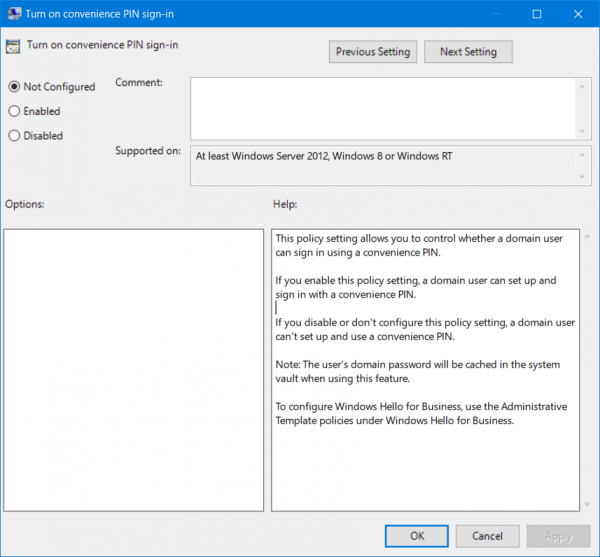
Now, on the right side panel and double-click on Turn on convenience PIN Sign-in and set the radio button to Enabled for it.
This policy setting allows you to control whether a domain user can sign in using a convenience PIN. If you enable this policy setting, a domain user can set up and sign in with a convenience PIN. If you disable or don’t configure this policy setting, a domain user can’t set up and use a convenience PIN. Note: The user’s domain password will be cached in the system vault when using this feature. To configure Windows Hello for Business, use the Administrative Template policies under Windows Hello for Business.

This will turn on the Logins using PIN. Setting the radio button as Disabled or Not Configured will turn off the Logins using PIN.
Exit the Group Policy Editor and then reboot your computer for the changes to take effect.
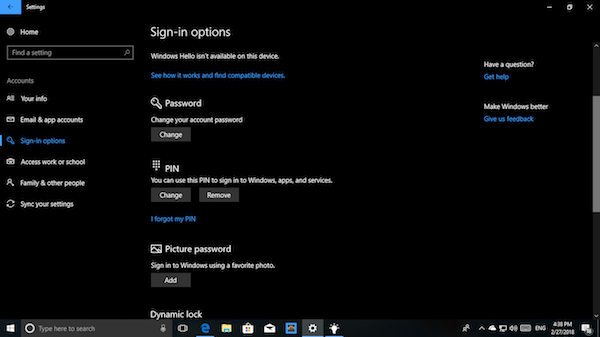
3] Remove and Change the PIN or the Password

Maybe there might be some conflicting issues with the PIN or the Password you have set for the User Account of your computer. So removing or changing the PIN or the Password that you use, can fix this error.
The steps to follow are:
- Remove the PIN
- Restart PC
- Set new PIN
- Restart PC and see.
If you face issues when changing the PIN, boot Windows in Safe Mode and then try.
Read: How to enable or disable Passwordless sign-in only in Windows
4] Reset ACLs on Ngc folder
Run Command Prompt as Administrator and execute the following command:
icacls C:\Windows\ServiceProfiles\LocalService\AppData\Local\Microsoft\Ngc /T /Q /C /RESET
It will either start checking for errors and fixing them.
5] Use System File Checker and DISM
Run CMD as Administrator and then execute the following command to run System File Checker:
sfc /scannow
Restart your system after the scan is completed.
You can also use our freeware FixWin to Run the System File Checker utility with a click.
Now, in order to fix Windows Update files using DISM, open Command Prompt (Admin) and enter the following three commands sequentially and one by one and hit Enter:
Dism /Online /Cleanup-Image /CheckHealth
Dism /Online /Cleanup-Image /ScanHealth
Dism /Online /Cleanup-Image /RestoreHealth
Let these DISM commands run, and once you’re done, restart your computer and try again.
I hope this helped!
Related reads:
Leave a Reply