When a client computer enters the wrong password multiple times, A user account was locked out error appears on the domain controller with an Event ID 4740. This article will help you get the client computer online again so that the user can continue using it without any problem. Even if this error appears incorrectly, you can follow the same tips and tricks to troubleshoot the issue.

Fix A user account was locked out error in Windows 11/10
To fix A user account was locked out error in Windows 11/10, follow these tips and tricks:
- Use Account Lockout Status
- Find more details using Event Viewer
- Change account lockout timeout setting
- Change account lockout threshold
To learn more about these solutions, continue reading.
1] Use Account Lockout Status
Account Lockout Status is a free application that helps you find out the exact reason why a user was locked out at any given time. No matter whether it happened because of entering the wrong password multiple times or something else, you can find the reason using this app. The best thing is that it is made by Microsoft and you can download it from microsoft.com. After downloading and installing, open the app. Then, select the user account and find the reason on the same screen.
2] Find more details using Event Viewer

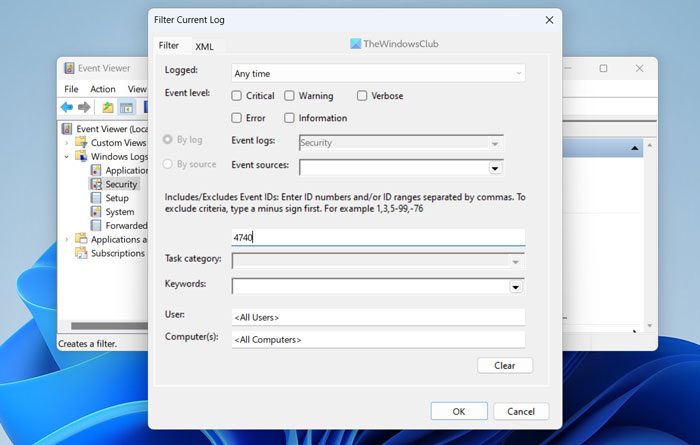
The in-built Event Viewer is one of the best utilities that shows everything about your computer. To use it, follow these steps:
- Search for Event Viewer in the Taskbar search box.
- Click on the individual search result.
- Expand the Windows Logs section.
- Select the Security menu.
- Click on the Filter Current Log option.
- Enter 4740 and click the OK button.
It will display all the events tagged with Event ID 4740. You need to click on each event log and check why that appeared.
Note: It is not a solution, but it helps you find why the error occurred.
3] Change account lockout timeout setting

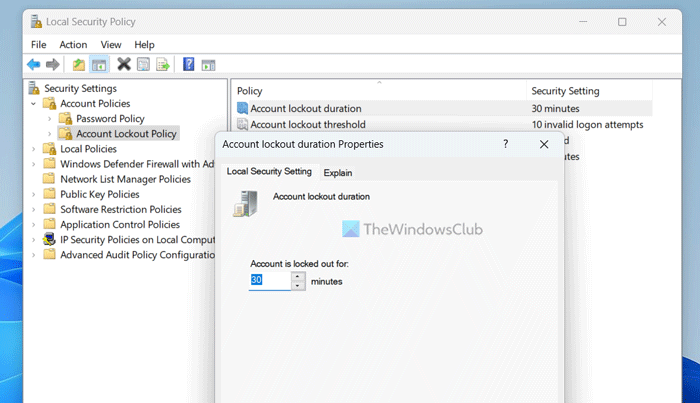
To change the account lockout timeout setting in Windows 11/10, follow these steps:
- Search for local security policy and click on the search result.
- Expand the Account Policies option.
- Select the Account Lockout Policy menu.
- Double-click on the Account lockout duration setting.
- Select a time that you like.
- Click the OK button.
This solution helps you get back the locked account after the time you selected earlier.
4] Change account lockout threshold

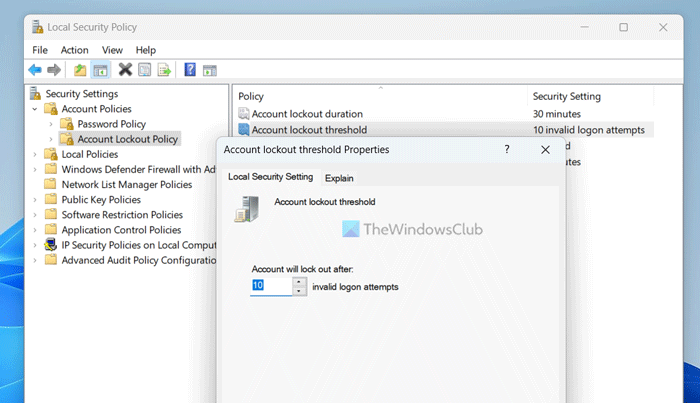
You can change how many attempts you want to allow before the account gets locked out. By default, it is set to 10. However, you can increase or decrease it as per your requirements. For that, open the Local Security Policy panel by following the same steps as above and do this:
- Double-click on the Account lockout threshold setting.
- Enter a number you like.
- Click the OK button.
Read: How to restrict the number of Login attempts in Windows
How do I unlock a locked Windows 11 PC?
In general, if a Windows 11 computer is locked, you can simply hit the Enter button, type your password, and press the Enter button again. Whether you use a PIN or password, the process is the same for both. You can use the same method for local accounts as well as Microsoft accounts.
How do I fix my locked Windows account?
If your administrator has locked your user account, there is no way you can unlock it without the admin privileges. If you have administrative permission, you can open the Local Security Policy and tweak the settings to get back your user account. No matter whether you use Windows 11 or any other version, the process is the same.
That’s all! I hope it helped.
Read: Harden Windows Login Password Policy & Account Lockout Policy.
Leave a Reply