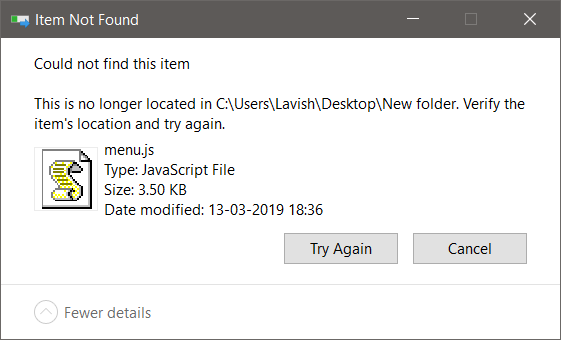
Did you ever come across a file or folder on your computer that cannot be copied, moved, modified, or deleted? You must have faced an error saying Could not find this item, This is no longer located in <path>, Verify the item’s location and try again. This error is thrown when you are trying to delete, rename, or open a certain file. These categories of files are often created by third-party software and lack crucial information such as file format, etc.

Could not find this item, This is no longer located in path
These files are visible in File Explorer, but you might not be able to perform certain operations on these files. In this post, we’ve covered ways to delete or rename such files that might throw the said error. If you see Could not find this item, This is no longer located in path, Verify the item’s location and try again, message in Windows 11/10, when copying, deleting or creating a new item, then maybe our suggestions will help you.
- Restart your computer and try again
- Delete the problematic file using CMD
- Rename the file using CMD.
1] Restart your computer and try again
The file may be locked. Restart your computer and try again and see if it helps.
2] Delete the problematic file using CMD
All the methods covered in this post rely heavily on the Command Prompt. So, make sure you are comfortable in executing these commands inside a CMD window. Usually, these files are large in size, and deleting them can free up some space. If you are looking for ways to delete any such file, follow these steps:
Open the folder which contains the item. Next, we need to open a command prompt window in this folder. So hold down the Shift key and right-click on the desktop. In the context menu, you will see the option to Open command window here. Clicking on it will open a CMD window.
Having done that, execute this command:
del <file-name>
Replace <file-name> with the original name of the file. e.g., menu.js.

Once the command has been successfully executed, the file would be removed from your computer. It should no longer be visible in File Explorer, and the space occupied by it will also be available for other files.
Another workaround this technique is that you move the faulty file to a new empty folder and then try to delete the folder. This might work in some cases and make the file ‘delete-able’ again.
If you are facing issues with a file that does not have an extension, try executing-
del *.*
command in that folder inside a command window.
3] Rename the file using CMD
If you don’t want to delete the file but use it instead. You can try renaming it and then opening it with other programs. Renaming is also similar, and you need to run a few commands on a CMD window. To rename a problematic file, follow these steps:
Open a CMD window in the items folder location as shown above and execute the following command to list all the files inside that folder:
DIR /A /X /P
Now to rename the file, execute:
RENAME <original file name> <destination file name>
The file would be renamed, and hopefully, you should be able to access it normally. The file will still be visible in File Explorer, and you can try opening it with any application.
This error has been faced often by users with files that have been generally created by third-party software. This error essentially makes it impossible to work with these files while they are visible in Explorer. The solutions discussed in this post can help you out with this problem.