When you run the DISM scan on your Windows 11 or Windows 10 system, you may get the Unable to access the Image Error 2, which consequently stops the Windows system image and component store repair operation on your device. This post provides the most applicable solutions to the error.

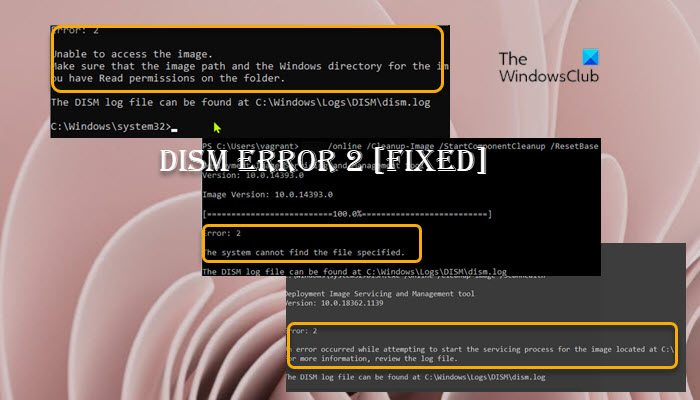
Error: 2, Unable to access the image, Make sure that the image path and the Windows directory for the image exist and you have Read permissions on the folder.
When the DISM Error 2 occurs on your system, the known accompanying error description could be any of the following;
- Unable to access the image. Make sure that the image path and the Windows directory for the image exist and you have Read permissions on the folder.
- An error occurred while attempting to start the servicing process for the image located at C:\. For more information, review the log file.
- The system cannot find the file specified.
In all cases, you can review the log file located at C:\Windows\Logs\DISM\dism.log.
DISM Unable to access the Image Error 2
If the DISM Unable to access the Image Error 2 has occurred on your Windows 11/10 computer, to resolve the issue, you can try our recommended fixes below in no particular order (after you must have gone through the initial checklist) and see what works for you!
- Initial checklist
- Refresh DISM Tool
- Run the DISM scan and specify another source
- Restore Windows Registry
- Reset PC or Cloud Reinstall or perform In-place Upgrade Repair
Let’s look at the solutions listed in detail.
1] Initial checklist
Before you roll up your sleeves and dive into the solutions below, you can carry out the following pre-tasks, and after each task see if the DISM tool runs without issues and throwing error codes:
- Check for file/folder permissions. As is the case in an instance of this Error 2, and as indicated in the output, make sure you have Read permissions on the Windows directory/folder.
- Optimize and defragment drive. When data or files are fragmented all across the hard drive, this disorganization of data sometimes can interfere with Windows ability to access specified files, which could potentially trigger the DISM error 2. So, you can run Disk Defragmenter to rearrange fragmented data, and afterwards see if the DISM scan runs successfully.
- Temporarily disable or uninstall antivirus. As far as Windows PC goes, there are known cases where the security software (especially from third-party vendors) could interfere with some processes on your computer. This is a likely culprit – so, to fix the problem, you can try disabling or uninstalling your antivirus application temporarily.
- Make sure Windows is up to date. It is important to make sure Windows is updated, so that you know you’re running the latest version of the DISM tool. If however, your system is up to date or the error started to occur after a recent Windows update, you can perform System Restore or uninstall the update then run the DISM scan again. If the error in focus reappears, you can then proceed with the solutions proper below.
2] Refresh DISM Tool
If the initial checklist didn’t pan out, your next line of action to resolve the DISM Unable to access the Image Error 2 on your Windows 11/10 computer is to refresh the DISM Tool – by refreshing the DISM tools on your PC, the /Restorehealth switch will be automatically enabled to run scans and repair the corrupted files automatically from the operating network.
To refresh DISM Tool, you can use the revertpendingactions parameter for DISM. Run Command Prompt, and execute the following command:
dism.exe /image:C:\ /cleanup-image /revertpendingactions
Afterward, restart your PC, and on boot, run the command below in elevated Command prompt to clean up the component store:
dism.exe /online/Cleanup-Image /StartComponentCleanup
Restart your computer once the cleanup completes, and run System File Checker in Safe Mode. Then finally, you can run the command below
dism.exe /online /Cleanup-Image /RestoreHealth
If the error in hand reoccurs, try the next solution.
Read: There is a system repair pending which requires reboot to complete
3] Run the DISM scan and specify another source

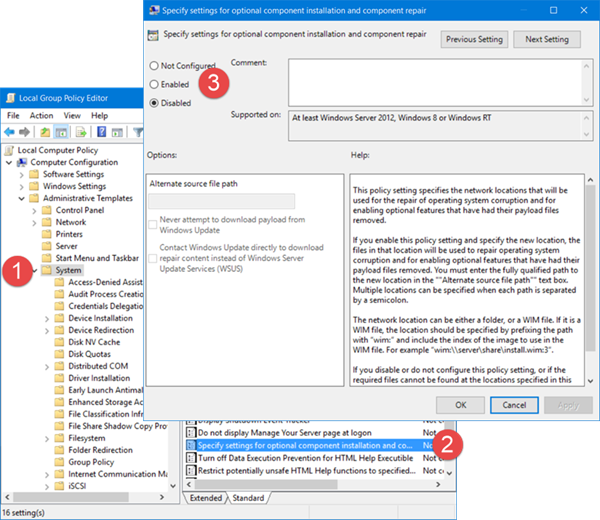
The error you’re currently getting is likely due to the Windows image on the PC is damaged or corrupted. You can run the DISM scan and specify another source in this case. You can clean up the system components and specify an alternative Windows image repair source, which will then be used to repair a corrupted Windows image by following the instructions described in this post.
Read: The scratch directory size might be insufficient to perform this operation
4] Restore Windows Registry
This solution worked for an affected user that had a brief power outage and the PC in sleep mode rebooted, but Windows froze and was manually rebooted and got to the Windows logo with spinning dots screen and then crashed with a BSOD. On running DISM scan, the error was triggered. However, the user later reported it wasn’t a DISM problem, rather it appeared that after the power outage the Registry got super corrupted. In this case, what worked was to Restore Windows Registry, and afterwards, running the DISM tool completed without throwing any error code.
5] Reset PC or Cloud Reinstall or perform In-place Upgrade Repair

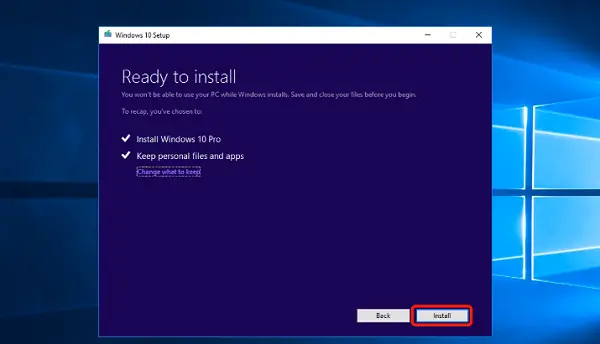
At this point, if the error in highlight is still not fixed after you have exhausted the options above, it’s most likely due to some kind of severe system corruption. In this case, your next line of action is to reset Windows 11/10 or Cloud Reinstall to reset every Windows component. If both procedures fails to resolve the issue, you can try In-place Upgrade Repair.
I hope this helps!
How do I fix DISM Error 5 Access Denied?
This typically occurs due to insufficient permissions on the system. Therefore, many people can fix DISM Error 5 Access Denied by simply making sure the current logged in user has administrator privilege on the system. Also, running the DISM command in Safe mode with Networking may solve the issue. If this does not help, activate and use the built-in super-admin account in Windows.
Why is DISM not working?
If DISM failed on your system and throws error code(s) like 87, 112, 11, 50, 3, 87,1726, 1392, 1393, 1910 you might be able to fix the problem simply by disabling certain antivirus features or by disabling or uninstalling your antivirus altogether. Once you disable your antivirus, repeat the DISM scan again.