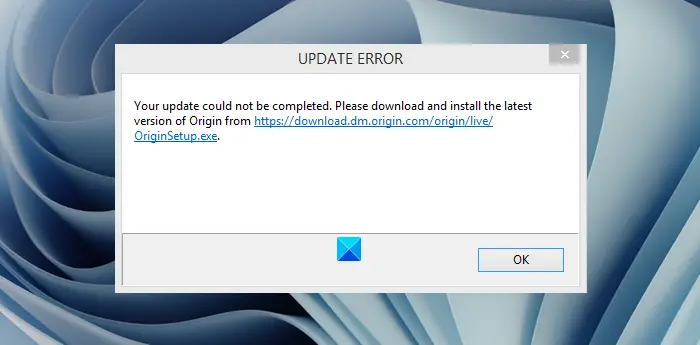
By now, we expect you must have heard of the Origin platform, especially if you’re a PC gamer. The platform is owned and maintained by Electronic Arts (EA), and when it comes down to updating Origin, the task is pretty simple to get done, but there are times when updating goes completely awry. Users have reported seeing the following error message:
Origin
Update error
Your update could not be completed
Why do you need to update Origin?
OK, so if Origin is unable to get updated to its latest version, users will not be able to play their favorite video games that are installed on your Windows 11/10 computer. If you play video games quite often, then this is something you do not want to happen.
Origin Update error – Your update could not be completed
There are multiple ways to solve this problem, and as expected, we will discuss all of them. In most cases, though, the issue is caused by Origin’s cache; therefore, the most sensible first step to take here is to clear the cache. We are going to explain how to do that along with other options if clearing the cache fails to work as intended – but before you begin, we suggest you run the Disk Cleanup Tool as well to clear up PC junk.
- Launch the Run dialog box
- Open the ProgramData folder
- Delete Files within the Origin folder
- Go to the AppData folder
- Delete the contents from the Origin folder
- Finally, disable Origin Client Service on Startup.
1] Launch the Run dialog box
In order to open the Run box, you must press the Windows key + R buttons on your keyboard. Once that is done, a small window will appear at the bottom-left of your computer’s desktop.
2] Open the ProgramData folder
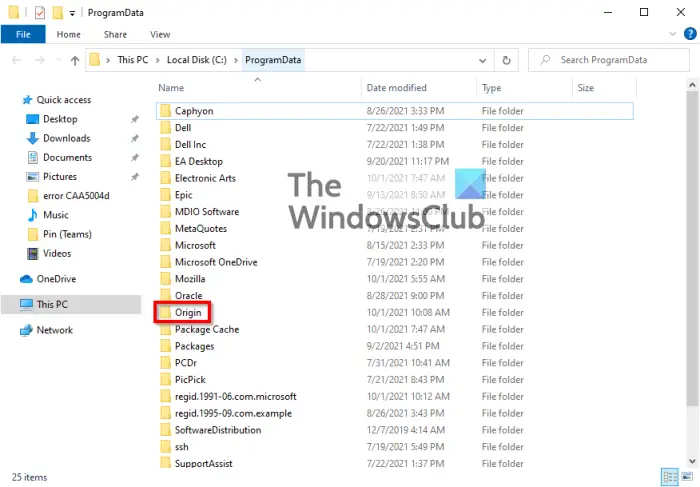
The next step here is to go to the Program Data folder. Simply type %ProgramData% into the Run dialog box and hit the Enter key or press OK. The Program Data folder should now be visible but do not get confused by the many folders.
3] Delete Files within the Origin folder
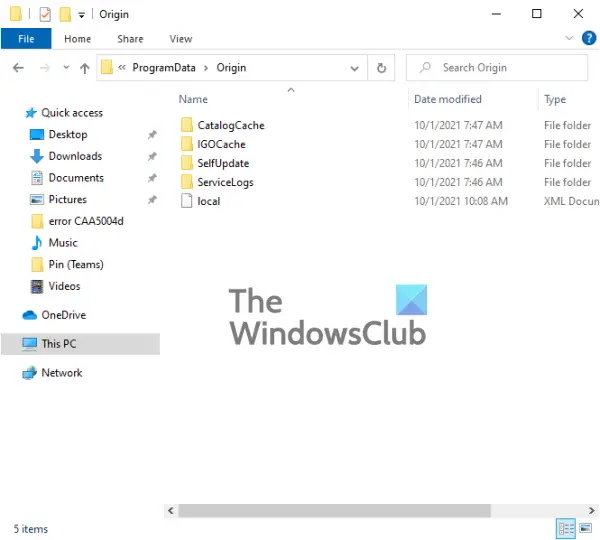
After entering the folder, you will need to look for a folder inside known as Origin. Enter that particular folder and delete everything apart from LocalContent.
4] Go to the AppData folder
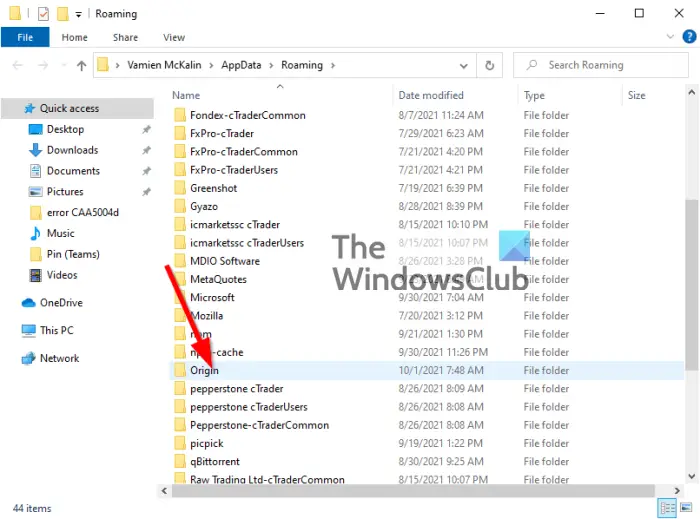
Again, we want you to fire up the Run dialog box, type %AppData% into the box area, and then hit the Enter key. Doing this should allow the AppData folder to load without issues.
5] Delete the contents from the Origin folder
From the AppData folder, look for Origin and delete the contents within it. You can also delete the entire folder if you so wish. Finally, restart your computer, then check if EA Origin is working as it should.
6] Disable Origin Client Service on Startup
From what we have gathered, several users have stated they’ve managed to solve the problem by completing this task. So, let us discuss how to do it in the easiest way possible.
Press the Start Menu button on your keyboard, then search for MSConfig. From the search results, please select System Configuration. Now, once the window has loaded, you will want to choose the Services tab, then from there, tick the box, Hide all Microsoft services.
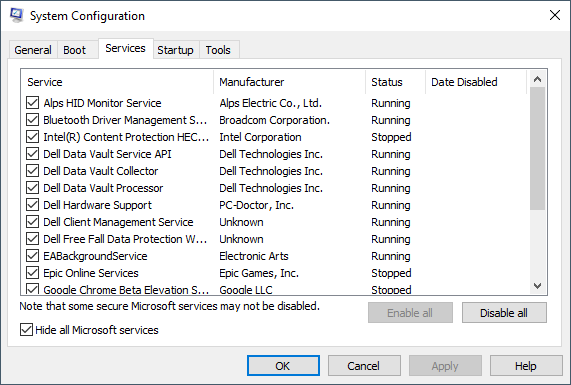
The next step from here is to look for Origin Client Service from the list and uncheck it right away.
Hit Apply > OK, then reboot your computer.
Finally, see if you can update the client.
How do I fix Origin update error?
If Origin fails to update, you can try deleting files from the Origin folder first and check if it resolves the issue or not. Not only that, but also you need to head to the AppData folder, find the Origin folder, and delete the corresponding contents. Finally, it could help if you disable Origin Client service on startup.
Why does my Origin update keep failing?
There could be several reasons why Origin keeps failing to update on your computer. Having said that, you need to check if your firewall is preventing the app or not. If you use a VPN or Proxy, it is suggested to disable it temporarily. On the other hand, you can go through the aforementioned solutions as well.
That’s all! Hope it helped you.
Read: Gaming Lag, Low FPS, in video games and how to fix them.
Leave a Reply