Do you see Event ID 1796 in your Windows 11/10/Server logs? If the Secure update process cannot complete and fails with an error message— The Secure Boot update failed to update a Secure Boot variable with the error Secure Boot is not enabled on this machine —then this post will help you fix the problem.
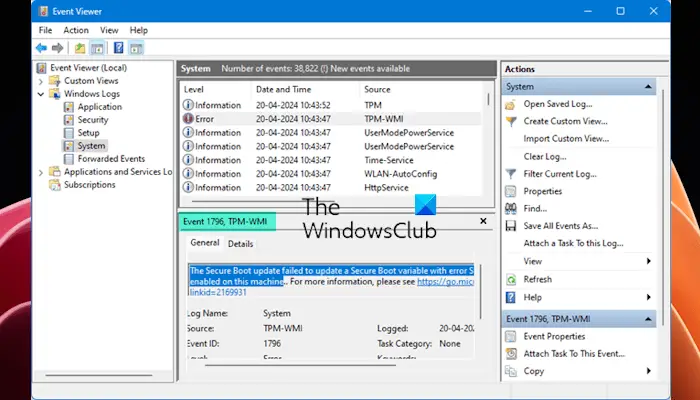
This Event may be accompanied by system shutdowns or crashes. According to the reports, users started experiencing this error in the Event Viewer after installing a recent Windows Update. However, the error message says the problem is associated with the Secure Boot.
What is Event ID 1796 in Windows?
Event ID 1796 occurs when an unexpected error is encountered. When the updated DBX revocation list is applied to a device, and an error occurs, an event is logged, and Windows will try to apply the DBX list to the firmware on the next system restart.
The complete error message that appears in the Windows Event Viewer is:
The Secure Boot update failed to update a Secure Boot variable with error Secure Boot is not enabled on this machine.
Fix Event ID 1796, TPM-WMI, The Secure Boot update failed
Event ID 1796 is a system event related to Windows’s secure boot feature, which prevents unauthorized software from loading on boot. If your TPM module is affected, you will face this error. The effects of this error can range from system crashes to lag and delayed boot.
This section will look at fixes for the event ID 1796. Here’s all that’s covered:
- Uninstall a recent Windows Update
- Uninstall and reinstall the problematic application or game
- Check the status of Secure Boot
- Disable and re-enable the Secure Boot
- Reset, Update, or Rollback BIOS.
Let’s follow these methods one by one.
1] Uninstall a recent Windows Update
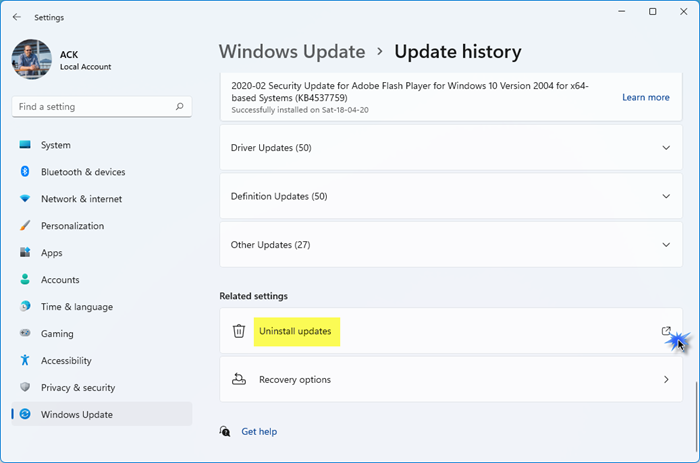
If you start receiving this error after installing a Windows Update, you can uninstall that particular Windows Update. This should fix this issue.
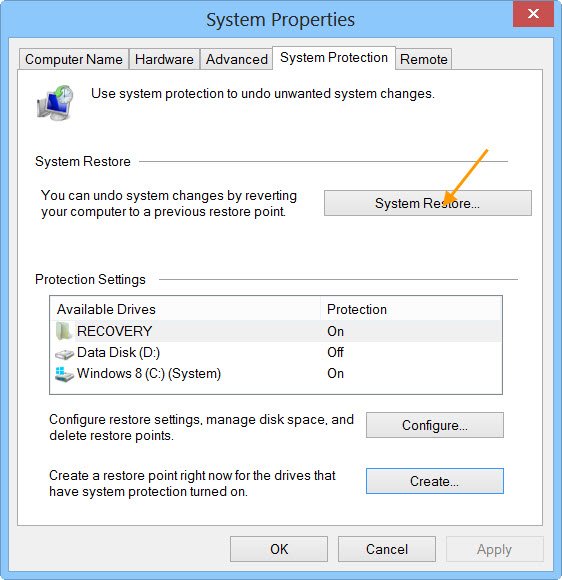
Alternatively, you can also perform a System Restore and take your system to the previous working state. While performing the System Restore, select the restore point that was created before the error started occurring.
2] Uninstall and reinstall the problematic application or game
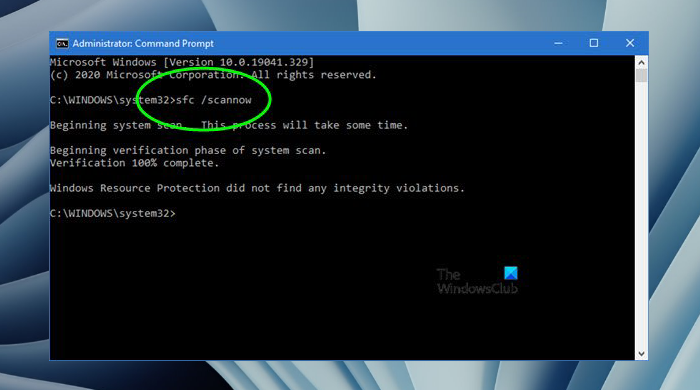
It is also possible that a problematic application or game has crashed your system unexpectedly and triggered this Event ID. If you have recently installed an application or game, uninstall it and then repair your system image files with the help of SFC and DISM tools. After that, you can reinstall the application or game.
3] Check the status of Secure Boot
The error message says that the Secure Boot is not enabled on this machine. Therefore, we suggest you check the status of Secure Boot on your system. The following instructions will guide you on this:
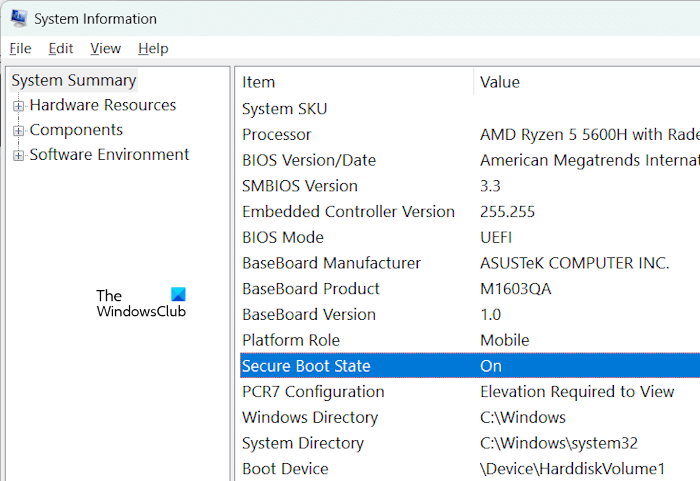
- Open System Information tool.
- Select System Summary on the left side.
- You will see the Secure Boot status on the right side.
If Secure Boot is disabled on your device, enable it. Different brands of computers have different methods for enabling Secure Boot in the BIOS. Therefore, visit the official website of your computer manufacturer to learn the correct process for enabling Secure Boot on your device.
This post will help you if you see the Secure Boot can be enabled when System in User Mode message while enabling the Secure Boot in BIOS.
4] Disable and re-enable the Secure Boot
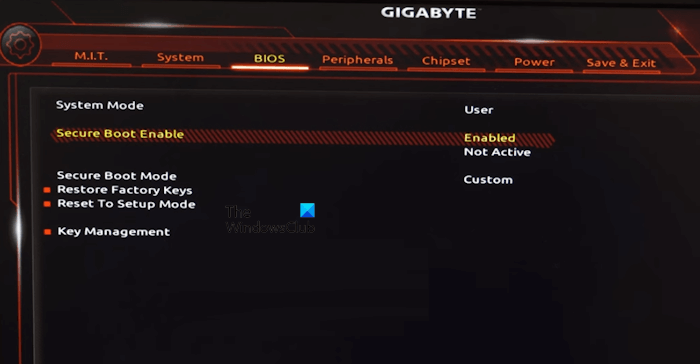
A secure boot ensures that your PC uses only the firmware trusted by the manufacturer, and the event ID 1796 is related to the secure boot update. If your PC meets all the requirements to use Secure Boot, disabling and re-enabling Secure Boot will fix the issue:
If Secure Boot is already enabled, do this. Enter your system BIOS and disable Secure Boot. Save changes and restart your computer. Wait for a few hours, then enable the Secure Boot again. This should work.
- You can enter the BIOS by tapping the BIOS key (F1, F2, F10, DEL, or ESC) while booting your PC.
- Now, in the BIOS, enter the Security section.
- In the Security section, find the Secure Boot option and disable it.
- Now, press f10 to save and exit. This will reboot your PC.
- Follow the same steps to enable Secure Boot on your PC.
The BIOS interface looks different for each motherboard manufacturer. To disable or enable Secure Boot, you only have to find the security settings and the Secure Boot option.
Warning if you are disabling Secure Boot
After disabling Secure Boot and installing other software and hardware, it may be difficult to re-activate Secure Boot without restoring your PC to the factory state.
5] Reset, Update or Rollback BIOS
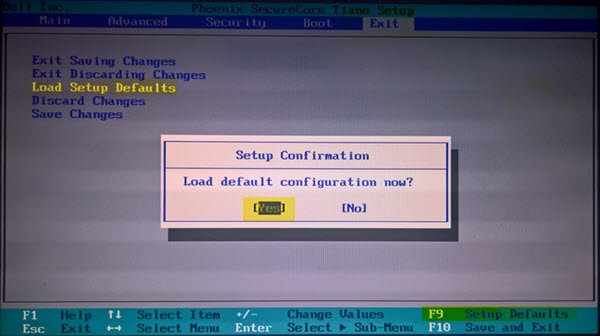
Resetting BIOS helps to restore the optimal settings for your system. This will also apply the TPM and Secure boot settings, which are recommended for your system, hence preventing the event ID 1796 from occurring:
- You can enter the BIOS by tapping the key (F1, F2, F10, Del, or ESC in most cases).
- Now, in the BIOS, find the option for Setup Defaults.
- In most PCs, BIOS can be reset to default by pressing the F9 key.
See if this helps.
If it doesn’t help, update your firmware and see. If you recently updated your firmware, roll it back or downgrade it to the earlier version and see.
Read: Fix Secure Boot isn’t configured correctly in Windows
We hope that you found the article to be helpful and were able to fix Event ID 1796. The Secure Boot update failed.
What is Event ID 14 in Event Viewer TPM?
Event ID 14 in the Event Viewer indicates a problem with the TPM device. This error prevents Windows from communicating with it for functionalities that rely on TPM, such as BitLocker.
What is TPM event log?
The TPM event log contains information about the error associated with the TPM on a Windows computer. You can use the information in the event log to troubleshoot and fix the issue.
Read next: Alert! TPM device is not detected error on Dell computers.
How do I enable UEFI Secure Boot?
UEFI Secure Boot can be enabled from the BIOS. Tap the BIOS key (typically the F1, F2, or F10 key) while booting your PC to enter BIOS. In the BIOS, find the security options and the secure boot. Now, change the Secure Boot status to enabled, and press F10 to save and exit.
Can I bypass the Windows 11 TPM requirement?
Yes, you can bypass the Windows 11 TPM requirement. You can create an installation media drive using a free and trusted tool called Rufusm. This tool has a specific image option to disable TPM, secure boot, and RAM check. You can also use a slightly lengthy and complex method of entering the registry and making some changes while installing Windows.
Leave a Reply