File Sharing is among the most important features of a Windows OS. It helps to share files between different systems connected under the same Local area network (LAN). However, some users have reported that file sharing is not working in Windows 11 or Windows 10. That said, if you are dealing with the same issue, we are here with a list of all the effective workarounds you can try in case File Sharing is not working.
File Sharing is not working in Windows 11/10
Below is a list of solutions you can try if File Sharing is not working on your Windows 11/10 computer:
- Restart the system.
- Re-enable file sharing.
- Check the status of the required Services.
- Disable IPv6.
- Disable password-protected sharing.
- Allow File Sharing in Windows Firewall settings.
- Turn on the SMB 1.0/ CIFS File Sharing Support.
Let’s check out all the solutions in detail.
1] Restart the System
Like any other Windows issue, the File Sharing problem can also be fixed just with a simple system restart. A temporary bug can cause the problem. Thus, restart the system and check if it makes any difference.
Read: File and Print sharing resource is online but isn’t responding to connection attempts
2] Re-enable File Sharing
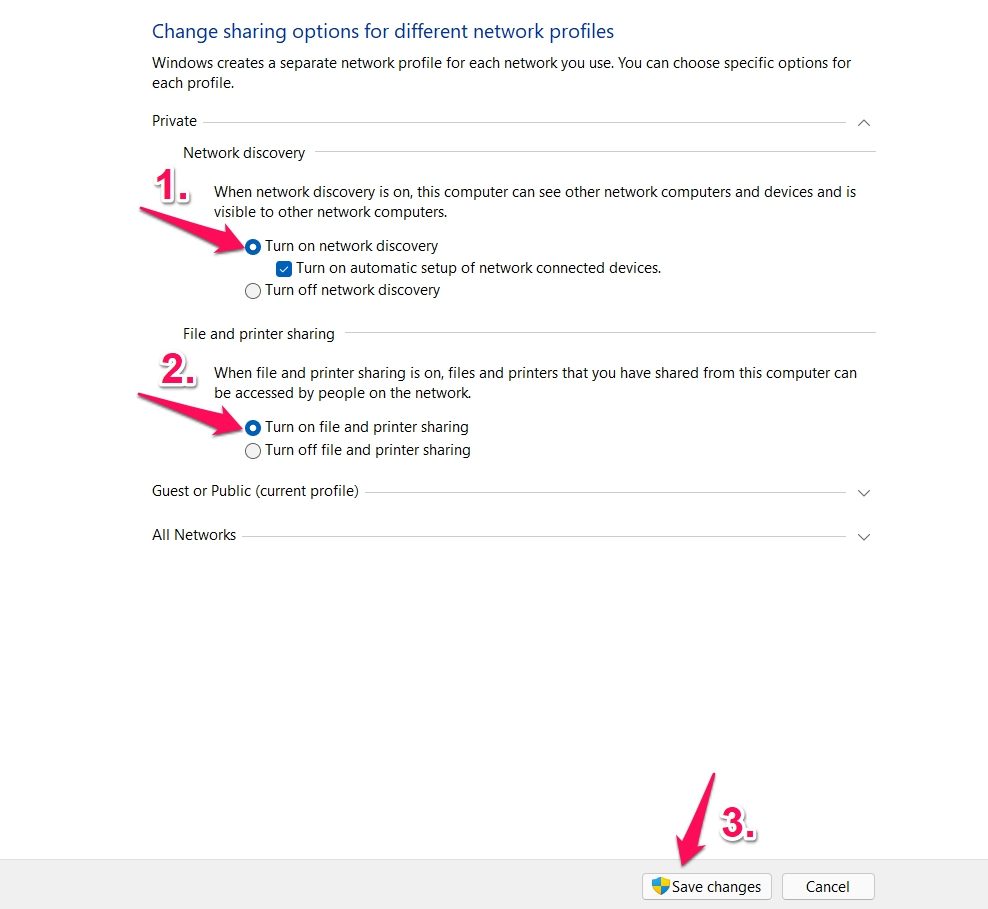
By default, file sharing is enabled in Windows 11 for private networks. But you can re-enable it, in case the feature is not working properly on this system you need to turn on printer sharing and network discovery. To do so, here are the steps you need to follow.
- In the Start menu, type Advanced Sharing Settings and press enter.
- Under the Private section, checkmark Turn on network discovery and Turn on file and printer sharing. Click on Save changes.
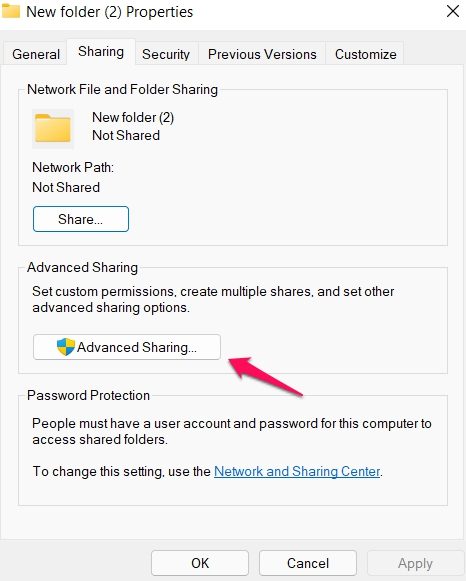
- Right-click on the file you want to share and choose Properties.
- Tap on the Sharing tab, and choose Advanced Sharing.
- Checkmark the Share this folder option, click Apply, and then OK.
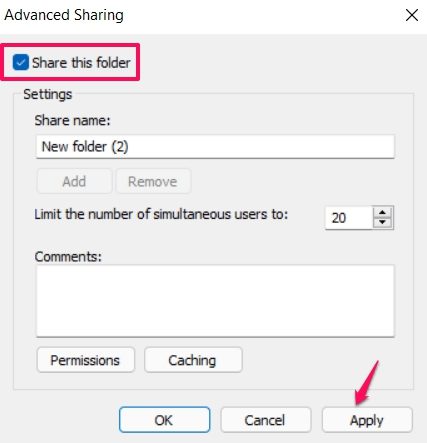
That’s it. Now check if the issue is fixed or not.
Read: Network discovery is turned off and not turning
3] Check the status of required Services
Open Services Manager, right-click each of the following services > select Properties and ensure that their Startup type is set to Automatic. Also, click the Start button if these services are not started.
- Function Discovery Provider Host
- Function Discovery Resource Publication
- SSDP Discovery
- UPnP Device Host
4] Disable IPv6
You can disable IPv6 connectivity on the systems in order to fix the File Sharing issue. Here are the steps you need to follow.
- Press Windows + R shortcut key to open the run dialogue box.
- Type ncpa.cpl and press enter.
- Right-click on the connected network and choose Properties.

- Uncheck the Internet Protocol Version 6 (TCP / IPv6) option, and click on OK.
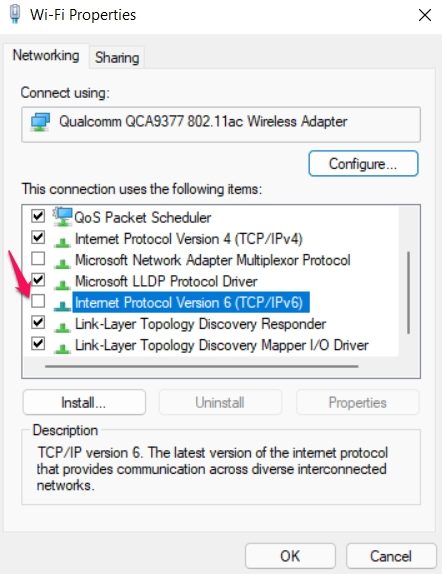
Restart your system, and check if the File Sharing issue persists.
Read: File sharing lock count exceeded error in Office Access.
5] Disable Password Protected Sharing
Password-protected sharing can also cause the File Sharing issue. If the option is enabled, then the recipient needs to be aware of your username and password. Thankfully, you can disable it manually to continue sharing files efficiently. To do so, here’s what you need to follow.
- In the Start menu, type Advanced Sharing Settings and press enter.
- Tap on the down arrow present next to All Networks to expand the option.
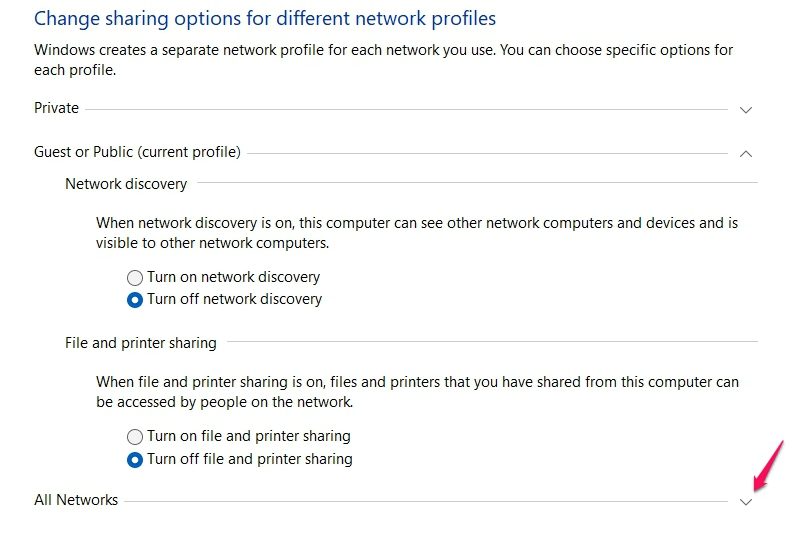
- Checkmark Turn off password protected sharing and click Save Changes.
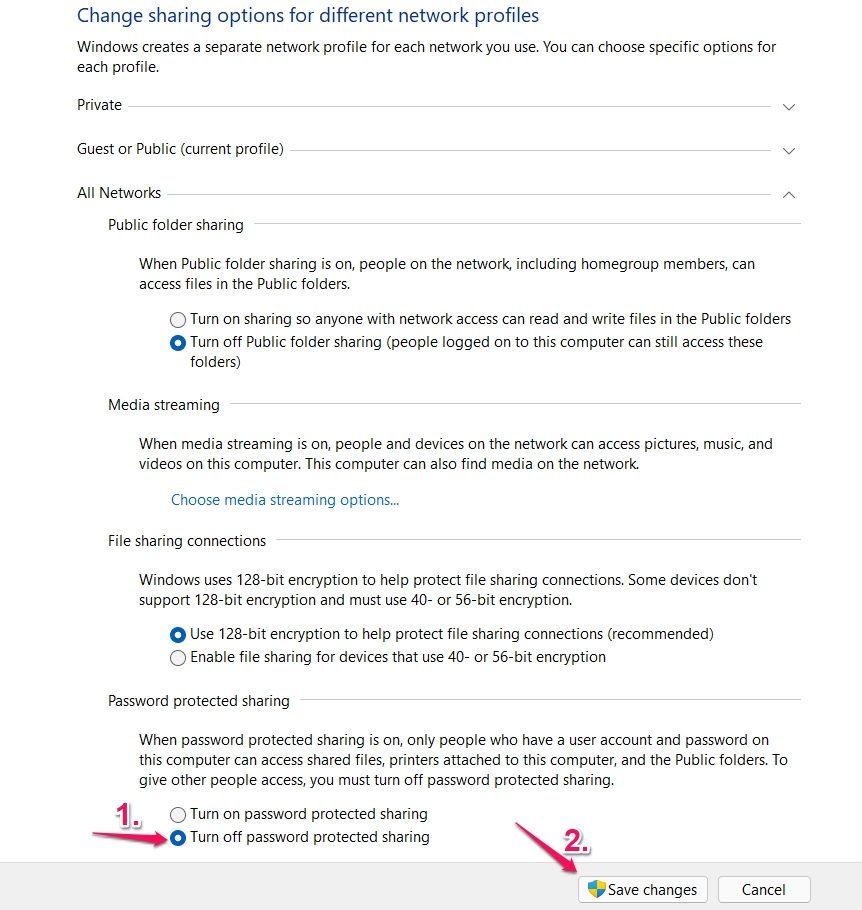
Check if the problem is fixed or not.
Read: Fix Your folder cannot be shared error in Windows
6] Allow File Sharing in Windows Firewall Settings
Not only File Sharing, but the Windows Firewall can also breach the smooth functioning of various Windows features. However, you can always allow the particular feature in the Windows Firewall settings to fix the problem. So, here are the steps you need to follow to allow file sharing in Windows Firewall settings.
- In the Start Menu type Windows Security and press enter.
- Click on Allow an app or feature through Firewall.
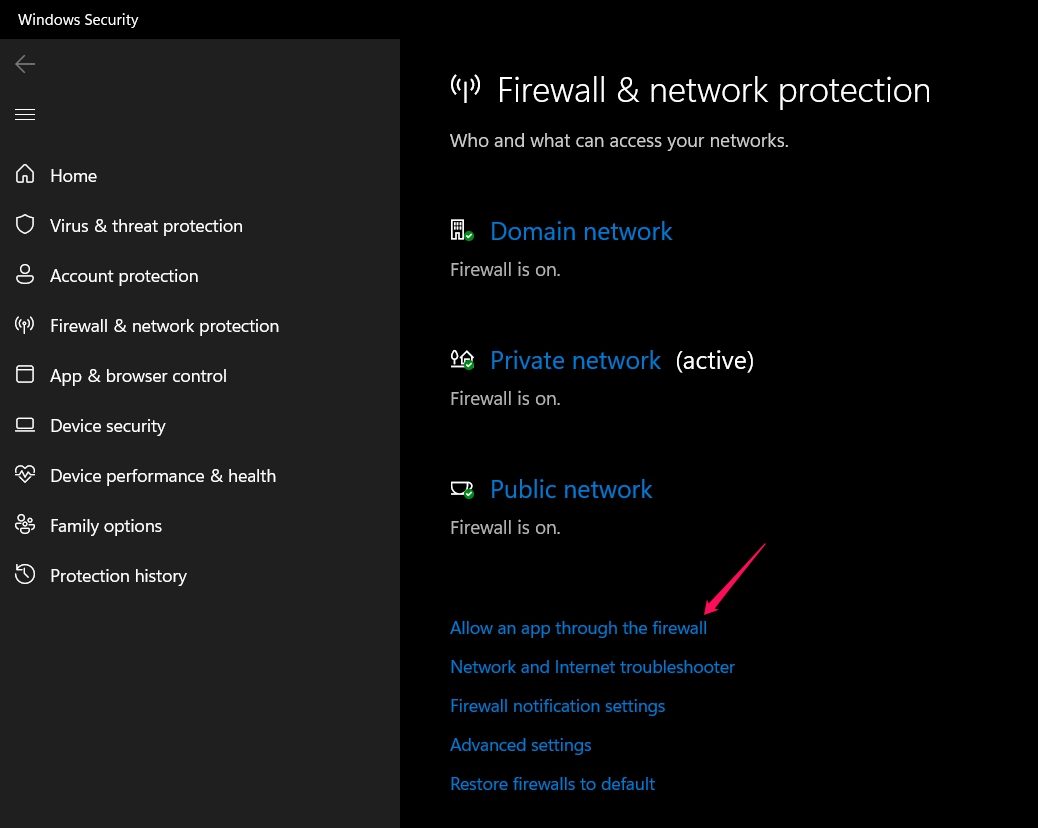
- Tap on Change Settings, and checkmark File and Printer Sharing.
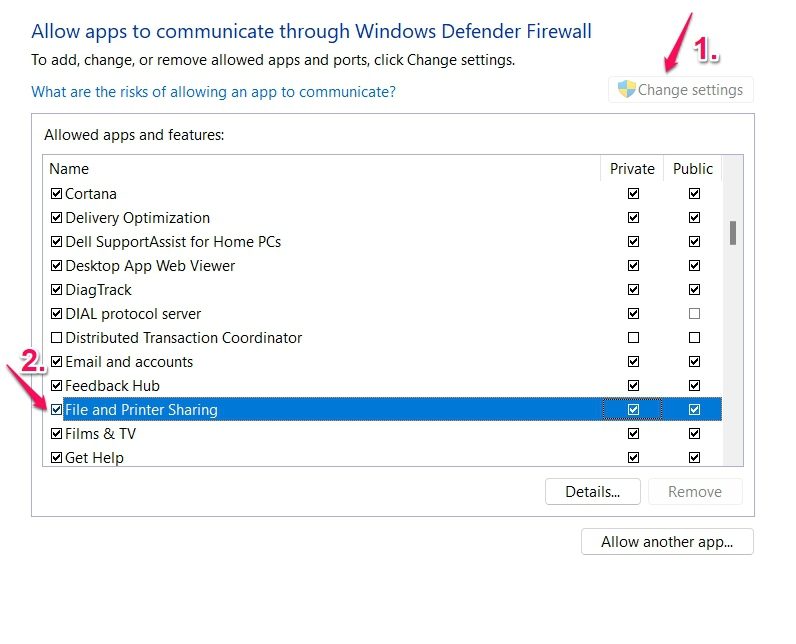
- Click on OK.
The File Sharing issue would have been fixed by now if it had been blocked by the Windows Defender Firewall.
7] Turn on the SMB 1.0/CIFS File Sharing Support
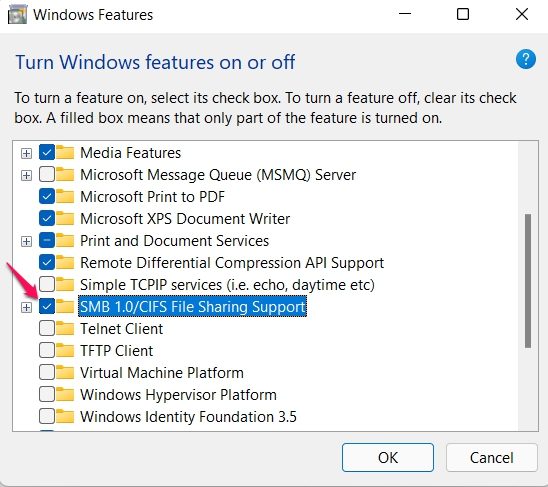
With the latest Windows OS update, Microsoft has decided to disable the SMB feature. It is one of the most important features for file sharing. However, you still have the option to enable the SMB 1.0 by visiting the Windows features. Here are the steps you need to follow.
- In the Start Menu, type Turn Windows features on or off and press enter.
- Checkmark SMB 1.0/ CIFS File Sharing Support and click on OK.
We hope the problem will be fixed by now. If you encounter any difficulties, feel free to use the comment section below.
Read: How to share files between computers using LAN
Why is File Sharing not working?
The Windows File Sharing feature may stop working if you have either not set it up correctly or if some of the required Windows Services are not started. Troubleshooting this issue is rather simple.
Why is my Shared folder not working?
If your Shared folder is not working on your Windows PC, you need to ensure that Printer sharing and Network discovery are enabled on all computers and check the configuration of the required Windows Services.
Leave a Reply