This post features solutions to fix Invalid IP address problems in Windows 11/10. IP addresses are unique numbers assigned to every device connected to the internet. These are necessary because they allow different devices connected to the internet to contact each other. Recently, some users have been complaining about invalid IP address problems on their Windows devices.
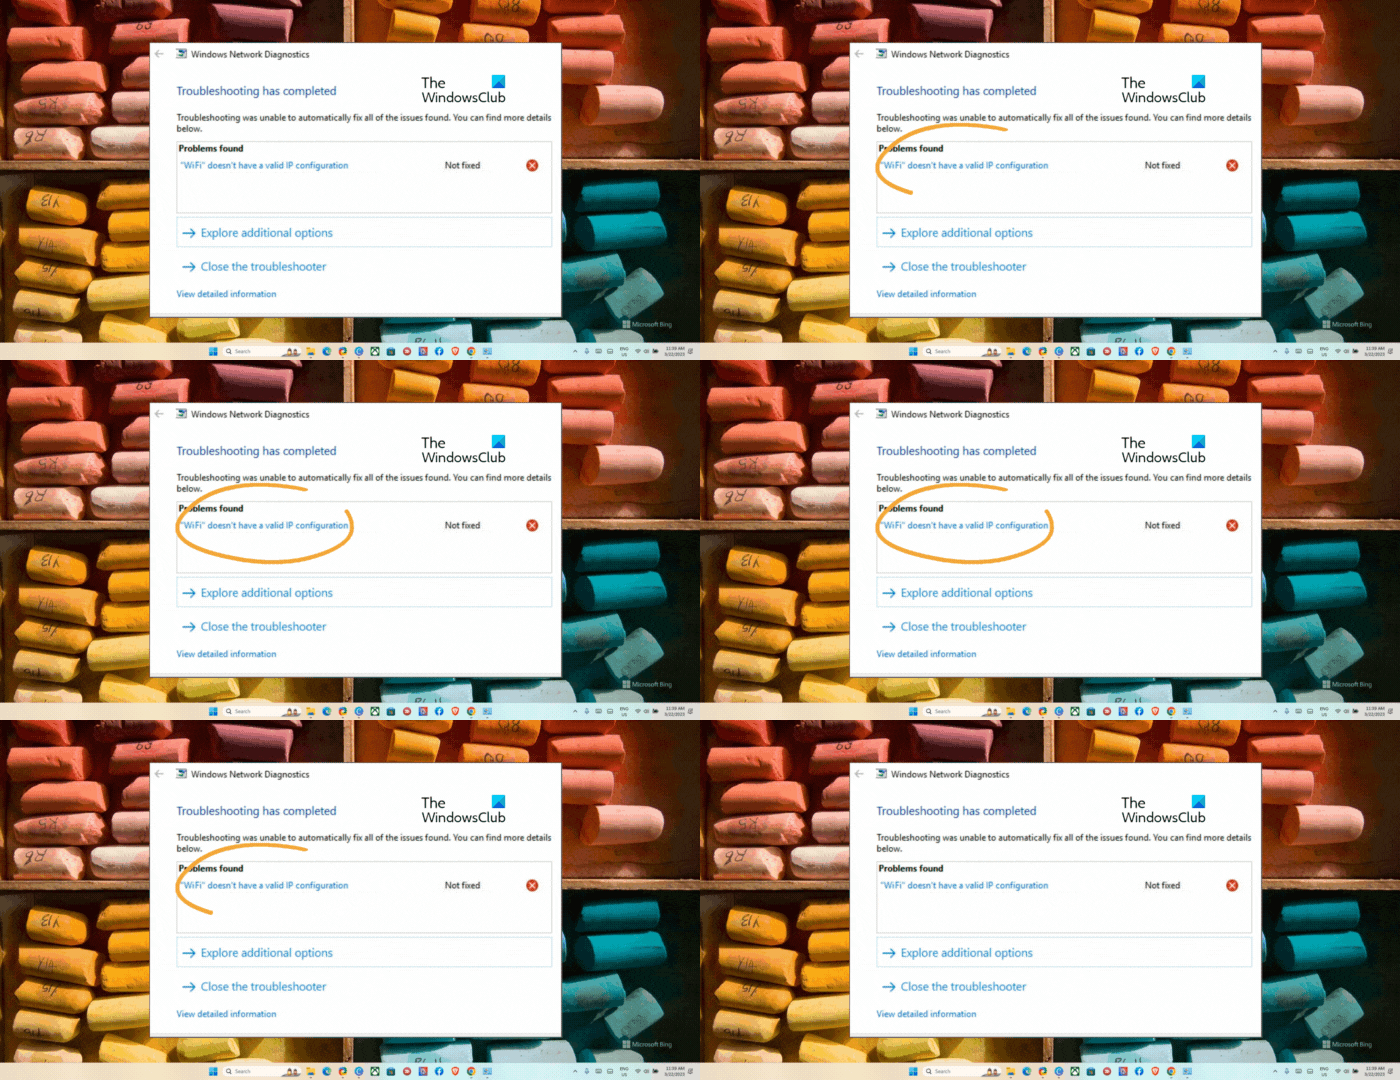
Fix Invalid IP address problem in Windows 11/10
To fix IP address issues, allow the adapter to obtain and reset the IP address automatically. Ffollow these suggestions to fix the issue:
- Run Network Adapter Troubleshooter
- Check Internet Connection
- Update Network Drivers
- Restart the designated service
- Allow Windows to Obtain IP Address Automatically
- Modify DNS Settings
- Run these Network Commands
- Reset Network Settings
Now let’s see these in detail.
1] Run Network Adapter Troubleshooter
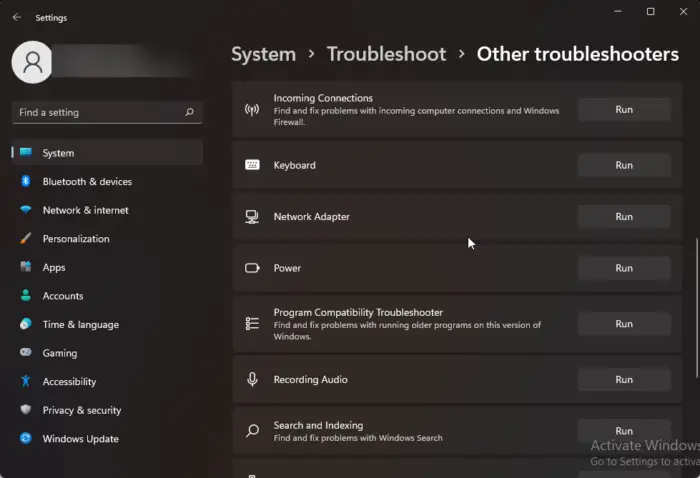
Before getting started with different troubleshooting methods to fix this issue, try running Microsoft’s Automated Troubleshooting Services as a first step to diagnose and repair common Network issues. Here’s how:
- Press the Windows key + I to open Settings.
- Scroll down and click on Troubleshoot > Other Troubleshooters.
- Click on Run beside Network Adapter and follow the instructions on-screen.
2] Check Internet Connection
Errors like this can also happen if you have an unstable Internet connection. Performing a speed test can check if anything is wrong with your Internet connection. If the internet speed is less than what you opted for, restart your router and modem. However, contact your service provider if restarting your router and modem doesn’t work.
3] Update Network Drivers
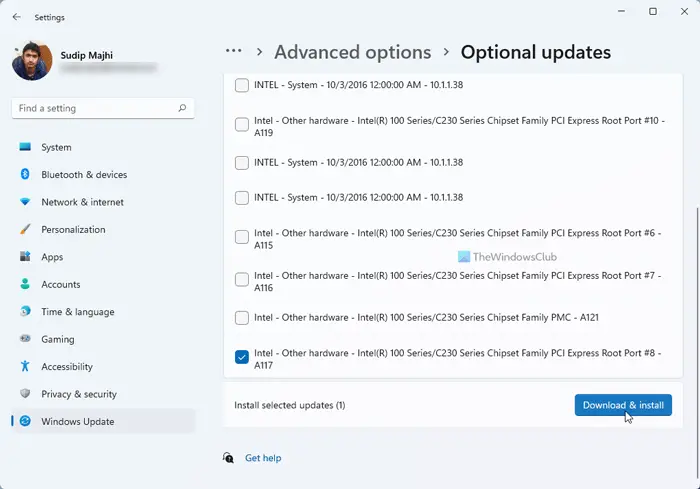
Outdated or corrupted drivers can also be responsible for the invalid IP address error. Update your Surface drivers and check if the issue gets fixed. Here’s how you can do it:
- Open Settings and navigate to Update & Security > Windows Update.
- Right under it, look for a clickable link— View optional updates.
- Under Driver Updates, a list of updates will be available, which you can choose to install if you are facing an issue manually.
4] Restart the designated service
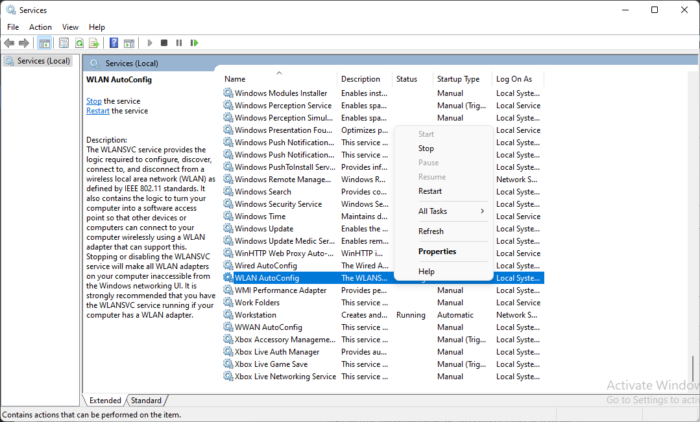
Restarting the designated service can also help fix IP address-related errors on Windows 11 devices. Here’s how:
- Click on Start, search Services and open it.
- Scroll down and search for one of these services:
- Wired AutoConfig (For Ethernet Connections)
- WLAN AutoConfig (For Wi-Fi Connections)
- WWAN AutoConfig (For Mobile Broadband Connections)
- Right-click on the service and select Restart.
5] Allow Windows to Obtain IP Address Automatically
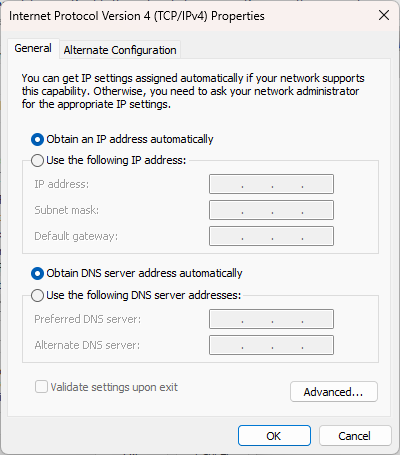
Errors with your device’s IP address may occur if you’re using a custom one. Allow windows to automatically obtain an IP address and see if the error’s fixed:
- Open Control Panel and navigate to Network and Internet > Network and Sharing Center.
- Click on Change adapter settings on the left.
- Right-click on your network adapter and select Properties.
- Double-click on Internet Protocol Version (TCP/IPv4) to open its properties.
- Check the option Obtain an IP address automatically and click Ok to save changes.
6] Modify DNS Settings
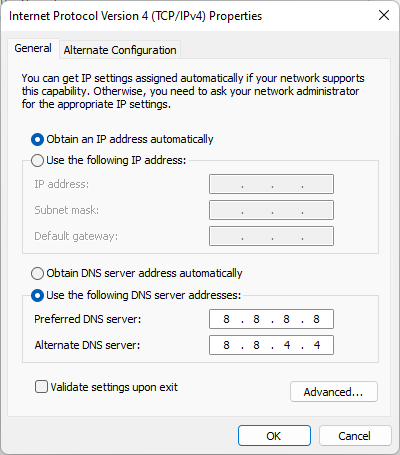
The invalid IP address error could be server-related and modifying the DNS settings can help fix it. Here’s how:
- Open Control Panel, navigate to Network and Sharing Center, and click on Change Adapter Settings
- Right-click on your Wi-Fi connection and select Properties
- Select Internet Protocol Version 4 (TCP/IPv4).
- Click on the Properties button and enter the following values:
- Primary DNS Value: 8.8.8.8
- Secondary DNS Value: 8.8.4.4
- Click OK and exit.
7] Run these Network Commands
Running the network commands will reset the TCP/IP stack, renew the IP address, Reset Winsock and flush the DNS client resolver cache. Here’s how you can do it:
Press the Windows key, search for Command Prompt, and select Run as Administrator.
Type the following commands one by one and hit Enter.
netsh winsock reset
netsh int IP reset
netsh int ipv4 reset all
netsh int ipv6 reset all
ipconfig /release
ipconfig /renew
ipconfig /flushdns
Restart your device once done.
8] Reset Network Settings
If none of these steps were able to help you, reset the network settings of your device. Performing a network reset will remove and then reinstall all your network adaptors. It will also reset all related settings to their defaults. Here is how you can do it:
- Press the Windows key + I to open Settings.
- Navigate to Network & Internet > Advanced network settings > Network Reset.
- Click on Reset Now beside Network Reset and follow the instructions on-screen.
All the best.
Related:
- Local Area Connection doesn’t have a valid IP configuration
- Ethernet or WiFi doesn’t have a valid IP configuration
Why is it saying my IP address is invalid?
The error message Invalid IP address indicates that something’s not suitable with your device’s network connection. Errors like these usually occur if the user uses a custom IP address or the internet service provider blocks the IP address.
Read: Why is 192.168.0.1 the default IP address for most routers?
How do I fix an invalid IP address on my computer?
To fix an invalid IP address on your Windows device, check your internet connection and network settings. However, if that doesn’t help, consider updating the network drivers and reconfiguring your device’s IP address using the command prompt.