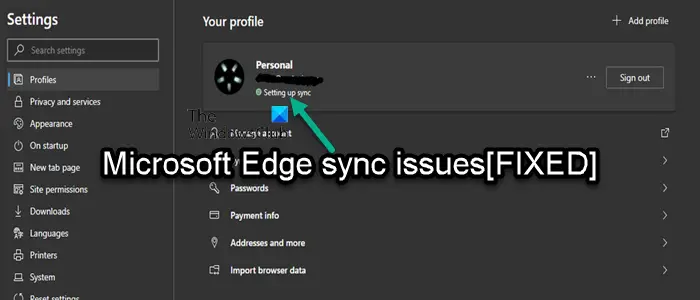
Microsoft Edge is touted as the best browser for gamers and the best performing browser for users and developers alike. If your Edge browser is stuck on Setting up sync, or you’re generally experiencing sync issues and problems with the browser, then this post is intended to help you with solutions to resolve the issue on your Windows 11 or Windows 11/10 PC.
Fix Microsoft Edge sync issues
With the Microsoft Edge sync capabilities, users can access their bookmarks, passwords, extensions, and other browsing data on any computer or mobile device. Also, all the user data stays perfectly safe as it gets stored on the server. However, the problem occurs when Edge runs into issues and fails to sync your data correctly. So, if you’re having general sync issues, including the browser is stuck on Setting up sync, you can try our recommended solutions below to resolve the issue.
- Make sure sync is enabled
- Disable Extensions
- Clear browser cached data
- Allow Microsoft account page to save cookies
- Reset sync
- Reset/Repair/Reinstall Edge browser
Let’s take a look at the description of the process involved concerning each of the listed solutions.
1] Make sure sync is enabled
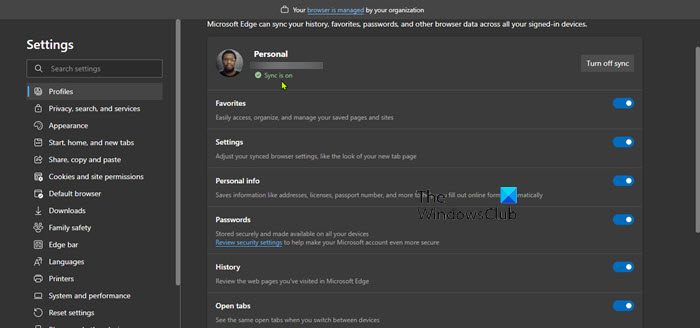
When you sync your browsing data, you will enjoy a seamless browsing experience with access to your bookmarks, passwords, and other browser data at all times across multiple devices. In the event where Edge fails to sync data or sync gets paused, your first line of action should be to make sure sync is enabled. Although, enabled by default, it could be that the setting got turned off after an update or for some other unexplained reasons.
To make sure sync is enabled, do the following:
- Open Microsoft Edge.
- Click on your profile icon in the top right corner.
- Click on the Manage profile settings link.
- Click Sync on the right pane to expand its settings.
- Check and if the current sync status reads Not syncing, then click on Turn on sync.
If the status shows or is just stuck on Setting up sync, you can click Turn off sync or sign out, wait a couple of minutes, and then turn it back on or sign back in and see if the sync setup completes.
- Next, make sure to toggle the button to On for the other individual sync settings per your requirement.
- Restart Edge when done.
Now see if sync is working correctly on your device. If not, try the next solution.
Read: Disable sync for all User Profiles in Microsoft Edge using Registry
2] Disable Extensions
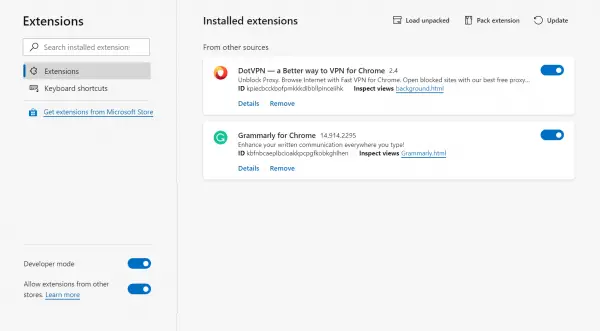
To facilitate your browsing experience and improve productivity, depending on your needs, there are a number of available Edge browser extensions you can make use of. The problem sometimes is that, some of these extensions especially from third-party vendors can also conflict with Edge’s functionality. So, if you’re experiencing sync issues on Edge, you’ll need to disable all of them and enable them one by one to isolate the extension causing the issue. To perform this task, do the following:
- Open Microsoft Edge.
- Type in edge://extensions/ in the address bar and hit Enter.
- In the Extensions page, toggle the button next to the extensions to Off to disable it.
- Restart Edge when done.
Now see if Edge can sync data now without issues. If the issue isn’t present again, then you’ll need to enable the extensions one by one to isolate the malicious one – once you identify the culprit, you can leave the extension disabled or uninstall the add-on.
Read: Disable or enable Extensions in Edge InPrivate browsing mode
3] Clear browser cached data
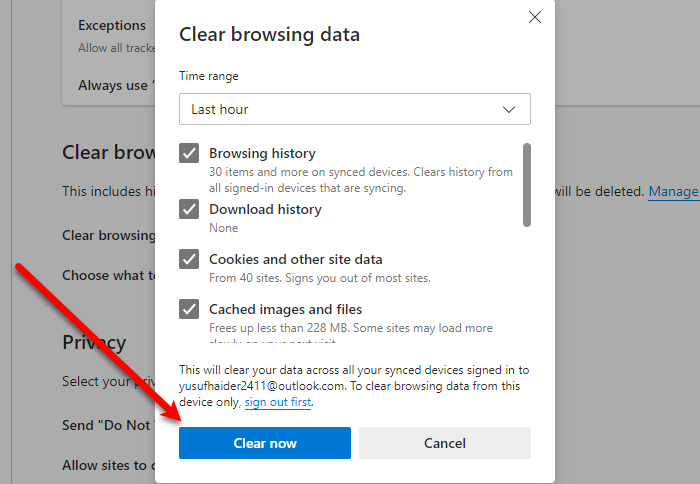
As you browse the web, to help save bandwidth and improve loading time, Edge collects cache data. If this cached data gets corrupted, you’re likely to have general browsing issues and possibly sync issues as well. In this case, the applicable solution is to clear Edge browser cache data and see if that helps with the issue in hand.
Do the following:
- Open Microsoft Edge.
- While the browser is open, press Ctrl + Shift + Delete combo on your keyboard to bring up the Clear browsing data panel. Alternatively, type edge://settings/clearBrowserData in to the address bar and hit Enter.
- Click on the Time range drop-down.
- Select All time.
- Select the option for Cached images and files.
- Click the Clear now button.
Read: Clear Cookies, Site Data, Cache for specific website in Chrome, Edge, Firefox
4] Allow Microsoft account page to save cookies
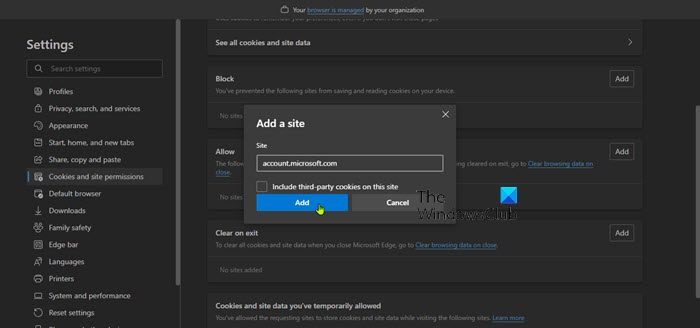
This solution requires you to allow your Microsoft account page to save cookies to ensure that all your browsing data is saved. To perform this task, do the following:
- Open Microsoft Edge.
- Click the ellipsis (three-dot menu) icon to open Settings.
- Switch to the Cookies and site permissions tab on the left navigation pane.
- On the right, under Cookies and data stored, click Manage and delete cookies and site data.
- Scroll down and click on the Add button next to Allow.
- In the Add a site dialog, type in account.microsoft.com in the Site field.
- Click on Add.
Now, you need to ensure that Edge is not configured to clear cookies once you exit the browser, and add your Microsoft account page to the Don’t clear option. Here’s how:
- Open Edge settings.
- Use the left pane to navigate to the Privacy, search, and services tab.
- Scroll down to the Clear browsing data section.
- Click on Choose what to clear every time you close the browser.
- Toggle the button to On for Cookies and other site data option.
- Next, click on the Add button next to Don’t clear.
- Enter your Microsoft account page.
- Click on Add.
Your browsing data should now be saved and clear any sync issues you might be facing. But, if the issue persists, try the next solution.
Read: Should Cookies be Enabled or Disabled in my Browser?
5] Reset sync
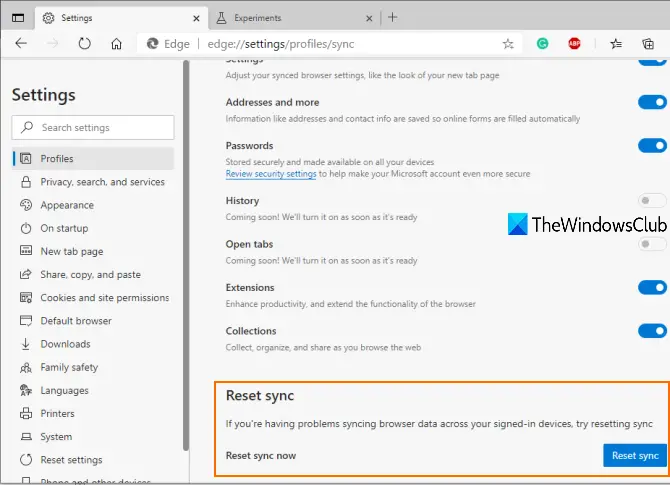
One way to resolve the issue whereby Edge is failing to sync your browsing data even after you’ve enabled the functionality, is to try resetting sync in Edge. To perform this task, do the following:
- Sign out from Edge on all your other devices.
- Open Microsoft Edge.
- Type in edge://settings/profiles/sync in the address bar and hit Enter.
- Scroll down and click on the Reset sync button.
- On the Reset sync prompt, select the Resume sync on this device after resetting sync option.
- Click Reset.
Proceed with the next solution if the issue persists.
6] Reset/Repair/Reinstall Edge browser
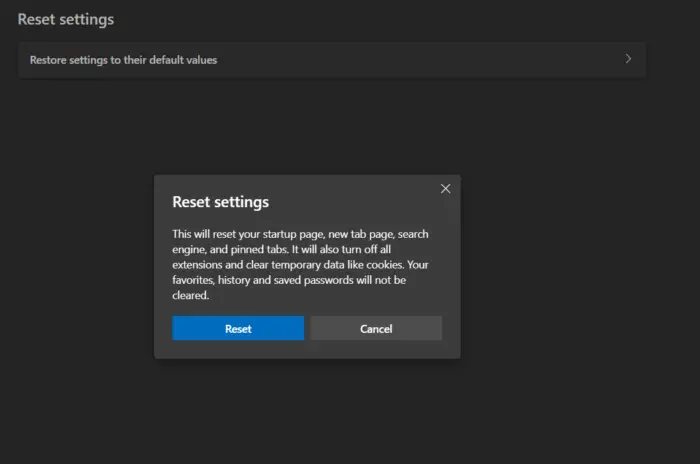
As a last resort, if the issue in highlight is still not resolved, you can first reset Edge to its default settings and see if that helps. If not, you can go ahead and repair Edge. If that still didn’t help, you can reinstall Edge on your Windows 11/10 PC.
To uninstall and install Edge browser, do the following
- Press Windows key + E to open File Explorer.
- Navigate to the directory path below:
C:\Program Files (x86)\Microsoft\Edge\Application
- At the location, double-click on the folder with the browser version number.
- Next, double-click the Installer folder.
- Now, to copy the location from the File Explorer address bar, press Alt+D, then press CTRL+C.
- Next, open Command Prompt in admin mode.
- In CMD prompt, type the command below and hit Enter to navigate to the folder containing the setup.exe file for Edge browser. Substitute the <Location> placeholder with the path copied from File Explorer address bar.
cd /d <Location>
- Now, copy and paste the command below and hit Enter to force-uninstall Edge on your device:
.\setup.exe -uninstall -system-level -verbose-logging -force-uninstall
- When done you can exit File Explorer and CMD prompt.
Alternatively, copy and paste the command below in elevated CMD prompt and hit Enter:
cd %PROGRAMFILES(X86)%\Microsoft\Edge\Application\9*\Installer
Similarly, to achieve the same outcome, you can copy your Edge version from the browser About page by clicking the Settings and more menu icon > Help and feedback > About Microsoft Edge. Then execute the following command in elevated CMD prompt. Replace the <YourEdgeVersion> placeholder with the version number you copied previously.
cd %PROGRAMFILES(X86)%\Microsoft\Edge\Application\<YourEdgeVersion>\Installer
Once the command executes, copy and paste the following command and hit Enter:
setup.exe –uninstall –force-uninstall –system-level
- To reinstall Edge on your device, simply download Edge latest version from the official page, then run the setup file and follow the on-screen directions to complete the installation.
Hope this post helps you!
Related post: Firefox Sync not working? Fix common Firefox sync issues and problems
How do I force Microsoft Edge to sync?
To start syncing your Favorites in Microsoft Edge, open Start > Settings > Accounts > Sync your settings. Toggle on Sync settings and Internet Explorer settings. Edge still uses the same sync setting as Internet Explorer.
Why are my Edge favorites not syncing?
If Edge favorites are not syncing on your Windows 11/10 PC, do the following: Tap Account settings. In the Sync settings section, tap Sync. If Sync is not already enabled, tap the toggle that’s located to the left of Sync. If necessary, tap the checkbox next to Favorites.
Read: How to manage Favorites in Microsoft Edge browser
Why is Sync not available for my Microsoft account?
If Sync is not available for your Microsoft account, it’s because your account is not verified. To resolve this issue, log into the Microsoft Account site at account.microsoft.com/ and check under Your Info and the Security tabs to confirm if your account is verified. If not, click the Verify link and go through the steps.
Leave a Reply