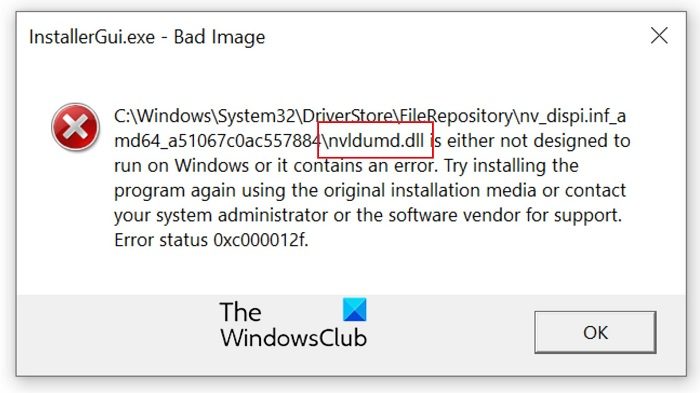
DLL files are important for the functioning of the system and applications. If certain DLL files are missing or corrupt, then it can cause problems with the functioning of the system or the application. The Nvidumd.dll file is one such file. If it goes missing or gets corrupted, you will encounter the Nvldumd.dll Bad Image error on your system.

What is Nvldumd.dll?
Nvldumd.dll is a DLL file associated with NVIDIA Driver Loader. NVIDIA is known for manufacturing GPU chips which are used for graphic processing. This DLL file is located in the /System32/DriverStore/ folder. If this DLL file is missing or corrupt, you will encounter the Nvldumd.dll Bad Image error in the discussion.
Fix Nvldumd.dll Bad Image error in Windows 11/10
Try the following solutions to fix the Nvldumd.dll Bad Image error on your system:
- Re-register the Nvldumd.dll file
- Update the NVIDIA Graphic drivers
- Run Windows Update and install the relevant Optional Update
- Reinstall Visual C++ Redistributable
- Restore your system to a previous Restore point
1] Re-register the Nvldumd.dll file
It could be possible that the Nvldumd.dll file has been restored to your system, however, it has not been registered on your system. You can re-register the DLL file on your system as follows.
Open the elevated Command Prompt window as explained earlier.
In the elevated Command prompt window, type the following command and hit Enter to execute the same.
Regsvr32 nvldumd.dll
Reboot your system once the DLL file has been registered.
2] Update the NVIDIA Graphics drivers
Since the DLL file is associated with NVIDIA, updating the NVIDIA drivers can be very helpful. While the system automatically updates drivers, that might not always work for external graphics card drivers and it is advisable to download them separately. Other than this, you can use the NV Updater tool to update the NVIDIA Graphics Card drivers.
3] Run Windows Update and install the relevant Optional Update
Windows Updates have an additional option called Optional updates. Optional updates push a lot of features and are also responsible for driver updates. We can update the Graphics Card drivers by updating Windows. The procedure is as follows:
- Right-click on the Start button and select Settings from the menu list.
- In the Settings Window, go to Windows Updates >> Advanced options >> Optional updates.
- Now, check the boxes for Optional updates and install them.
- Restart your system once the updates are done.
- The Graphics Driver will be updated along with other drivers.
If this doesn’t help or you are using an external Graphics Card on your system, we would advise using the Intel Driver and Support Assistant or AMD AutoDetect to update the Graphics Card drivers.
4] Reinstall Visual C++ Redistributable
The Visual C++ Redistributable package contains the Nvldumd.dll file as a part of the package. If you reinstall the Visual C++ Redistributable package on your system, then it will automatically install the Nvldumd.dll file on your system.
5] Restore your system to a previous Restore point
If your system was working fine earlier but has faced the problem recently, then restoring it to a previously created restore point could be helpful. The procedure to restore your system is as follows.
- Search for Recovery in the Windows Search bar.
- Open the Recovery window and click on System Restore.
- In the System Restore window, you will be prompted to choose a recommended restore point and another custom one. Select as per your requirements and click on Next.
- You will be asked to confirm the restore point. Select Finish and the System Restore process will initiate.
Please let us know in the comments if this helped.
Leave a Reply