This post features solutions to fix PowerPoint Failed to Load Hlink.dll. Microsoft PowerPoint is a presentation program for Windows that allows users to create presentations from scratch. Users can add text, images, transitions, animations, etc. But recently, users have complained about receiving these error messages:
Microsoft PowerPoint “hlink.dll” can’t be loaded.
Microsoft PowerPoint failed to load “hlink.dll”.
Fortunately, you can follow some simple steps to fix it.
What is Hlink.dll?
Hlink.dll is an application extension component that is a part of Microsoft Office. You will see it in C:\Windows\SysWOW64, C:\Windows\System 32 and WinSxS folders. If this file goes missing, is not found, or fails to load, Office programs like PowerPoint may not work properly.
Fix PowerPoint failed to load Hlink.dll
If your PowerPoint cannot load the Hlink.dll file, you will need to extract the file and then replace it. However, there are others you can try to fix this issue.
- Re-register the DLL file
- Extract the Hlink.dll File
- Run PowerPoint in Clean Boot State
- Repair Office Online
- Perform a System Restore.
Now let us see these in detail.
1] Re-register the DLL file
If the Hlink.dll file is causing PowerPoint to malfunction, you should try re-registering the DLL file. Here’s how:
Click on the Windows key and search for Command Prompt.
Click on Run as Administrator.
Type the following command and hit Enter:
regsvr32 Hlink.dll
Now, restart your PC and check.
2] Extract the Hlink.dll File
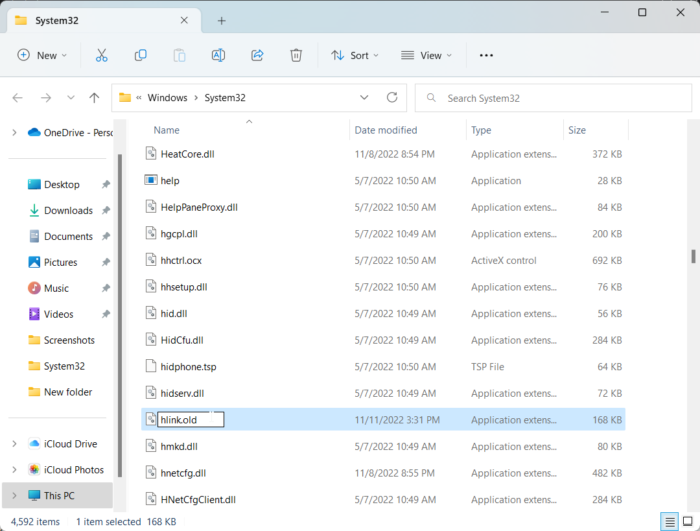
The next suggestion requires you to replace the old Hlink.dll file with a new one. It’s possible the file has somehow been corrupted and is causing issues. Here’s how:
Open File Explorer and navigate to the following location for 64-bit systems.
C:\WINDOWS\SysWOW64\hlink.dll
Right-click on the Hlink.dll file and rename it as Hlink.old.
Now download the new Hlink.dll file from Microsoft and extract it.
Once done, open Command Prompt as an Admin.
Type the following command where the drive is the location of the new DLL file, and Windows is the folder with Windows operating system:
expand drive:\i386 hlink.dl_ c:\windows\SysWOW64\hlink.dll
Once done, run the following command to re-register the file.
regsvr32 Hlink.dll
Now restart your device to check if the issue is fixed.
3] Run PowerPoint in Clean Boot State
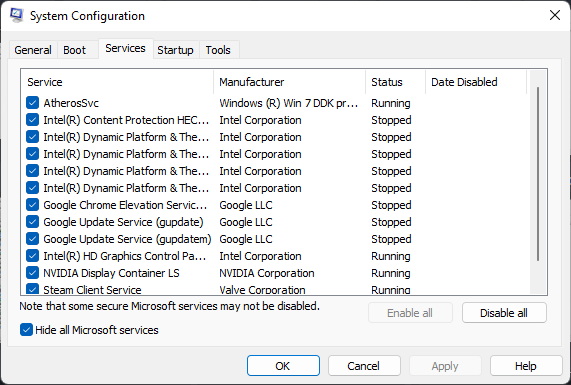
Third-party applications installed on your device can be responsible for hlink.dll can’t be loaded in PowerPoint. Perform a Clean Boot of your PC to restrict all third-party applications. Here’s how you can perform a clean boot:
- Click on Start, search for System Configuration and open it.
- Navigate to the General tab and check the Selective Startup option and the Load System Services Option under it.
- Then navigate to the Services tab and check the option Hide all Microsoft services.
- Click on Disable all at the bottom right corner and hit Apply, then Ok to save changes.
If the error doesn’t appear in the Clean Boot State, you may need to manually enable one process after another and see who the culprit is. Once you’ve identified it, disable or uninstall the software.
4] Repair Office Online
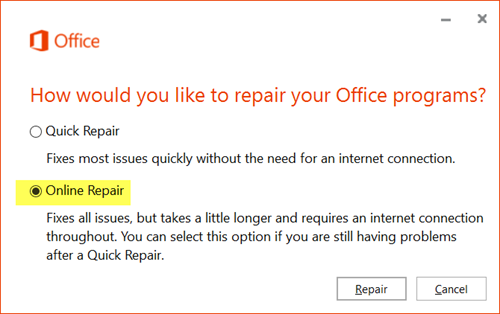
If none of these steps could help you, consider repairing Office 365 online. It has been known to help most users get over this error. Here’s how to do it:
- Press Windows Key + I to open Settings.
- Click on Apps > Apps & Features.
- Now scroll down, click on the office product you want to repair, and select Modify.
- Click Online Repair and follow the instructions on-screen.
5] Perform a System Restore
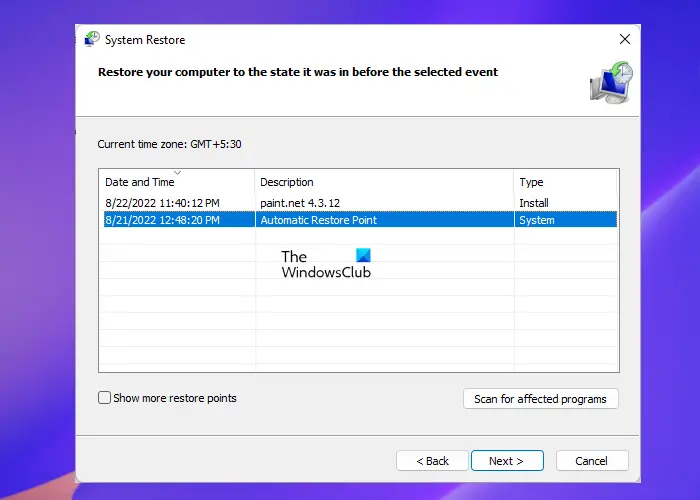
If this does not help you, perform System Restore to go back to the point before the problem started. Performing a system restore can make your device to working condition without reinstalling the operating system. Doing so will repair the Windows environment by installing the files and settings saved in the restore point.
Fix: Error code PIN-INAPP-INVALIDPIN-8 when trying to activate Office
How do I fix a corrupt PowerPoint files?
To fix a corrupt PowerPoint File, right-click on the damaged file, click on Properties, and navigate to the Tools tab. Under Error-checking, click on Check Now and select the Automatically fix file system error check box.
Leave a Reply