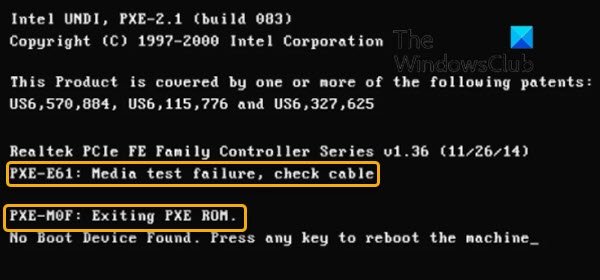
If your desktop or laptop computer fails to boot and throws the error; PXE-E61: Media test failure, check cable OR PXE-M0F: Exiting PXE ROM on a black screen, then this post is intended to help you. In this post, we will identify the potential causes of the error, as well as provide the most suitable solutions you can try to successfully resolve the issue.

PXE-E61, Media test failure, check cable boot error on Windows 11/10
The error indicates a problem with your computer’s PXE. This error often occurs when your boot sequence is misconfigured in your BIOS, or your boot device (usually your hard drive) cannot be read correctly because it’s physically damaged, corrupt, or crashed.
Other reasons for this error include:
- Power issue
- Damaged ethernet cable
- Hard drive or network drive is
- Damaged boot sector
In addition to the two error message in focus in this post, the following are PXE-E61 related errors:
PXE-M0F: Exiting Intel PXE ROM.
PXE-M0F: Exiting Intel Boot Agent.
No Boot Device Found. Press any key to reboot the machine.
PXE-M0F: Exiting PXE ROM
If you’re faced with this issue, you can try our recommended solutions below in no particular order and see if that helps to resolve the issue.
- Check Power Supply and Cables
- Change Boot Order
- Check bootable device
- Disconnect the network drive
- Disable PXE
- Update Network Card drivers
- Reset BIOS
Let’s take a look at the description of the process involved concerning each of the listed solutions.
1] Check Power Supply and Cables
As soon as you power on your PC, the system tries to boot from the configured bootable network drive. An improper or loose connection between the hardware may prevent the system from booting and cause the error.
This solution requires you to thoroughly inspect your network drive and make sure that power cables are properly connected and not damaged.
2] Change Boot Order
If you want to boot from a network drive, check if the network drive is placed at the top in the boot order. If not, set it at the top in the BIOS settings.
If you want to boot from the hard drive, then set the HDD at the top of the list. If the hard disk is not listed as an option in the boot sequence, this may indicate a failed hard drive or a loose cable connection. If it’s a desktop computer, power it down, open the case, and verify the connections to your hard drive are connected firmly and properly.
It’s also possible that the SATA cable is defective and the computer is not able to detect the hard drive due to a bad SATA cable. If the cables are firmly connected to the hard drive and to the motherboard, and the error still occurs, try replacing the SATA cable.

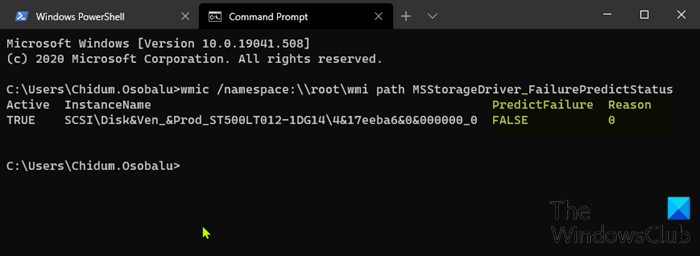
If the cables are securely connected and the hard drive still isn’t detected, you might need to replace the hard drive. Before you do, run a S.M.A.R.T. test.
3] Check bootable device
If the BIOS is misconfigured and USB boot has the highest priority in the boot sequence, the BIOS will try to boot from USB first. If the connected USB device is not bootable then it will search the bootable device in the network and you may get the Media Test Failure error.
Remove the external USB device to skip boot from USB or you can create a bootable USB device on a Windows 10 computer or on a Linux or Mac computer.
Also double-check that the boot order is configured to boot from USB.
4] Disconnect the network drive
It’s possible that you have Windows installed on your hard drive, but the connected network drive is set to the highest priority in the boot sequence which doesn’t have Windows installed on it. The computer will try to boot from the network drive and may fail and consequently trigger this error. In this case, disconnect the network drive by removing the network cable.
5] Disable PXE
This solution requires you to boot into BIOS and disable the PXE if you don’t actually want to use it. It’s normally listed as Boot to Network or Ethernet, and is usually found in the Boot menu.
6] Update Network Card drivers
An outdated, missing, or corrupted driver can prevent the computer from accessing the network, which prevents PXE from working properly. Since you most likely can’t boot to your computer to update the drivers, you can boot into Safe Mode or change the boot order to the local hard drive.
Once you successfully boot to the desktop, you can update the Network driver. You may also download the latest version of the driver from the NIC manufacturer’s website.
After updating the network card drivers, try booting from the network once more and see if the issue is resolved. If not, try the next solution.
7] Reset BIOS

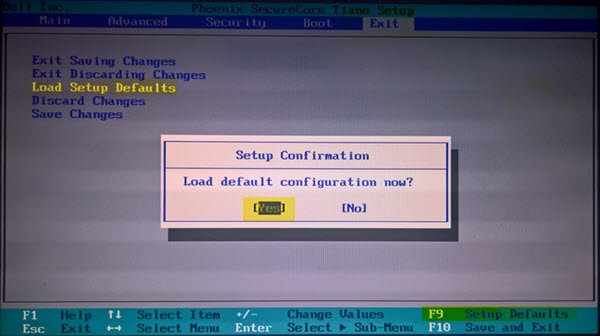
This solution requires you to clear CMOS to reset the BIOS. If the PXE-E61 error is due to a misconfigured BIOS setting, resetting BIOS to its default values will most likely fix the issue.
You can reset the BIOS setting to its default values by removing and re-inserting the CMOS battery. The CMOS battery is flat and round in shape. It looks like the ones used in electronic toys and watches. If it’s not removable, don’t try to remove it; instead, reset the BIOS from within the BIOS environment.
I hope this helps!
Related post: Surface Laptop PXE boot attempt fails.
Leave a Reply