WMI is essential in SCCM for client-server connection and remote Windows PC management. SCCM relies on the Win32_Service class for service monitoring. The WMIC command-line utility allows for effective Windows system management. However, users face many SCCM Client WMI issues, and in this post, we will discuss all of them.
Fix SCCM Client WMI issues
Following are SCCM Client WMI Issues that we will discuss in this guide.
- WMI Invalid Class
- WMI Connectivity Issue
- Access Denied
Let us talk about them in detail.
1] WMI Invalid Class
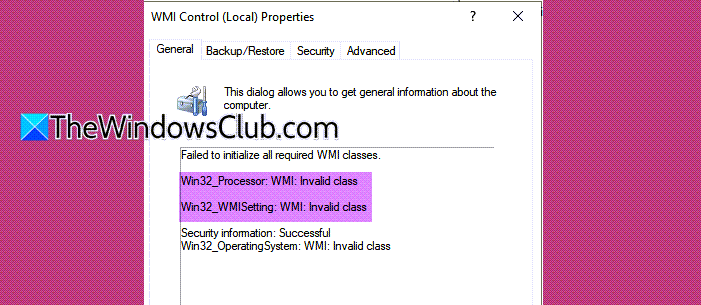
A lot of users face issues with SSCM Client and other applications such as Battle.Net and when they check winmgmt.msc, they see the following error message.
Failed to initialize all required WMI classes.
Win32_Processor: WMI: Invalid class
Win32_WMISetting: WMI: Invalid class
Security information: Successful
Win32_OperatingSystem: WMI: Invalid class
To resolve this issue, we will create a script to restart all the related services as this issue is nothing but a glitch.
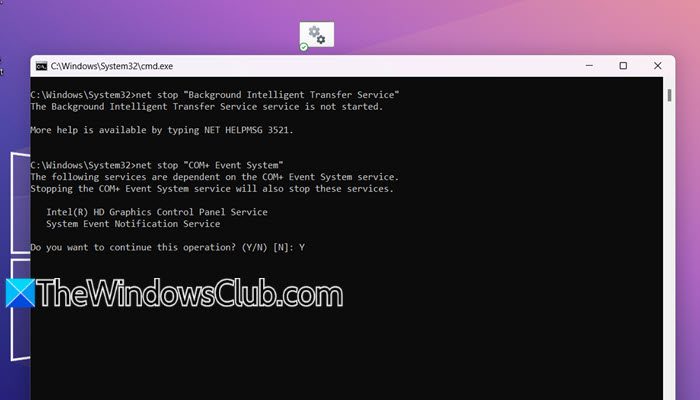
To do so, open Notepad, paste the following lines of code in there, and save it with any name and a .cmd extension.
net stop "Background Intelligent Transfer Service"
net stop "COM+ Event System"
net stop "Microsoft Software Shadow Copy Provider"
net stop "Volume Shadow Copy"
net stop Winmgmt
net stop WSearch
cd /d %windir%\system32\wbem
dir /b *.dll > dlllist.txt
dir /b *.mof > moflist.txt
dir /b /s *.mfl > mfllist.txt
for /f %f in (dlllist.txt) do regsvr32 /s %
for /f %s in (moflist.txt) do mofcomp %s
for /f %s in (mfllist.txt) do mofcomp %s
net start "Background Intelligent Transfer Service"
net start "COM+ Event System"
net start "Microsoft Software Shadow Copy Provider"
net start "Volume Shadow Copy"
net start Winmgmt
net start WSearch
del dllist.txt /Q
del moflist.txt /Q
del mfllist.txt /Q
wmiprvse /regserver
Once done, go to the location where you have saved the script, for the sake of accessibility, we saved it on the desktop, you can do the same. Right-click on the script file and select Open as administrator. Click Yes when the UAC prompt appears.
This will launch the Command Prompt screen, and keep entering ‘Y’ when prompted. Hopefully, this will resolve the issue.
2] WMI Connectivity Issue
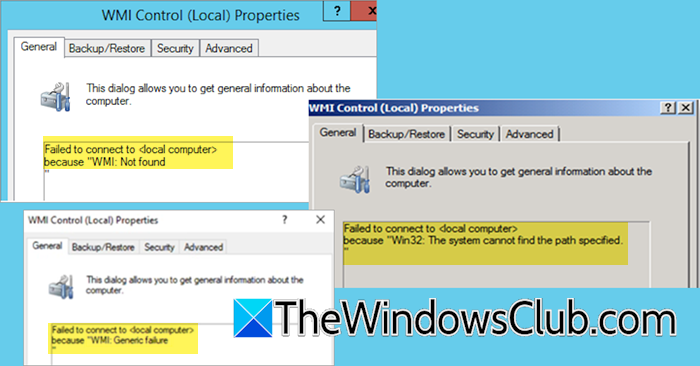
There are WMI Connectivity errors that one can face when configuring WMI or when using SCCM. We have listed a few of them below, but if you encounter some other errors that are not listed here, you can still use the solutions mentioned here.
Failed to connect to <local computer>
because “WMI: Not found..
Failed to connect to <local computer>
because “Win32: The system cannot find the path specified…
Failed to connect to <local computer>
because “WMI: Generic failure..
Since these issues are glitches, we need to perform a consistency check on the live or currently used WMI repository.
To do so, run the following command.
winmgmt /verifyrepository
You can use the command /verifyrepository <path> and provide the path argument to check any saved copy of the repository. In this case, the path argument should contain the full path to the saved repository copy. The saved repository should be a copy of the entire repository folder.
To resolve this issue, you need to restart the WMI Service. To do so, run the commands mentioned below in the elevated mode of the Command Prompt.
sc config winmgmt start= disabled
net stop winmgmt /y
%systemdrive%
cd %windir%\system32\wbem
for /f %s in ('dir /b *.dll') do regsvr32 /s %s
sc config winmgmt start= Auto
net start winmgmt
dir /b *.mof *.mfl | findstr /v /i uninstall > moflist.txt & for /F %s in (moflist.txt) do mofcomp %s
Hopefully, this will do the job for you.
Read: How to install the SCCM Console in Windows 11
3] Access Denied
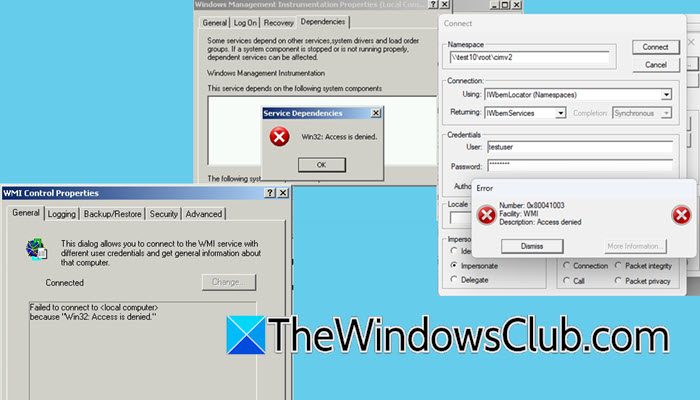
As evident from the error message, you may get Access is denied error due to the lack of privileges to the user account.
So, if you encountered this error when connecting to a Namespace, we first need to make sure that the added that account to the administrators group or if there is some other Active Directory account that has the required privilege, make sure that the user is a part of that. Also, make sure that the credentials that the user is using is correct, an incorrect password can also give the same error.
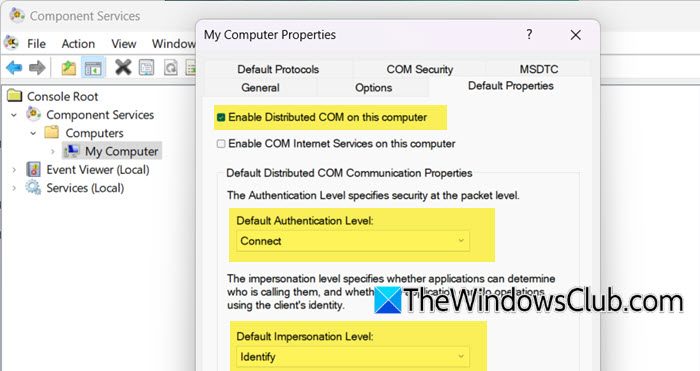
In case WMI Control Properties throws the error “Access is denied”, we need to manually check and configure the access in WMImgmt. To do so, follow the steps mentioned below.
- Open Run by Win + R, type “WMImgmt.msc”, and click Ok.
- Expand Console Root, right-click on WMI Control (Local), and click on Properties.
- On the Security tab, select Everyone, and make sure that all the Allow checkboxes are ticked as they should have to permission to access Root and CCM.
- Now, again open Run, paste “dcomcnfg”, and click Ok.
- Navigate to Component Services > Computers > My computer.
- Right-click on My Computer and select Properties.
- In the Properties window, go to the Default Properties tab, check the Enable Distributed COM on this computer, set the Default Authentical Level to Connect, and set the Default Impressionation Level to Identify.
- Go to the COM Security tab, click on Edit limits, and give full permission to everyone if you have not given them enough permission.
However, even if you made changes recently, they might not have been applied, so to do that, you need to reboot the WMI Services (follow the steps mentioned in the previous section).
Read: WMIC command give Access is denied error when connecting remotely
How to fix WMI issues in SCCM?
There are various WMI issues in SCCM, but most of them are glitches. To fix them, we need to restart the WMI Service. To do so, you need to run a few commands mentioned in this post. You can also restart the related services by executing the commands mentioned in the first section and see if that helps.
Read: Fix 0x87D00607 SCCM Application Installation Error
How to fix SCCM client issues?
To repair SCCM client, we can run the repair client utility. To do so, launch the Configuration Manager console, go to Assets and Compliance > Overview > Devices, select the vulnerable device, right-click on it, and select Right Click Tools > Client Tools > Repair Client, check the box that says “Are you sure you want to repair the client?“, and Click Yes to proceed with repair.
Also Read: Find Model Name or Serial Number of Windows computer.
Leave a Reply