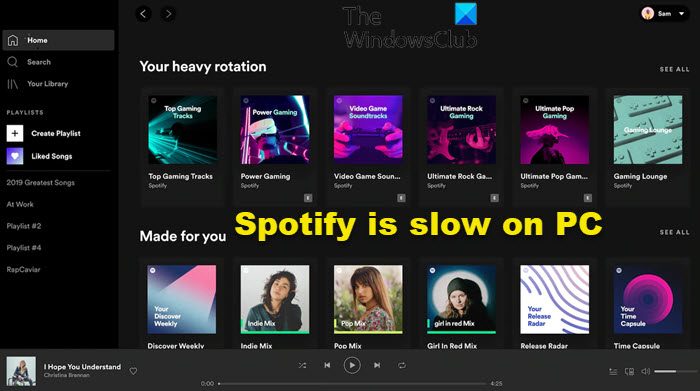
In this post, we will talk about how to get rid of a slow Spotify on Windows 11/10. Spotify is a popular audio streaming platform that has an audience all over the world. Launched in 2008, Spotify currently has more than 320 million users. Spotify is the place to listen to online and offline music, and the best part is that you can find music of all genres. However, on the negative side, many users have reported that Spotify is acting incredibly slow on their Windows 11/10 PC. So, if you are also experiencing the same issue with Spotify, continue with this troubleshooting guide to get rid of the app slowness.

Spotify is slow on Windows PC
Here’s how to fix a slow Spotify on Windows 11/10
- Clear Spotify Cache Data
- Turn off Hardware Acceleration
- Turn off Local Files Option
- Increase the Cache Files Size
- Update Spotify
- Repair, Reset or Reinstall Spotify
Now, let’s check out all these solutions in detail.
1] Clear Spotify Cache Data
Similar to any other application, Spotify stores cache data on the system. It helps to offer faster and smoother service next time you visit the platform. Whenever you make any changes to your Spotify account, for instance, your account password, it automatically gets saved as cache. But on a negative note, if this cache data gets corrupted for some reason, it will automatically slow down the computer, resulting in the slowness of the Spotify app. As a solution, you will have to clear the Spotify cache data from your Windows PC to get rid of the problem. Here’s how it’s done.
- Press the Windows + R shortcut key to open the Run dialogue box.
- In the space provided, type %appdata%, and press the enter key. Here you will find a folder associated with all the applications installed on your system.
- From the list, locate and open the Spotify folder.
- Inside the Spotify folder, open the Users folder.
- In the following folder, open the folder associated with Spotify username.
- Locate a file named local-files.bnk
That’s it. You have deleted the Spotify cache data from your Windows PC. Now, launch the app and check if there is any difference in speed. If not, continue with the guide.
2] Turn off Hardware Acceleration

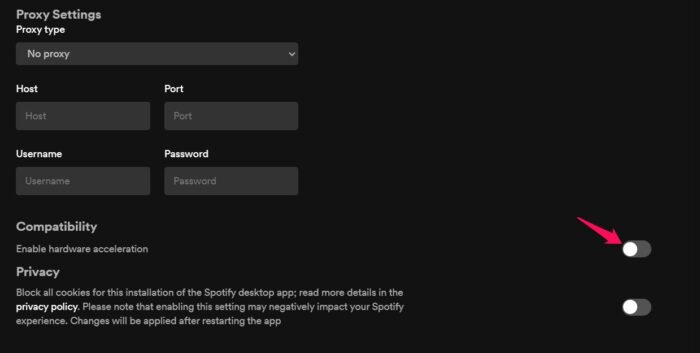
Most of the applications nowadays, including Spotify, come with the hardware acceleration feature. If enabled, the feature helps the app use the installed graphics card to offer the most smoother experience in terms of the visual interface. The only bad thing about this feature is that it mainly helps a system with high-end specifications. If you have enabled this feature on a low-end system, it will start consuming a lot of system resources which will automatically slow down the app. So, here’s how to turn off the hardware acceleration feature on Spotify.
- Launch the Spotify app on your system.
- Click on the dropdown icon present next to your account name.
- From the context menu, choose the Settings option.
- Tap on the Show advanced settings option.
- Toggle of the Enable hardware acceleration option present under the Compatibility section.
Now, relaunch the app and check if the problem is fixed.
3] Turn off Local Files Option

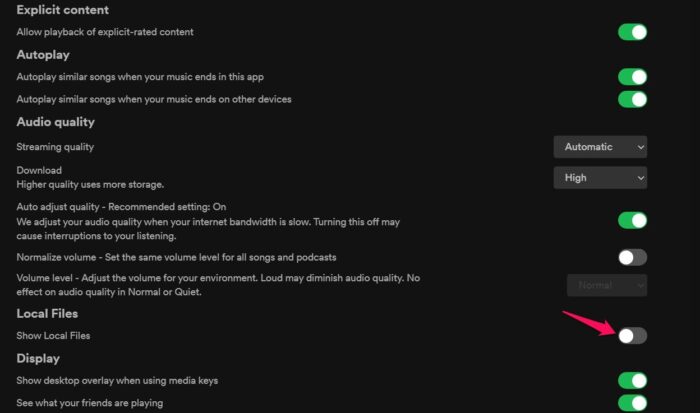
As mentioned, Spotify is the place to listen to online and offline music. So if you are fond of listening to offline music on Spotify, you must have enabled the Show Local Files feature of the application. But at the same time, it can also slow down the app. As a solution, you will have to disable this feature to eliminate the app slowness. Here’s how to do it.
- Open the Spotify app on your Windows PC.
- Click on the dropdown icon next to the username and choose the Settings option.
- Toggle off the Show Local Files option in the following window under the local files section.
Now, relaunch the app and check if there is any difference in the app’s speed.
4] Increase the Cache Files Size
As mentioned above, cache files are important to offer a faster and better user experience. However, if you haven’t cleared cache data for a long time, they will keep increasing in size, and once they surpass the set limit, they will begin to consume the system memory. You will have to increase the cache file size of Spotify on Windows to fix the problem, and here’s how to do so.
Open the Run dialogue box by pressing the Windows + R hotkeys.
Type %appdata% and press enter.
Locate and open the Spotify folder.
Right-click on the prefs file in the following folder, and choose Open with Notepad.
Enter the below-mentioned line at the bottom of the file code.
storage.size=1024
Press Ctrl + S to save the changes.
Now, exit the window.
Launch the app and check if the problem is fixed to not.
5] Update Spotify
If you don’t remember updating Spotify for a long time, you must consider going through the process to get rid of the mentioned issue. You can update the Spotify app by following the below steps.
- Visit Windows Store and search for Spotify.
- Click on the Update option.
Wait until the update is downloaded; once done, launch the app and check if the problem continues. If not, try out the last solution.
6] Repair, Reset or Reinstall Spotify
If nothing helped you solve the problem, try to Repair or Reset Spotify. If even that does not help, the last thing you can do is try to reinstall the Spotify app. There can be an issue with the installation that triggers the mentioned problem. Thus, reinstall the Spotify app to eliminate its slowness on Windows.
Why is Spotify slow on PC?
Generally, Spotify works equally well on PC as well. But due to some reasons, it can get slow over time. It includes a huge amount of Spotify cache data, hardware acceleration feature, shows local file option, and limited cache file size. An updated Spotify app will also feel slow to use.
What is Spotify cache?
Like any other application, Spotify stores cache data, and it is nothing but a temporary version of all your progress on Spotify. Apps including Spotify store cache data in order to offer faster and smoother service the next time you access the platform.
Read Next: A firewall may be blocking Spotify, Error code 30.