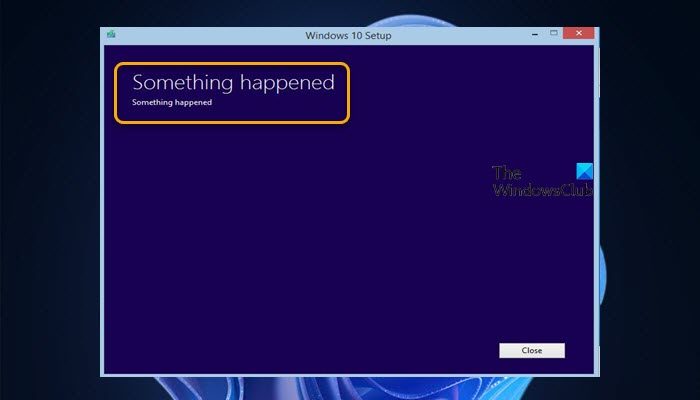
If when you try using the Media Creation Tool to upgrade to Windows 11 or to the latest version/build of Windows 10, and you encounter the Something Happened Windows Setup error, then this post is intended to help you. In this post, we will provide the most suitable solutions affected PC users can apply to successfully resolve the issue.

Something Happened Windows Setup error
If the Something Happened Windows Setup error has occurred on your Windows 11/10 device, you can try our recommended solutions below in no particular order and see if that helps to resolve the issue.
- Run Windows Media Creation Tool as Administrator
- Change Locale and Language Settings to English (United States)
- Disable or Uninstall Security software
- Enable Essential Services
- Modify Registry – AllowOSUpgrade key
- Directly download the Windows 11/10 ISO
- Clean install Windows 11/10
Let’s take a look at the description of the process involved concerning each of the listed solutions.
1] Run Windows Media Creation Tool as Administrator
You can as your first line of action in troubleshooting and fixing the Something Happened Windows Setup error that occurred on your Windows 11/10 device is to run Windows Media Creation Tool as Administrator. Alternatively, you can sign into an admin account or change a Standard User to Administrator Account and run the upgrade from there.
2] Change Locale and Language Settings to English (United States)
You may encounter this issue if the locale and language settings in your computer are different than the downloaded Windows 11/10 setup files. In this case, to resolve the issue, you can change Locale and Language Settings to English (United States).
Try the next solution if this action didn’t work for you.
3] Disable or Uninstall Security software
Third-party security software installed on your device can interfere with the upgrade process and consequently trigger this error. We recommend using Windows Defender for protection during the upgrade operation.
To disable your antivirus software, locate its icon in the notification area or system tray on the taskbar (usually in the lower right corner of the desktop). Right-click the icon and choose the option to disable or exit the program.
To uninstall the third-party antivirus programs from your PC, we recommend using the dedicated removal tool to remove all files associated with your antivirus program. Once the upgrade completes successfully, you can verify compatibility information, and if desired, re-install the third-party antivirus application.
4] Enable Essential Services
This solution requires you to make sure the following services are set to automatic and running in Windows Services manager:
- Automatic Updates OR Windows Update
- Background Intelligent Transfer Service
- Server
- Workstation
- TCP/IP NetBIOS Helper
- IKE and AuthIP IPsec Keying Modules
To enable these essential services on your Windows 11/10 computer, do the following:
- Open Services console.
- Locate the mentioned services one by one, and if any of the service is not running or not set to Automatic, double-click on the service, set its Startup type to Automatic from the drop-down list. Apply the changes.
- Click on Start button to immediately start the service.
- Finally restart your PC and run the upgrade operation again.
If the issue is unresolved, try the next solution.
5] Modify Registry – AllowOSUpgrade key

Since this is a registry operation, it is recommended that you back up the registry or create a system restore point as necessary precautionary measures. Once done, you can proceed as follows:
- Press Windows key + R to invoke the Run dialog.
- In the Run dialog box, type regedit and hit Enter to open Registry Editor.
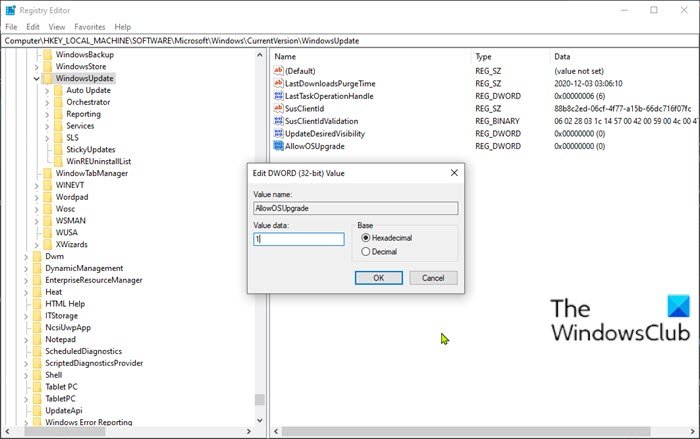
- Navigate or jump to the registry key path below:
HKEY_LOCAL_MACHINE\SOFTWARE\Microsoft\Windows\CurrentVersion\WindowsUpdate
- At the location, on the right pane, double-click the AllowOSUpgrade entry to edit its properties.
If the key is not available, right-click on the blank space on the right pane and then select New > DWORD (32-bit) Value to create the registry key and then rename the key as AllowOSUpgrade and hit Enter.
- Double-click the newly created entry to edit its properties.
- Input 1 in the Value data field.
- Click OK to save changes.
- Restart your computer.
On boot, retry the Windows upgrade install. If the issue is still unresolved, try the next solution.
6] Directly download the Windows 11/10 ISO
Since you’re having issues with the MCT, this solution requires you to directly download the Windows 11/10 ISO image file from the official Microsoft website. Once you have downloaded the ISO to a location (preferably the desktop) on your device, mount the ISO image as a virtual drive and then run the setup.exe file to start the Windows in-place upgrade process.
7] Clean install Windows 11/10
If upgrading isn’t working for you, you can simply create a Windows 11/10 installation media on a Windows computer or create Windows installation media on Linux or Mac computer, and then proceed to use the media to clean install Windows 11/10 on the device you were trying to upgrade.
Related post: Something happened and we couldn’t start the upgrade to Windows 11/10
How do you fix Windows 10 Something went wrong but you can try again error?
If you have encountered the something went wrong but you can try again error on your Windows 11/10 device, you can try the following simple workaround:
- Press Ctrl+Alt+Delete on the keyboard.
- In the lower right corner of the screen, select the Power button.
- Select Restart.
How do I fix OOBE settings error?
If you have encountered the OOBE settings error while upgrading to the latest Windows 11/10 version, it’s just the OOBE that hasn’t completed yet. So, to resolve the issue, do the following: Force shutdown your computer. When you boot the computer again, Windows will simply restart and ask you to configure OOBE settings again as the Windows is already installed.
Leave a Reply