A lot of users have complained about Error Code -203 on SteamVR. As per the reports, a game crashes when trying to play it in the SteamVR with the error code in question. This can happen because of multiple reasons, but the good news is that it can be resolved pretty easily. In this post, we are going to talk about solutions that you can try to fix this issue.
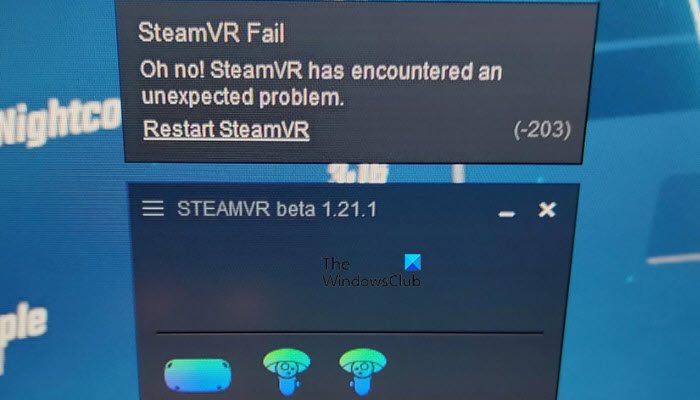
The following is the exact error message users see along with Error Code -203.
SteamVR Fail
Oh no! SteamVR has encountered an unexpected problem.
Restart SteamVR (-203)

Let us see why this is happening, and then go to the troubleshooting guide.
What causes SteamVR Error Code 203?
Error Code -203 can be caused by various things just like any other Windows-related issue. We have accumulated a list of reasons behind this issue, keep in mind that is not exhaustive.
- You may see the error code in question because of misconfiguration in Windows or SteamVR. A lot of users have reported that Hardware Acceleration, which is a Windows feature, tends to interfere with Steam and cause trouble. Disabling the feature, in that case, seems like a wise option.
- Another reason for this issue is interference from a third-party application. Since we run a lot of apps in the background, there is a high chance that some of those apps are interfering with SteamVR; also, if they are interfering, they may compete for resources. There are separate solutions for both of them that we will see hereinafter.
- If you are running an outdated version of Windows or SteamVR, there is a high chance that such error codes will pop up out of nowhere. Updating these software is pretty simple.
- Along with OS and Steam, you need to update your drivers as well, especially your Graphics Drivers.
Now that we know why this is happening let us see how you can fix it.
Fix SteamVR Fail Error Code -203
If you see Error Code -203 on SteamVR, try the following solutions.
- Restart your computer
- Disable Hardware-accelerated GPU Scheduling
- Update Windows, all its drivers, and Steam Client App
- Delete SteamVR Config Files
- Opt into SteamVR Beta
Let us talk about them in detail.
1] Restart your computer
Let us start by restarting your system. This will get rid of any temporary glitches that might be the cause of this issue. If restarting didn’t work, move to the solutions.
2] Disable Hardware-accelerated GPU Scheduling

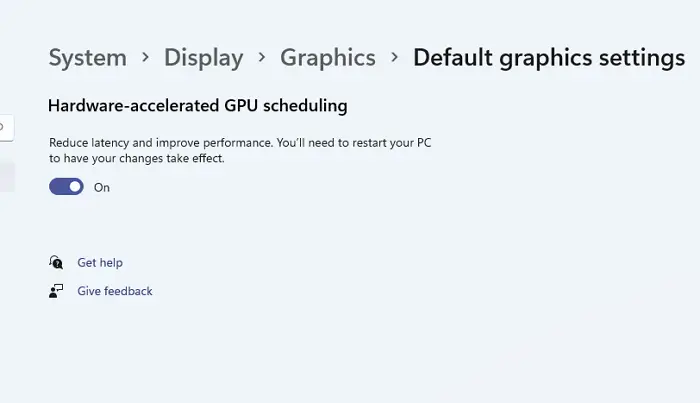
Hardware-accelerated GPU Scheduling, when enabled, puts the load of rendering graphics to your GPU and offloads your CPU. This allows the distribution of workload and helps in improving the overall performance of the computer when playing any game or doing a graphically-intensive task. This feature is causing issues for a lot of users, especially for those whose system doesn’t have a dedicated GPU. Even if you have a powerful dedicated GPU, this process can interfere with SteamVR and cause trouble for you. In that case, we recommend you disable it and see if that helps.
Follow the given steps to disable Hardware-accelerated GPU Scheduling.
- Launch Windows Settings by Win + I.
- Go to System > Display.
- Scroll down to Related Settings and click on Graphics.
- Click on Change default graphics settings.
- Use the toggle to disable Hardware-accelerated GPU Scheduling.
Once you have disabled the feature, check if the issue persists.
3] Update Windows, all its drivers, and Steam Client App
If you disable the feature or you are not able to find it on your computer, the next thing you should do is check for your OS updates, and if that doesn’t work, update all your drivers. Use any of the following methods to update your device drivers.
- Try any of the free driver update software
- Download the driver from the manufacturer’s website
- Install Driver and Optional Update.
- Update Device Driver from Device Manager.
Usually, the Steam client app gets updated manually. You must have noticed that every time you open the app, it checks for an update; in case it is not doing that, open the app, click on Steam and then select Check for Steam Client Updates.
4] Delete SteamVR Config Files

As mentioned earlier, if your SteamVR is misconfigured or if its configuration files are corrupted, you will see Error Code -203. Since we are trying to resolve this issue, we will be deleting the configuration files of SteamVR. There is nothing to worry about as these files will be created again as you launch the game.
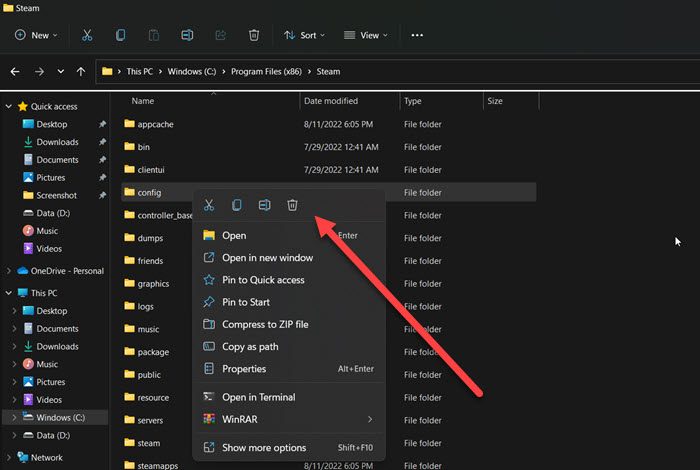
To do the same, open File Explorer, you can use the shortcut Win + E or just click on its icon from the Taskbar. Go to the location where you have installed Steam, most likely, the address will be the following.
C:\Program Files (x86)\Steam
Look for the config folder, right-click on it and select Delete.
Once the files are deleted, check if the issue persists.
5] Opt into SteamVR Beta
Some victims were able to fix the problem by opting into SteamVR Beta. The only caveat here is that, since it is a Beta update, it won’t be as stable as your current build, but since you are unable to use SteamVR, we would give it a shot. Follow the given steps to opt into SteamVR Beta.
- Launch Steam.
- Click on Steam > Settings.
- Go to Account and click Change from the Beta Participation section.
- Select SteamVR Beta Update.
Finally, check if the issue persists.
Hopefully, you will be able to resolve the issue using the solutions mentioned in this post.
How do I fix SteamVR error?
If you see a SteamVR error, make sure to use the error code to search for solutions. If you are seeing the error code -203, then check the solutions mentioned in this post to resolve the issue. In case your error code is different, use it to look for solutions as every error code has a particular meaning.
Read: How to fix SteamVR Error Code 436
Why does my SteamVR keep failing?
SteamVR may keep on failing and will not launch on your computer because of corrupted or missing files. You may have to run the installer again so that it can download any missing files, in case of corrupted files, reinstalling the app is the way to go. Also, make sure that your computer is compatible to run SteamVR.
Also read: Fix SteamVR Error 108 the right way.
Leave a Reply