Aligning text in Microsoft Word is one of the primary features of the popular app. Many users tend to use the Justify option to get the job done, but there may come a time when it fails to work. The question is, then, what can be done to get this issue under control? There are a few things we can do, and luckily for you, we have the sauce. Just know we’re going to focus on the latest version of Microsoft Word in this article. But that shouldn’t be a problem if you’re an advanced user.
Fix Test Paragraph not justifying in MS Word
If Justify Text or Paragraph is not working in Microsoft Word, then here are the steps you need to take to fix the issue:
- Open the preferred Microsoft document
- Choose the paragraph you want to Justify
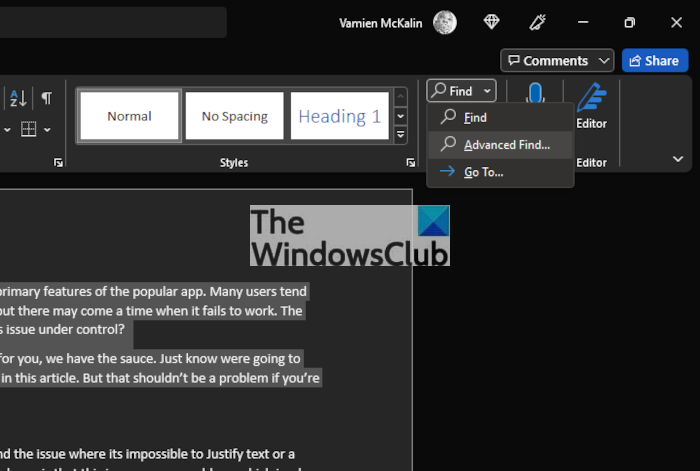
- Navigate to Advanced Find
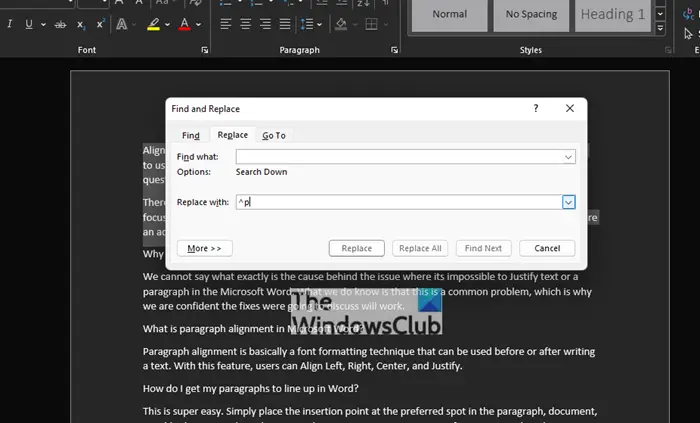
- Go to the Replace tab
1] Open the preferred Microsoft document
To begin, you must launch the affected document. To do this, open Microsoft Word on your Windows computer, then you should see a list of recent documents. The one you want should be in that list, so seek it out, then click on it to open.
2] Choose the paragraph you want to Justify
In order to select the paragraph, please click and hold the left mouse button at the beginning of the paragraph, then drag to the end, and release. If the texts are highlighted, then you can be sure the paragraph has been selected.
3] Navigate to Advanced Find

How do we get this done? Well, simply look to the top-right corner of the document. You should see the Find icon in that section. Just click on the arrow next to it then select Advanced Find.
4] Go to the Replace tab

After you’ve fired up the Advanced Find section, you are required, then, to select the Replace tab. From there, go to the Find box, then enter the following:
^p
Finally, hit Replace All. Ensure the Replace With field is 100 percent empty before adding anything to it. The problem with the inability to Justify should now be solved once and for all, or until next time.
Alternatively, use the Word Advanced Options to justify Text & Paragraphs
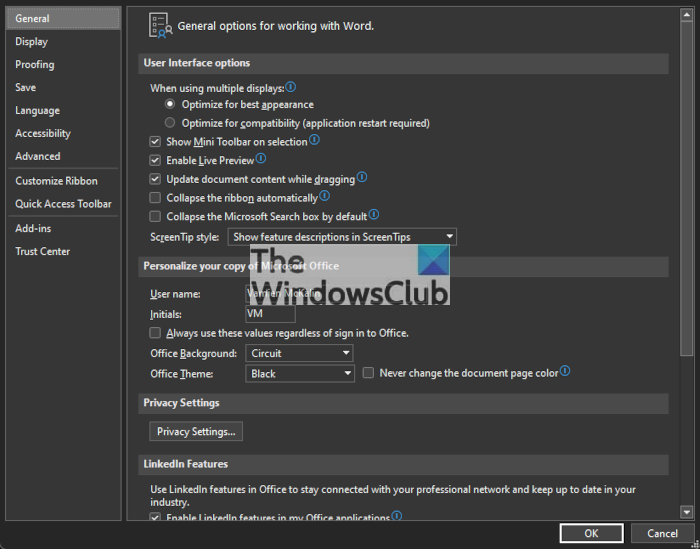
Another way to get things working again is to take advantage of the Advanced Options section via the Microsoft Word settings area. So, let us look at how to get this done right now.

First thing, you must navigate to the Options area of Microsoft Word. To do this, click on File from the top-left corner of the document, then from there, select Options to fire up a new window.
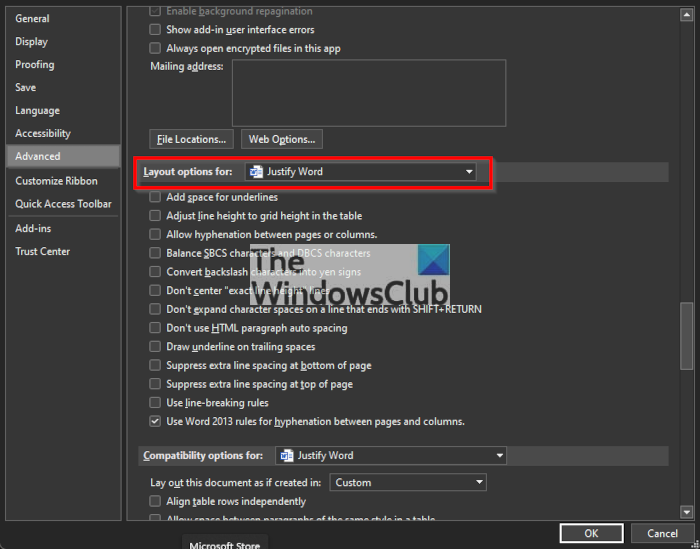
Via the left menu, you should see several tabs to choose from, but you only need to click on Advanced. It is located below Ease of Access and above Customize Ribbon, so you cannot miss it.

Finally, you’ll be required to navigate to the section named, Layout options for. Below it, please tick the box next to Don’t expand character spaces on a line that ends with SHIFT Return, then hit the OK button.
That’s it, your problems with Justifying text in Microsoft Word should now be rectified.
Why is my Justify not working in Word?
We cannot say what exactly is the cause behind the issue where it’s impossible to Justify text or a paragraph in Microsoft Word. What we do know is that this is a common problem, which is why we are confident the fixes were going to discuss will work.
What is paragraph alignment in Microsoft Word?
Paragraph alignment is basically a font formatting technique that can be used before or after writing a text. With this feature, users can Align Left, Right, Center, and Justify.
How do I get my paragraphs to line up in Word?
This is super easy. Simply place the insertion point at the preferred spot in the paragraph, document, or table that you wish to align. From there, you must press CTRL + I. If you want to align the text right, press CTRL + R, and if left is the best option, then hit CTRL + L, and that’s it.