Sometimes when you boot your Windows 11/10 computer, you may see Error Code 0x490 and you won’t be able to proceed from there. This happens if the Boot Manager is damaged or corrupted. In such a case, what we have to do, is we could run Automatic Windows Startup Repair.
Fix Error Code 0x490 on Windows Boot

To fix Error Code 0x490 on boot in Windows 11/10, you can follow these suggestions. Since you cannot boot Windows normally, you may have to try and boot in Safe Mode or into Advanced Startup options screen to be able to carry out the fixes. You will need to make use of the Command Prompt.
- Run sfc /scannow in CMD
- Run CHKDSK /F in CMD
- Rebuild Boot Configuration Data
- Run Automatic Startup Repair
- Repair your computer using Installation Media.
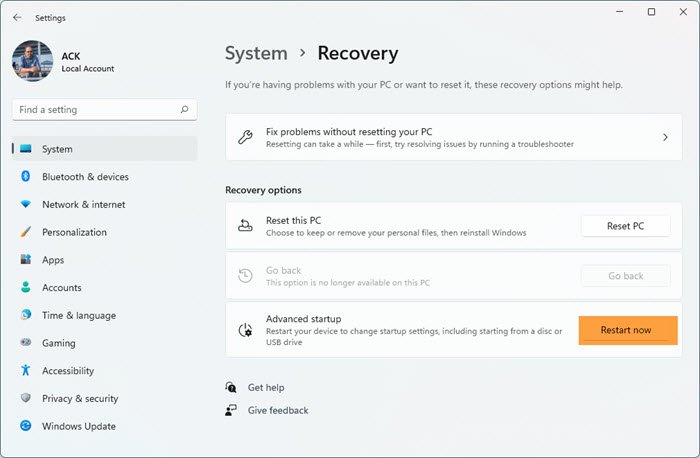
To carry out Startup Repair in Windows 11, you need to boot to the Advanced Startup Options screen.

- Open Windows Settings
- Click open System settings
- Scroll down till you see Recovery on the right side, and then click on it
- In the next screen, under Recovery options, you will see Advanced startup
- Click on the Restart now button to initiate the process.
If you cannot enter Safe Mode, then you may then have to boot into Windows 11/10 with your Windows Installation Media or Recovery Drive and select Repair your computer to enter Troubleshoot > Advanced Startup Options > Command Prompt. You can now use CMD to run commands. You may use a Windows 11/10 DVD or a bootable USB drive, or you can burn Windows ISO to a USB drive using another computer.
Related read: Run Startup Repair using the Installation Media or via Advanced Startup Options.
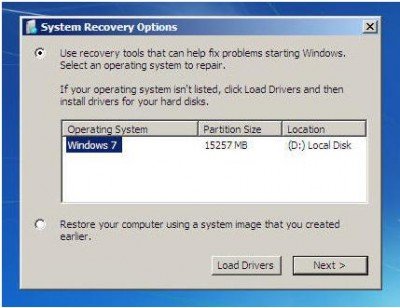
The following shows the steps in detail for repairing your Windows computer. While the example shows Windows 7 installation media, the process is the same for Windows 11/10 too. To do so:
- Insert the Windows installation disc or USB flash drive, or a system repair disc, and then shut down your computer.
- Then restart your Computer
- When prompted, press any key, and then follow the instructions that appear
- On the Install Windows page, or on the System Recovery Options page, choose your language and other preferences, and then click Next.

- Click Repair your computer.
- Select the Windows installation you want to repair, and then click Next.
- On the System Recovery Options menu
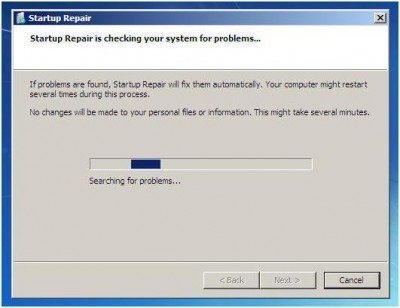
- Click on Start Repair
- Startup Repair would run the Repair process
- After the process is over and fixes are applied, the computer would be re-started.
On some occasions, we might need to run the Repair, 3, or 4 times to create the boot files to a new location.
Each time we have to restart the PC.
Some common FAQs about Windows Startup Repair
How do I use Startup Repair?
If a startup problem is detected, Startup Repair will start automatically and try to fix the problem.
Suppose the problem is severe enough that Startup Repair doesn’t start on its own and you can’t access the System Recovery Options menu on your computer’s hard disk. In that case, you can get to the menu and start Startup Repair by using the Windows installation disc or a system repair disc that you created earlier.
Are there problems that Startup Repair cannot fix?
Startup Repair can only fix certain problems, such as missing or damaged system files. It can’t fix hardware failures, such as a failing hard disk or incompatible memory, nor does it protect against virus attacks.
Startup Repair isn’t designed to fix Windows installation problems, nor is it a backup tool, so it can’t help you recover personal files, such as photos or documents. To help protect your computer, back up your system and files regularly. For more information, search for “backup” in Windows Help and Support.
What if Startup Repair can’t fix my problem?
If repairs aren’t successful, you’ll see a summary of the problem and links to contact information for support. Your computer manufacturer might include additional assistance information.


Start Up repair fails quite often instead choose command Prompt and put these commands one by one
bootrec /fixboot
bootrec /fixmbr
This never fails enjoy!!!!!!!!
guess what? it failed! :(
okay so once you have done that and it says succesful> what do you do next???