If you are unable to install VirtualBox on Windows 11/10 and getting an error as Installation failed! Error: Fatal error during installation, follow these suggestions to get rid of this issue. There could be countless reasons why VirtualBox fails to run the installer on your computer. Here we have consolidated some of the common reasons along with the solutions so that you can troubleshoot the issue and install Windows 11/10 OS without any problem.
Fix VirtualBox Installer Installation failed error
To fix VirtualBox Installer Installation failed error in Windows 11/10, follow these solutions:
- Turn off Hyper-V
- Run installer as administrator
- Change Advanced app settings
- Run Program Install and Uninstall troubleshooter
To learn more about these tips and tricks, keep reading.
1] Turn off Hyper-V
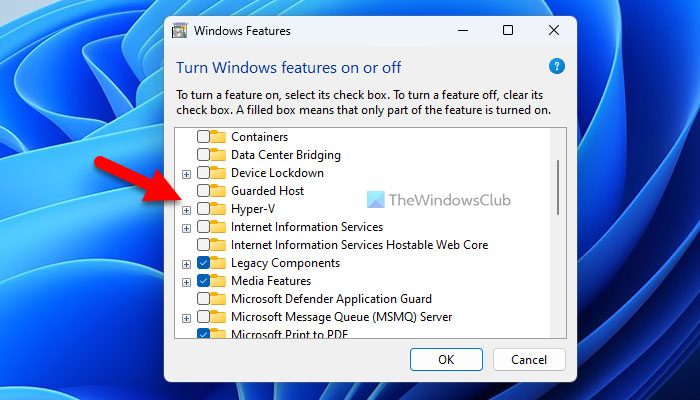
It is the very first troubleshooting suggestion you should follow in order to get rid of this problem from your Windows computer. Third-party virtual machine apps, such as VirtualBox, VMware Workstation Player, etc., do not run alongside Hyper-V. That is why it is recommended to disable or turn off Hyper-V on your computer before going through the VirtualBox installation process.
To turn off Hyper-V on Windows 11/10, follow these steps:
- Click on the Taskbar search box.
- Search for turn windows features on or off.
- Click on the individual search result.
- Find out the Hyper-V option.
- Uncheck the Hyper-V checkbox.
- Click the OK button.
Then, let it finish all the processes and restart your computer. Once done, you will be able to install VirtualBox without any problem.
2] Run installer as administrator
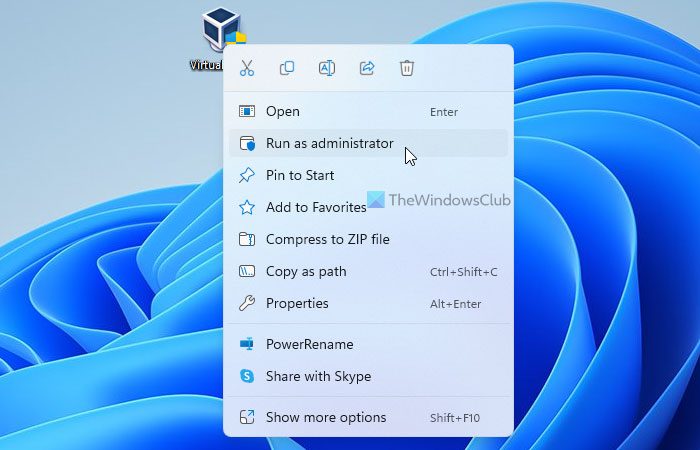
At times, you might need to run an installer with administrator privilege. It requires when you have tweaked the UAC or User Account Control setting on your computer. That is why follow these steps to run the VirtualBox installer as administrator:
- Find the VirtualBox installer file you downloaded from the official website.
- Right-click on the installer.
- Select the Run as administrator option.
- Click on the Yes option on the UAC prompt.
Your installer should not display any error message now.
3] Change Advanced app settings
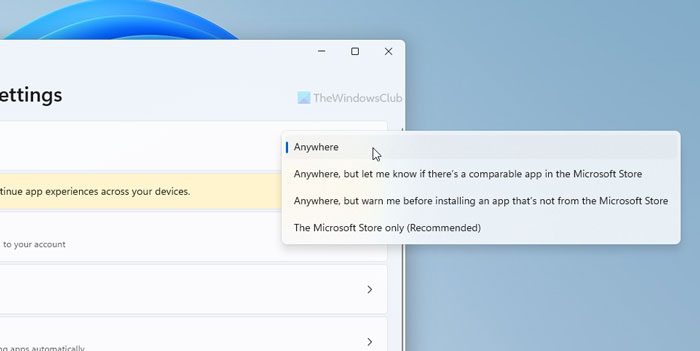
Windows 11 and Windows 10 come with an option that blocks the system from installing third-party apps. If you have enabled that setting, you won’t be able to install VirtualBox or any other software. That is why follow these steps to change Advanced app settings in Windows 11/10:
- Press Win+I to open Windows Settings.
- Go to Apps > Advanced app settings.
- Expand the Choose where to get apps drop-down menu.
- Select the Anywhere option.
After that, try to install the app.
4] Run Program Install and Uninstall troubleshooter
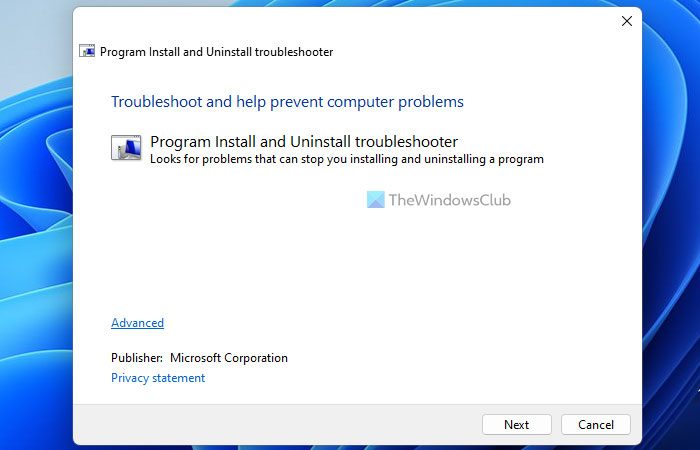
Microsoft offers a troubleshooter that works when you fail to install or uninstall an app on your computer. It is called Program Install and Uninstall troubleshooter. You can download this application from the official website of Microsoft. Therefore, run the troubleshooter and follow the screen instructions to fix this issue. Download Program Install and Uninstall troubleshooter from support.microsoft.com.
Read: VirtualBox FATAL: INT18: BOOT FAILURE Error
Why is my VirtualBox not installing?
There are several reasons why VirtualBox is not installing on Windows 11/10 PC. Here are some suggestions you can follow to fix a failed installation on Windows 11/10 PC. For example, you can check if you have administrator rights or not, check if the Windows Installer engine is working or not, etc. On the other hand, you can run the Program Install and Uninstall troubleshooter, restart your computer, try in Safe Mode, etc.
Fix: VirtualBox causing Blue Screen in Windows
Can’t install VirtualBox on Windows?
There could be multiple reasons why you can’t install VirtualBox on Windows. For example, if your user account doesn’t have administrator permission, you cannot install this app. No matter why you are getting this problem, you can troubleshoot it by following the aforementioned tips and tricks.
That’s all! Hope these solutions worked for you.
Leave a Reply