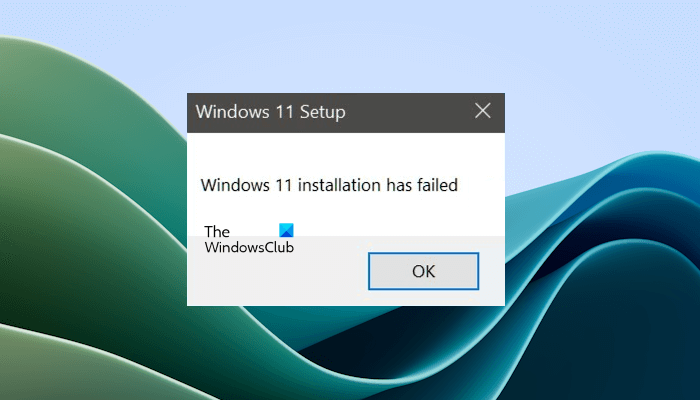
If you’re encountering Windows 11/10 installation has failed error on your computer while upgrading to a newer version of Windows 11/10 or upgrading from Windows 7/8/8.1 to Windows 10 or Windows 11, you can try the suggestions we will present in this post to effectively resolve the issue.
You might encounter this error due to one or more (but not limited to) of the following known causes;
- Some files are sometimes copied twice during the installation because of a bug in Windows Media Creator.
- A file might have an improper extension.
- Issues with Boot Manager may cause the problem so try resetting it.
- A service or a program may cause the problem to appear.
Windows 11 installation has failed
If you encounter the Windows 11/10 installation has failed error popup on your system, you can try our recommended solutions below in no particular order and see if that helps to resolve the issue.
- Verify the minimum requirement
- Uninstall the language pack
- Clear $WINDOWS.~BT installation folder attributes
- Unplug all peripheral devices
- Rename the install.esd file
- Rebuild BCD
- Clean install Windows 11/10
Let’s take a look at the description of the process involved concerning each of the listed solutions.
1] Verify the minimum requirement
These are the basic requirements for installing Windows 11/10 on a PC. If your device does not meet these requirements, you may not have the great experience intended with Windows 11/10 and might want to consider purchasing a new PC.
| Processor: |
1 gigahertz (GHz) or faster compatible processor or System on a Chip (SoC)
|
| RAM: | 1 gigabyte (GB) for 32-bit or 2 GB for 64-bit |
| Hard drive size: | 32GB or larger hard disk |
| Graphics card: | Compatible with DirectX 9 or later with WDDM 1.0 driver |
| Display: | 800×600 |
| Internet Connection: | Internet connectivity is necessary to perform updates and to download and take advantage of some features. Windows 10 Pro in S mode, Windows 10 Pro Education in S mode, Windows 10 Education in S mode, and Windows 10 Enterprise in S mode require an internet connection during the initial device setup (Out of Box Experience or OOBE), as well as either a Microsoft account (MSA) or Azure Activity Directory (AAD) account. Switching a device out of Windows 10 in S mode also requires internet connectivity. |
If your system meets the minimum requirement but you’re still encountering the error, then you can try the next solution.
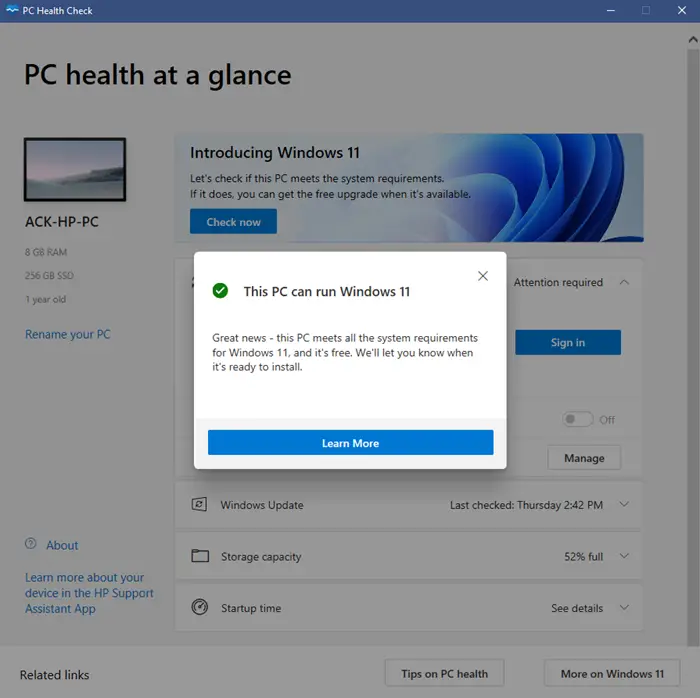
If you are installing Windows 11 on your system, you should check the minimum hardware requirements for Windows 11. You can install the PC Health Check Tool. This tool is developed by Microsoft that lets users know whether their computer systems are compatible with Windows 11 or not.
There is also a way by which users can install and run Windows 11 on computer systems with unsupported hardware. Moreover, a third-party tool, Rufus also allows users to bypass TPM and other hardware requirements for Windows 11, so users can install Windows 11 easily on computers with unsupported hardware. However, running Windows 11 on computers with unsupported hardware can cause various issues. Such users can also experience performance issues on their computers.
2] Uninstall the language pack
If your previous Windows iteration had a language pack that isn’t the same as the localization, you’ll encounter the error. In this case, you can try changing the region and uninstall the language pack. After that, you can restart the upgrade process and look for a resolution.
3] Clear $WINDOWS.~BT installation folder attributes
In certain cases, the Windows 11/10 installer tries to overwrite (copy) the installation files in a folder named $WINDOWS.~BT in your local disk. This may occur because the installer tries to copy the files two times in succession but fails to do so and reports the error.

To clear the $WINDOWS.~BT installation folder attributes, do the following:
- Start the Windows 11/10 installation as usual and navigate to the last screen, just before you are going to start the installation. The screen should say just what will be installed and what settings you have chosen to use.
- Minimize the installer and open File Explorer by opening a folder and navigating to Local Disk C.
- Try to locate a folder named $WINDOWS.~BT in the root folder of the Local Disk.
- If you are unable to see the $WINDOWS.~BT folder, you will need to show hidden files.
- Right-click on the problematic folder and click the Properties option from the context menu.
- Stay in the General tab and locate the Attributes section at the bottom.
- Clear the box next to the Read-only and System options and click on Apply before exiting.
Check to see if the problem still appears when re-running the installation.
4] Unplug all peripheral devices
Older printers and similar peripheral devices with generic drivers can cause the Windows 11/10 installation has failed error. In this case, unplug all peripheral devices and stick with essentials only. When the upgrade finishes, you can plug them back and they’ll be automatically be installed.
5] Rename the install.esd file
It appears that there is a bug regarding the Windows Media Creation Tool which renamed the file different as to it should be named. The error appears when trying to install to a DVD because a file is named install.esd as opposed to install.wim which will cause the installation to go smoothly. In this solution, you’ll need to rename the install.esd file.
Here’s how:
- Start the Windows 11/10 installation as usual and navigate to the last screen, just before you are going to start the installation. The screen should say just what will be installed and what settings you have chosen to use.
- Minimize the installer and open File Explorer by opening a folder and navigating to the disk where you have inserted the installation media (USB or DVD).
- Double-click it and open the sources folder located inside.
- Locate the file named install.esd, right-click on it and choose Rename.
- Change its extension from esd to wim.
Try running the upgrade again and see if the issue is resolved.
6] Rebuild BCD
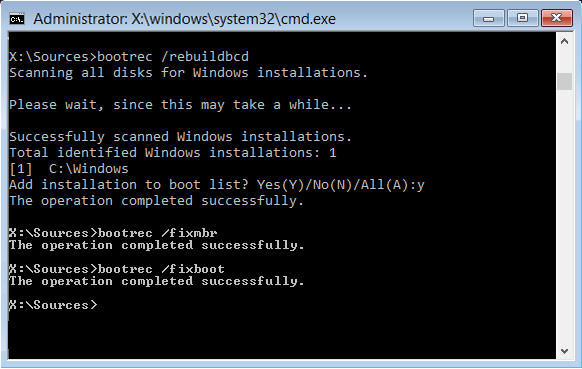
This solution requires you to rebuild the Boot Configuration Data (BCD) and see if the Windows 11/10 installation has failed error will be resolved.
7] Clean install Windows 11/10
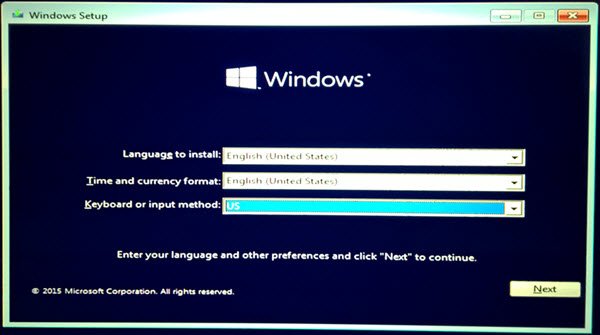
Since you’re encountering this issue using the Update Assistant or directly running setup from within the mounted Windows 11/10 ISO, this solution entails you clean install Windows instead and see if you can get past this upgrade block.
Any of these solutions should work for you!
Why does my Windows 11 download keep failing?
If you are downloading a Windows 11 ISO file and the download is failing, again and again, check your internet connection. Sometimes, the downloading issues are associated with a particular web browser. Therefore, if the Windows 11 ISO download keeps failing, you can switch to another web browser and see if you can download Windows 11 ISO from there. We also suggest you clear your web browser cache and cookies and try again.
Is Windows 11 better than Windows 10?
Windows 11 comes with a lot of new features that are not available in Windows 10. However, if we talk about which is better in Windows 11 and Windows 10, it depends on users. Different users have different experiences with Windows 11 and Windows 10 operating systems. If your computer fulfills all the hardware requirements for Windows 11, you can upgrade it from Windows 10 to Windows 11 and use it. If you do not like the new operating system, you can roll it back to Windows 10. However, the time to switch back to Windows 10 from Windows 11 is limited.
Read next: Can’t upgrade to Windows 11 even though I meet the requirements.