A piece of software is never perfect. And Windows 11/10 is not an exception. Some of the users often report an issue where their computers are stuck on a screen that says Preparing Security Options. When this is happening, these users will not be able to use their keyboard or mouse in any way and will be stuck on that screen until its processing is done. A similar issue was reported by users running Windows 7, Windows 8 or Windows 8.1. This issue often persists when the operating system is trying to load the lock screen or the log-on screen. And even sometimes when they are trying to load the Task Manager.

Preparing Security Options – Windows 11/10
Now since your PC is stuck on this screen, you will have to power down the PC and then start your PC. Hit F11 as soon as the computer powers on. This should get you to the Advanced Startup Options menu. Once here you can carry these steps out. If that does not work for you, you may boot Windows 10 in Safe Mode and then follow our suggestions.
Read: Windows is stuck on loading some screen.
1: Use System Restore
This method can be either done using System Restore or booting into Safe Mode.
If you are in Advanced Startup Options, you can select System Restore directly and proceed with the steps. Or if you just booted into Safe Mode, follow the steps here.
Start by hitting the WINKEY + R combo to launch the Run utility.
Now type in sysdm.cpl and hit Enter.
Now, select the tab labeled as System Protection.
And then choose the System Restore button.
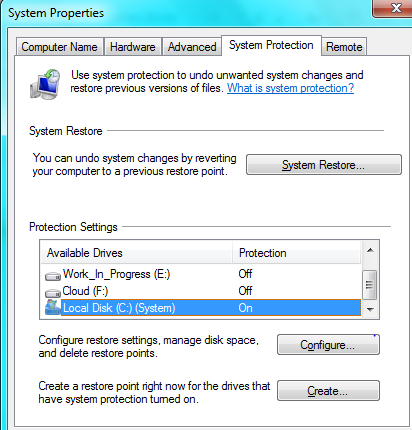
It will now open a new window where you will need to choose your desired System Restore Point.
After selecting your desired System Restore Point, follow the on-screen instructions to complete the process.
Now Reboot your computer and check if this method was able to resolve your issue.
2: Try uninstalling recently installed Windows Updates
To uninstall Windows Updates, the best way to do it is in Safe Mode.
There might be chances that recently installed updates might have messed up your computer’s software. To fix the issue first you can first of all start by booting into Safe Mode then try hitting the WINKEY + I combo to launch the Settings App.
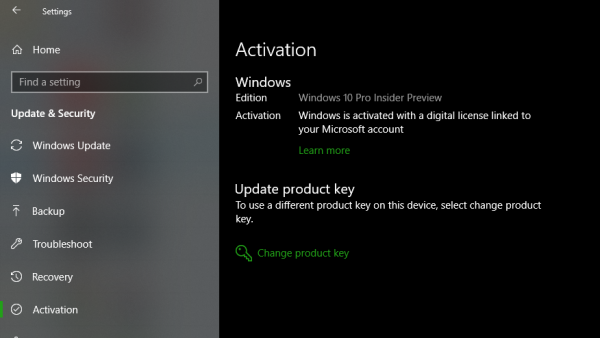
Now click on Update and Security.
From the left side menu column, select Windows Update.
And then on the right side column, select View installed update history.
Then click on Uninstall Updates.
Now it will open a window which will show the list of all the installed updates on your computer. Then you can select the update you want to uninstall and click on the Uninstall button on the lower right corner of the window.
3: Disable Fast Startup
To disable Fast Startup, boot your computer into the Safe Mode.
Press the WINKEY + R combo to launch the Run utility.
Now type in control to launch the Control Panel.
Then click on Hardware and Sound and then click on Power Options.
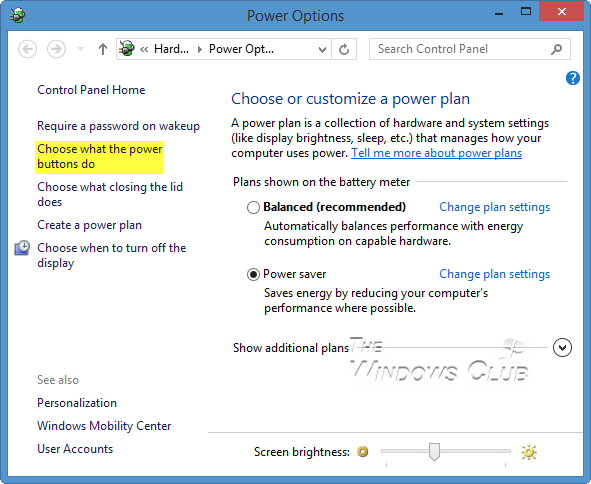
Now, from the left side menu pane, select Choose what the power buttons do.
And then click on Change settings that are currently unavailable.
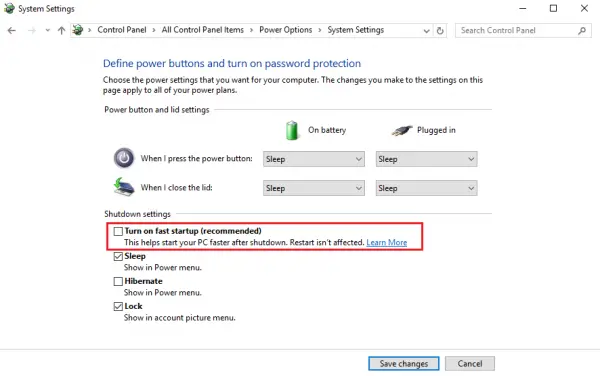
Now Uncheck the entry that says Turn on fast startup (Recommended) and then click on Save Changes.
Reboot your computer to check if the issue is fixed or not.
5: Run SFC and CHKDSK
This method can be done using both Safe Mode and Advanced Startup Options. If you use Advanced Startup Options, just click on Command Prompt and proceed with your steps.
Or else if you have booted into the Safe Mode, start by pressing WINKEY + X button combo or right-click on the Start button and click on Command Prompt (Admin) or just search for cmd in the Cortana search box, right click on the Command Prompt icon and click on Run as Administrator.
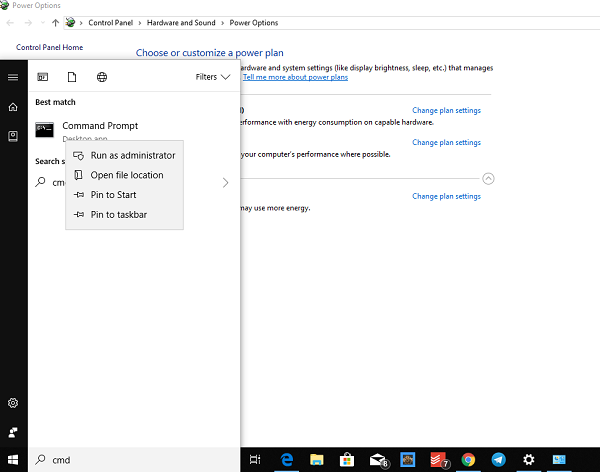
To run the System File Checker, type in the following command and hit Enter:
Sfc /scannow
If the above command does not work, try in the following command:
sfc /scannow /offbootdir=c:\ /offwindir=c:\windows
Wait for the above process to finish and once it is completed properly, Reboot your computer.
And then run the CHKDSK Utility.
Now, once the above utility is done checking your disk for errors, Reboot your computer to Save Changes.
6: Reset Windows 11/10
The Reset Windows 11/10 option can be using either of the options of Advanced Startup Options or booting into the Safe Mode. If you are in Advanced Startup Options, just hit on Reset my PC and follow the on-screen instructions.
An ultimate way to fixing anything with Windows after reboot is to Reset your computer while on Safe Mode.
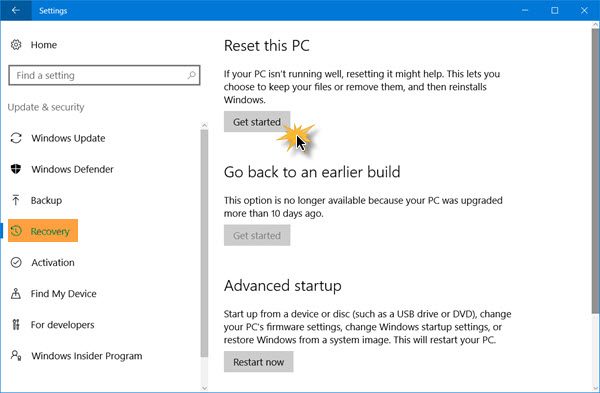
For this, hit the WINKEY + I combo and navigate to Update and Security > Recovery.
Now under the section of Reset this PC, click on Get Started.
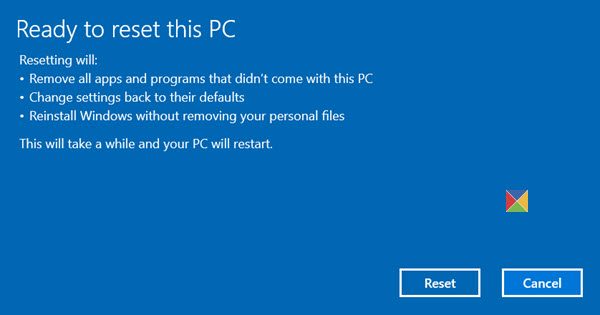
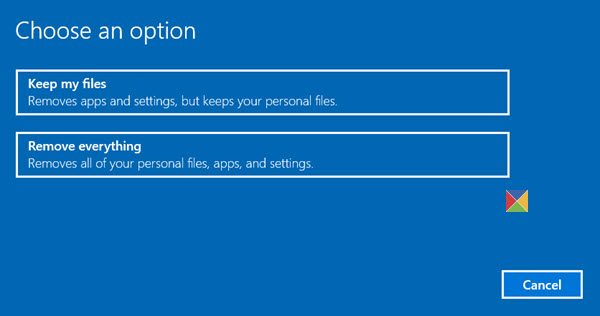
Now follow the on-screen instructions regarding how you want to reset and what files and settings you wish to revert.
This will now reset your computer by reinstalling it.
7: Rename SoftwareDistribution folder
For this method, the command prompt is supposed to be used like in Method 5. You can use either of the ways to launch the Command Prompt.
You can also try to rename SoftwareDistribution folder to try fixing this issue of Windows 10 stuck on Preparing Security Options.
Then, open an elevated command prompt window with Admin privileges, type the following commands one after the other, and hit Enter:
net stop wuauserv
net stop bits
rename c:\windows\SoftwareDistribution SoftwareDistribution.bak
net start wuauserv
net start bits
Alternatively, you can also try to rename SoftwareDistribution to SoftwareDistribution.bak or SoftwareDistribution.old folder after booting into Safe Mode.
8: Rebuild BCD
To rebuild BCD, start by booting into the installation environment for Windows 10 from a Windows installation media.
Click on Repair your computer.
On the blue screen, select Troubleshoot
Then select the Advanced options menu.
Now select Command Prompt.
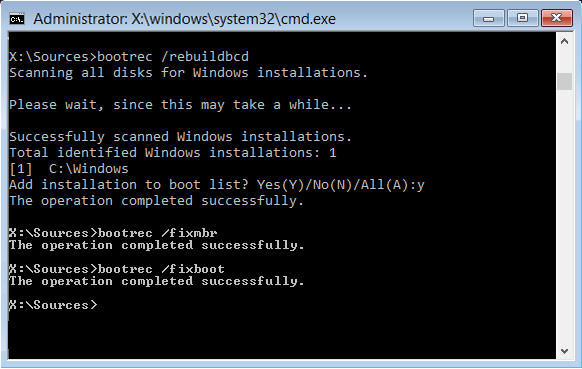
After this, type in the following commands one by one and hit Enter after each one.
bootrec.exe /FixMbr
bootrec.exe /FixBoot
bootrec.exe /RebuildBcd
In case the above commands do not work, try entering the following commands in the same way as the ones above.
bcdedit /export C:\BCD_Backup
c:
cd boot
attrib bcd -s -h -r
ren c:\boot\bcd bcd.old
bootrec /RebuildBcd
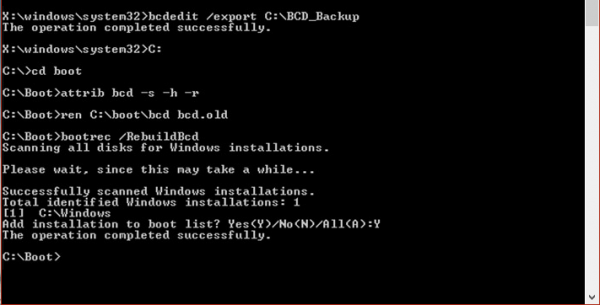
Finally, type in Exit to exit the command prompt window.
Reboot your computer and check if the issue is resolved or not.
9: Check status of some Windows Services
First of all, boot into Safe Mode. Read more about it here.
Hit the WINKEY + R button combo and then type in Services.msc and then hit Enter.
Right click on each of the following services and click on Properties to check if the Startup Type is set to Automatic:
- Background Intelligent Transfer Service (BITS)
- Cryptographic Service
- Windows Update
- MSI Installer
And if the above services are not running, make sure you right click on the service and click on Start.
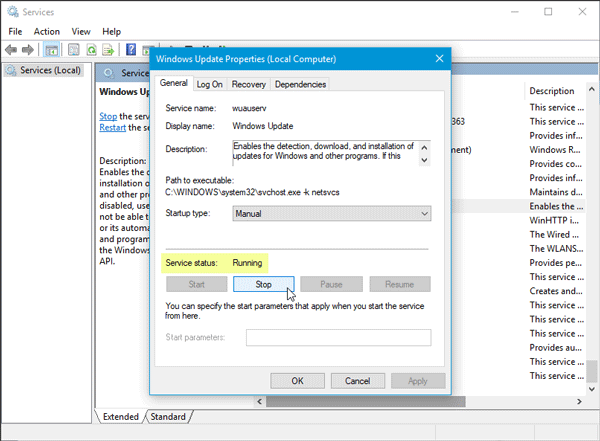
Now locate the service named as Windows Update, right click on it and click on Restart.
Apply these changes and Reboot your computer for the changes to take effect.
10: Disable Credential Manager Service
Open Services as explained in Method 9 above after booting into the Safe Mode as instructed above.
Now, look up for a service named Credential Manager Service.
Now right click on it and select Properties.
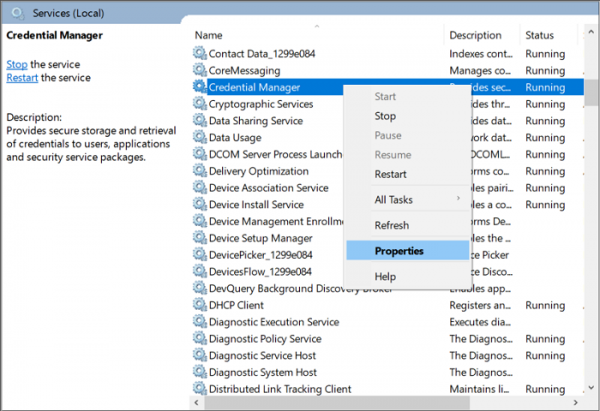
From the drop-down under Startup Type, select it as Disabled.
Click on OK to apply the changes.
Reboot your computer to save the changes and check if your issue was fixed or not.
All the best!