Many home users tend to get a computer that comes installed with Windows 11/10 Home. Since Windows 11/10 Pro offers even more features and utilities than Windows 11/10 Home, many prefer to upgrade Windows Home to Windows Pro. But while doing this, some people may see error 0xc03f6506.
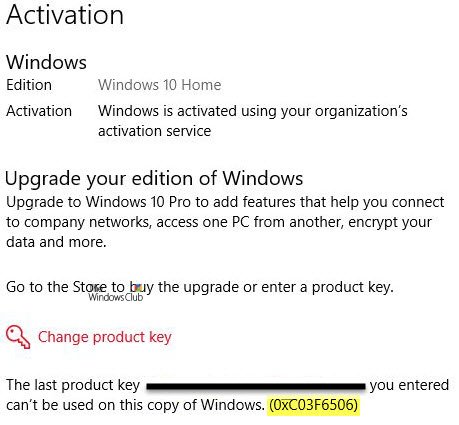
This 0xc03f6506 error usually occurs when you go on to activate Windows 11/10.
The last product key you entered can’t be used on this copy of Windows (0xc03f6506).

But it can also appear during the Upgrade process itself.
Unable to upgrade your edition, We can’t upgrade your edition of Windows. Try upgrading your edition of Windows again. (0xc03f6506).

Today we will be checking out how to overcome this error in both the scenarios and get the affected computer to Windows Pro.
Fix Activation Error Code 0xc03f6506 for Windows 11/10
We will be taking a look at the following fixes to get rid of error 0xc03f6506 for Activation upon changing the edition of Windows 11/10,
- Use Registry Editor.
- Use the Command Prompt.
- Disable Network Adapter.
1] Use Registry Editor
If you have upgraded to Windows 10 Pro and have trouble in its Activation, you can use the Registry Editor to help you.
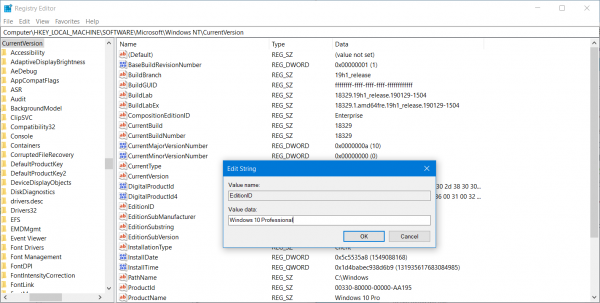
Hit the WINKEY + R button combination to launch the Run utility, type in regedit and hit Enter. Once Registry Editor opens, navigate to the following key-
Computer\HKEY_LOCAL_MACHINE\SOFTWARE\Microsoft\Windows NT\CurrentVersion
Now, check if you find a DWORD named as EditionID.

Double-click on it and change its Value data to Windows 10 Professional.
Also, check if you find a DWORD named as ProductName.
Double-click on it and change its Value data to Windows 10 Professional.
Reboot your computer for the changes to take effect.
2] Use the Command Prompt
This fix can be used in both scenarios mentioned above.
Insert a bootable drive of Windows 11/10 installer.
Start by hitting the WINKEY + X combinations and select Command Prompt (Admin) to launch Command Prompt with Administrator Privileges.
Navigate to the root location of that bootable device inside the Command Prompt command line.
Once you get there, type the following and hit Enter-
setup.exe /auto upgrade /pkey <YOUR WINDOWS PRO EDITION PRODUCT KEY>

Check if that helps you.
Read: Upgrade using the default Windows Pro key.
3] Disable Network Adapter
Just like the method of using the Command Prompt command line, this fix can also be used in both the scenarios mentioned above.
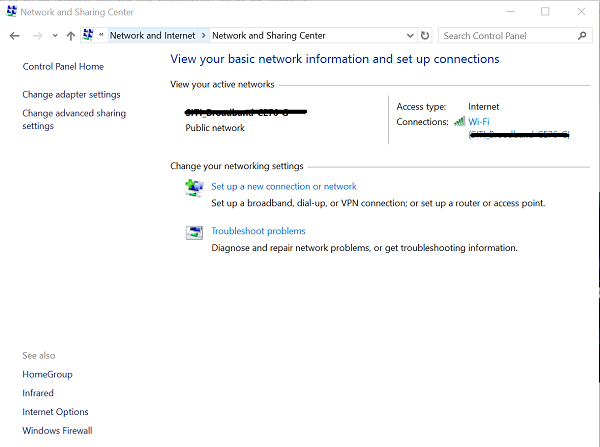
Start by hitting the WINKEY + X button combinations and click on Network Connections.
It will open the Settings app on a specific page. On the left side panel, click on the link that says Change adapter settings.

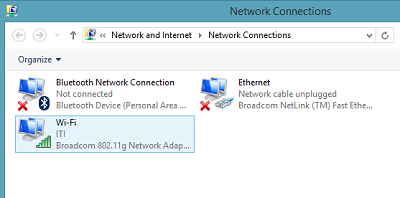
It will open the Control Panel. On the right side, click on the network that you are connected to.
Right-click on the Network Adapter that you have been using, and select Disable.

Once it disables your Network Adapter, try switching the edition of your copy of Windows 11/10 again.
Check if that fixes your issues.
Do remember to double-click on the disabled Network Adapter to get back on the Network.
I hope something helps!
Leave a Reply