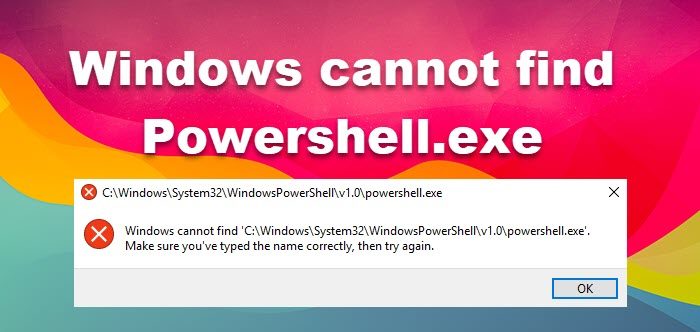
PowerShell is an open-source scripting language and is used as a Shell to control the computer with commands from a Command-Line Interface (CLI). This tool is useful to automate your tasks and manage a variety of Windows settings from the command line. However, when some users tried opening the app, they encountered “Windows cannot find powershell.exe”. In this article, we will learn about the troubleshooting and real cause of this issue.
Windows cannot find ‘C:\Windows\System32\WindowsPowerShell\v1.0\powershell.exe’.
Make sure you’ve typed the name correctly, then try again.

Fix Windows cannot find Powershell.exe
When you want to start PowerShell, you may sometimes get a Windows cannot find powershell.exe error message, in that case, make sure you type “PowerShell” correctly. If you are still unable to open this app then it is a possibility that the PowerShell scripting language is not installed on your computer. Follow the prescribed steps below to resolve this issue.
- Check whether Windows PowerShell is Enabled
- Use Run Command or File Explorer to launch Powershell
- Make PowerShell shortcut on Desktop
- Run System File Checker(SFC)
- Update Windows PowerShell
- Reset your PC
1] Check whether Windows PowerShell is Enabled

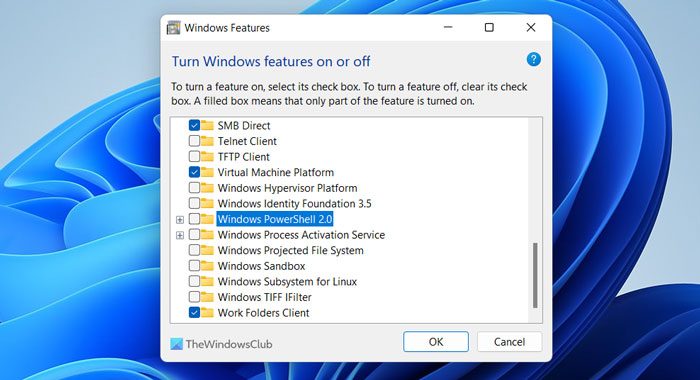
If you are unable to run PowerShell using the Search functionality then you need to verify whether this app is enabled on your computer or not. If you want to verify the same and enable it, follow the prescribed steps.
- Press the Windows key and type Control Panel there and press Enter.
- Click the drop-down menu in the top right corner of the screen to select Large icons.
- Click on Programs and Features.
- Click on the Turn Windows features on or off option from the left pane.
- In the Windows Features screen, verify Windows PowerShell (it can be suffixed with 2.0 depending on the version) checkbox is checked or not.
- If it is unchecked then checked that box and press the OK button.
Now, see if the Windows can’t find Powershell.exe issue is resolved or not.
2] Use Run Command or File Explorer to launch PowerShell
Sometimes, there might be some issues while opening the PowerShell using the Search menu, in such scenarios, you can either run a command or use File Explorer. Click Win+R to open Run and then type PowerShell, now press Ctrl+Shit+Enter to run PowerShell as admin, and lastly click Enter to open it. If you want to open it via File Explorer, then click Win+E and type PowerShell and then click Enter. Hopefully, this will do the job, if it doesn’t move on to the next step.
3] Make PowerShell Shortcut on Desktop

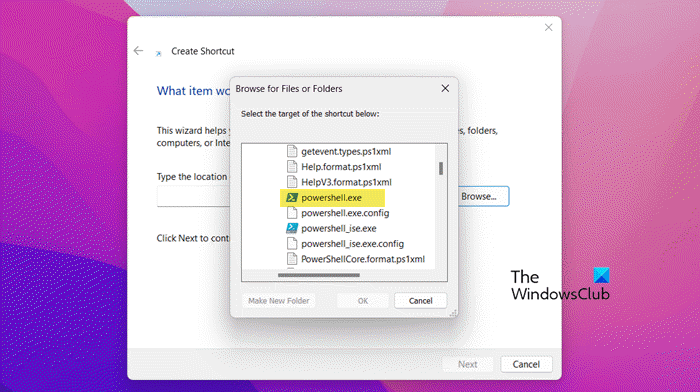
You can not open this app if Windows does not know the correct file location for the PowerShell executable file. In this case, you can verify the exact location of the PowerShell executable file and make a desktop shortcut for your convenience. To find the location, and create the shortcut follow the steps mentioned below:
- Right-click on anywhere on the desktop and select the New option.
- Select the Shortcut option.
- Now click on the Browse button, scroll down the list and expand This PC.
- Click on C Drive > Windows folder > expand SysWOW64.
- Expand the WindowsPowerShell folder and select the powershell.exe file.
- Finally, click on the OK > Next > Finish button to make the shortcut.
Related: Windows cannot find Make sure you typed the name correctly.
4] Run System File Checker(SFC)
It has been seen that damaged or corrupted system files may create an issue and may prevent PowerShell from launching. However, there are built-in tools such as SFC (System File Checker) and DISM (or Deployment Image Servicing and Management) in the Windows operating system that can resolve this issue. Let’s resolve this issue using the prescribed steps
- Press the Windows + S and type Command Prompt.
- Right-click on Command Prompt when it appears and then select Run as administrator.
- Click on the Yes button when prompted by UAC.
- Type SFC /scannow in the command prompt and press Enter.
- Now, the system file checker will start scanning your system files, and if anything is found, the tool will resolve it.
Other than SFC, you can also opt for DISM (Deployment Image Servicing and Management). This will automatically detect the issues with the system and fix them.
Read: What is Windows PowerShell? Features and benefits of upgrading.
5] Update Windows PowerShell
If none of the above solutions work for you then it could be possible that the problem is with the PowerShell app itself. There might be a bug in PowerShell that’s causing your issue. In that case, you need to update PowerShell on your Windows 11 system.
- Press Windows + X key to open the Power User menu.
- Select Terminal (Admin) from the list and click on the Yes button
- Type the following command on the Command Prompt and press Enter.
Winget install --id Microsoft.Powershell --source Winget
It will take a few seconds to download and install the latest version of PowerShell.Hopefully, after updating PowerShell the said error will be resolved.
Read: Terminal vs PowerShell vs Command Prompt difference explained.
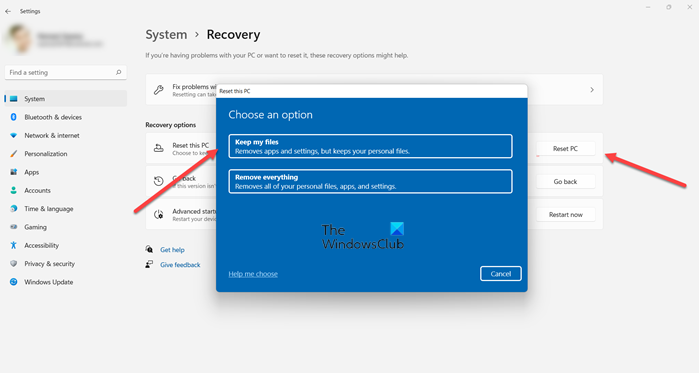
6] Reset your PC

In case, nothing worked, your last option is to reset your PC. Go ahead and reset your PC and keep all your files by selecting Keep my files. Hopefully, your issue will be resolved.
Similar errors: Windows cannot find: Outlook.exe | Explorer.exe | C:\Program files | IntegratedOffice.exe | GPEDIT.MSC | WT.exe | REGEDIT.exe.