While finding a shared computer on virtually installed Windows 11/10 on VirtualBox or VMWare, here is how you can fix the issue. However, you may use the same tips and tricks even if you are getting the error message, Windows can’t find a computer or device named ‘pc-name’, on your host computer, or even if you are not using Windows 11/10 without any virtual machine software.

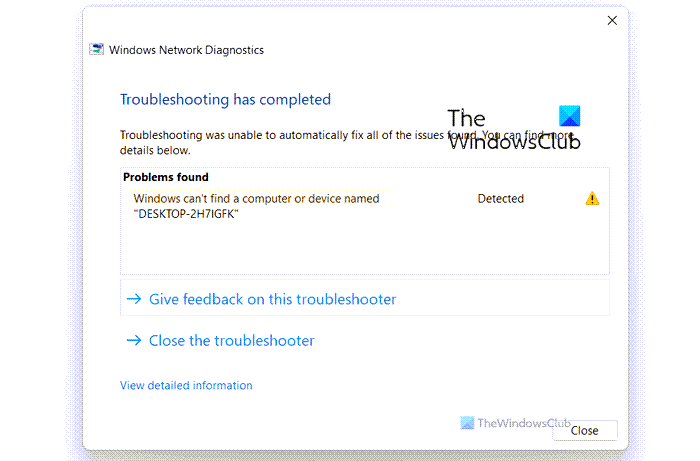
The exact error message says something like this:
Windows can’t find a computer or device named ‘computer-name’
This error mainly occurs when you have set a shared folder on VMware or VirtualBox, but then you changed the host computer name. In such situations, you won’t find the shared folder on your virtual machine, and if you run the corresponding Troubleshooter, you will encounter the aforementioned error.
Windows can’t find a computer or device named
To fix Windows can’t find a computer or device named error, follow these steps:
- Turn on Network discovery
- Set up Shared folder on VMware
- Set up Shared folder on VirtualBox
- Turn on SMB 1.0/CIFS File Sharing Support
To learn more about these solutions, continue reading.
1] Turn on Network discovery

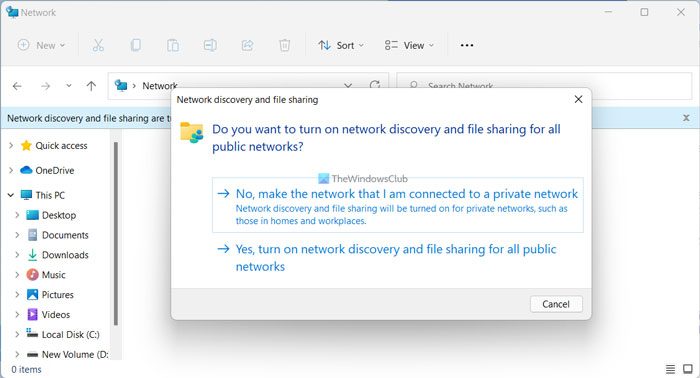
It is the very first thing you need to check when your virtual machine or host computer is unable to find the shared folder. Without enabling the network discovery setting, you won’t be able to use or share files from the virtual machine to the host computer and vice versa. Therefore, do the following to turn on Network discovery on your PC:
- Open File Explorer and go to the Network section.
- Click the OK button.
- Click the yellow notification bar.
- Select the Turn on network discovery and file sharing option.
- Select the No, make the network that I am connected to a private network option.
However, if you have already done that earlier, you can follow this guide to verify or turn on network discovery settings using Control Panel. Since Control Panel offers more options than any other method, you must check with the Control Panel. In case you missed or modified any setting earlier, there is a chance of getting such an error on your PC.
In general, this solution works and resolves the issue within moments. However, if you have recently changed the shared folder setting on the host computer, you need to enter the modified details. VirtualBox or VMware doesn’t fetch the shared folder details automatically. You need to set things up as per the requirements.
2] Set up Shared folder on VMware

To share a folder on VMware, you need to create a shared folder on the host computer first. For that, open the properties of a folder > go to the Sharing tab > click the Advanced Sharing button and tick the Share this folder checkbox.
Then, click on the Permissions button and tick the Full Control checkbox.
Once you are done with this, you can follow these steps:
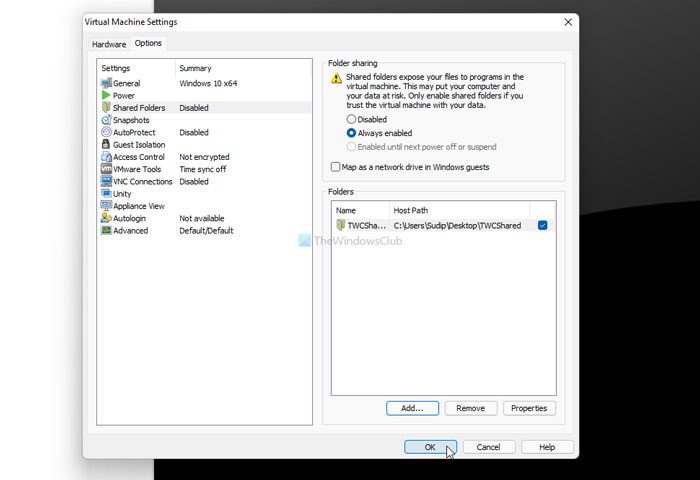
- Open VMware > right-click on the virtual machine > and select the Settings.
- Switch to the Options tab and click on the Shared Folders setting.
- Choose the Always enabled option and click the Add button.
- Choose the shared folder path and click the OK button.
- Start your virtual machine and turn on network discovery.
However, if you want to read this guide in detail, you can follow this tutorial to create a shared folder on VMware.
3] Set up Shared folder on VirtualBox

To set a shared folder on VirtualBox, you need to create a shared folder on the host computer. For that, do the following:
- Right-click on a folder and select Properties.
- Switch to the Sharing tab.
- Click on the Advanced Sharing button.
- Tick the Share this folder checkbox and click the Permissions button.
- Tick the Full Control checkbox.
- Click the OK button.
After that, you need to open the VirtualBox and do the following:
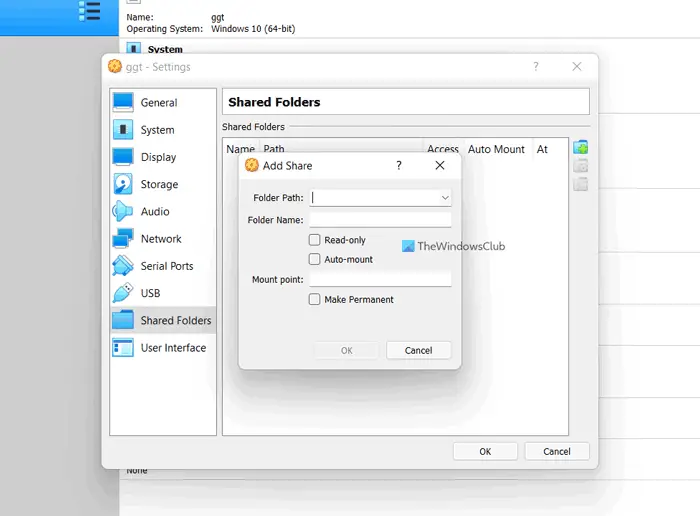
- Right-click on the virtual machine and select Settings.
- Switch to the Shared Folders tab.
- Click on the Adds new shared folder icon.
- Select the new shared folder path.
- Tick the Auto-mount checkbox.
- Click the OK button.
Then, try to find the shared folder on your virtual machine.
4] Turn on SMB 1.0/CIFS File Sharing Support
SMB 1.0/CIFS File Sharing Support is required when you want to share files between two devices on LAN. To verify if it is turned on or not, follow these steps:
- Search for turn windows features on or off in the taskbar search box.
- Click on the individual search result.
- Tick the SMB 1.0/CIFS File Sharing Support checkbox.
- Click the OK button.
- Restart your computer.
After that, you should not have any problem.
Why can’t Windows find my device?
If your Windows 11/10 PC can’t find your device or another computer on the same network, you must check the computer name first. Following that, it is recommended to turn on Network discovery on Windows using this guide. The last but not the least thing is to connect both devices to the same network.
Read: Network computers not showing in Windows 11/10
Why can’t I see all computers on my network Windows 11/10?
There could be several reasons why you are unable to see all computers on your network running Windows 11/10. For example, if you changed the computer name recently, you might face problems finding the device. On the other hand, if the Network discovery is disabled on the remote computer, you cannot see the computer even if it is connected to the same network.
Read: How to share files between computers using LAN in Windows 11/10.
Leave a Reply