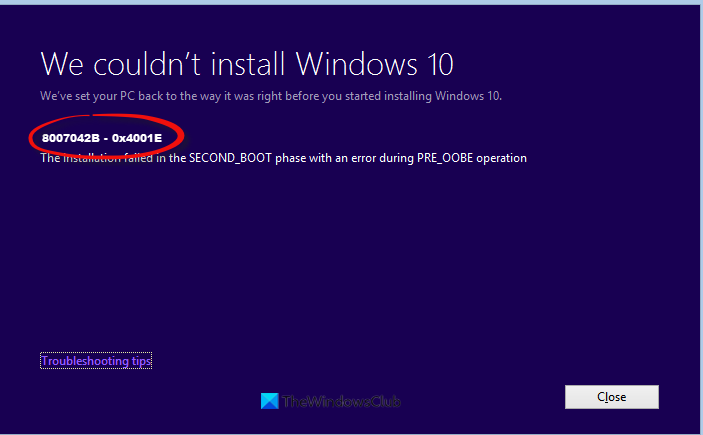
If you have encountered the Windows upgrade error code 8007042B – 0x4001E when attempting to upgrade to Windows 11 or update to the latest version/build of Windows 10 on your device, then this post is sure to help you fix this issue.

The error description reads as follows:
The installation failed during the Second Boot phase while attempting the PRE_OOBE operation.
Windows Upgrade error 8007042B – 0x4001E
If you’re faced with this issue, you can try our solutions below and see if that helps to resolve the Windows Upgrade error 8007042B – 0x4001E on your device.
- Run Windows Update Troubleshooter
- Verify System Requirements
- Check Internet connection
- Disconnect additional USB peripherals
- Run SFC and DISM scan
- Update device drivers
- Run CHKDSK
- Disable/Uninstall third-party Security software (if applicable)
- Uninstall non-essential apps
- Analyze log files
- Run SetupDiag
- Use Microsoft Virtual Support Agent
Let’s take a look at the description of the process involved concerning each of the listed solutions.
1] Run Windows Update Troubleshooter
Your first action to take to fix the error on your Windows 11/10 device is to run yhr inbuilt Windows Update Troubleshooter. After you run the automated wizard, you can try the upgrade operation again. If the error reappears, you can try the next solution.
2] Verify System Requirements
Most Windows upgrades will fall on your device if the PC doesn’t meet minimum system requirements. So check the system requirements for Windows 11 or check if your device can run Windows 10 as the case may be.
3] Check Internet connection
The OOBE consists of a series of screens that require users to accept the license agreement, connect to the internet, log in with, or sign up for a Microsoft Account, and share information with the OEM.
Make sure your device is connected and has a stable internet connection, before you start the upgrade operation on your PC.
4] Disconnect additional USB peripherals
In some cases, you may encounter Windows upgrade errors on your computer due to connected additional secondary peripheral devices. To fix this issue, just unplug these devices and then retry the upgrade. If the error still appears, try the next solution.
The non-essential external hardware devices that you need to disconnect from the computer could be any of the following:
- Headphones
- Joysticks
- Printers
- Plotters
- Projectors
- Scanners
- Speakers
- USB flash drives
- Portable hard drives
- Portable CD/DVD/Blu-ray drives
- Microphones
- Media card readers
- Cameras/Webcams
- Smart phones
- Secondary monitors, keyboards, mice
If this action does not help in resolving the issue in hand, proceed with the next solution.
5] Run SFC and DISM scan
This solution requires you to run the SFC scan and DISM scan to repair corrupt system files and bad Windows image, which sometimes are the causes of upgrade failures.
On reboot, try the upgrade again.
6] Update device drivers
Before you re-try the upgrade on your computer, make sure all device drivers are updated.
7] Run CHKDSK
You could also run CHKDSK and see if that helps.
8] Uninstall third-party Security software (if applicable)
It’s known that in some cases, third-party security software installed on your device can cause Windows upgrade failures. We recommend using the dedicated removal tool to remove all files associated with your antivirus program.
After the successful completion of the Windows 11/10 upgrade, if you still prefer the third-party AV solution, you can verify compatibility information, and re-install the security software.
9] Uninstall non-essential apps
Outdated applications or some third-party applications can cause problems with a Windows upgrade. In this case, you can uninstall apps that are outdated, unused or non-essential (preferably using third-party software uninstaller) from the computer, and then try the upgrade again and see if the procedure completes without errors. Otherwise, try the next solution.
9] Analyze log files
If a Windows 11/10 upgrade fails on your computer, you can analyze the Windows Setup log files which can help you identify the culprits to the error and point you to the required actions you can take to fix the error.
10] Run SetupDiag
Microsoft has made available a new tool called SetupDiag, which is designed to help PC users diagnose many Windows upgrade errors on a computer.
11] Use Microsoft Virtual Support Agent
You can troubleshoot and possibly have your PC issues, including upgrade errors fixed on your device by using the Microsoft Virtual Support Agent.
Hope this helps!
Related post: Windows Upgrade error 0x8007042B – 0x4000D
How do I fix Windows Update error encountered?
Generally, to fix Windows 10 Update error encountered, you can try running the troubleshooter. Go to Start > Settings > Update & Security. Select troubleshoot tab. Under “get up and running”, click on Windows Update. Click on run the troubleshooter and follow on-screen instructions.
How do I fix error code 0x8007042b?
To fix this error on Windows 11/10 PC, you need to run the Windows Update Troubleshooter first. If it does nothing, you can follow the other solutions mentioned above. Having said that, you can verify the system requirements, check for a valid internet connection, disconnect all additional USB peripherals, run the System File Checker, use the DISM tool, etc.
Leave a Reply