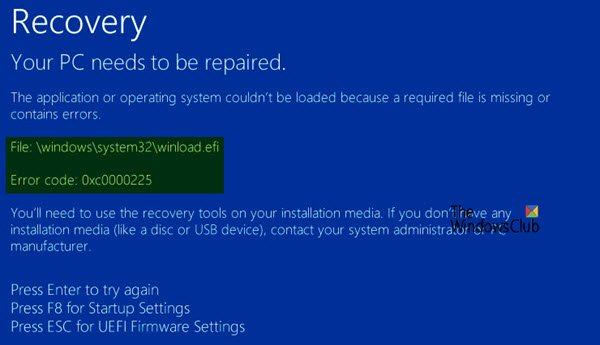
In this post, we will see how to fix error Winload.efi file missing or not found with error codes 0xc00000e, 0xc0000001 or 0xc0000225 on Windows 11/10 during boot or startup.
What is the Winload.efi file?
Winload.efi is an EFI or Extensible Firmware Interface file. These files are executable files for the firmware of the computers that are based mainly on UEFI and execute the tasks of loading the files to the computer’s bootloader. These files are used for specific tasks like turning on the computer, restarting the computer, installing Windows, resetting the computer, and others. Hence, Winload.efi becomes a critical file. If this file is lost, corrupted, or damaged, it becomes impossible for the Windows operating system to proceed.

Some of the error statements that this file gives out when goes missing or damaged are:
- winload.efi is missing
- winload.efi cannot be found
- winload.efi is missing or contains errors
- This program can’t start because winload.efi is missing from your computer
- This application requires the file winload.efi, which was not found on this system.
- There was a problem starting [path]\winload.efi. The specified module could not be found.
The error codes 0xc00000e, 0xc0000001 or 0xc0000225 are associated with the Winload.efi file not found error.
Fix Winload.efi file missing error
If you tend to create a System Restore point usually, you can try to undo any modifications on your computer, by performing System Restore – and then try to run the upgrade again. In case, you do not have a habit of creating a System Restore point; I suggest you start doing so because it is a very strong feature that will let you fix your computer in a number of scenarios.
To fix this error, we will be carrying out the following fixes:
- Rebuild BCD.
- Disable Secure Boot.
- Run System File Checker.
- Disable Early Launch Anti-Malware Protection.
1] Rebuild BCD
For this fix to work, you will need to make a bootable Windows USB drive and then boot your computer using it. Then when you get the Welcome Screen to click on Next, and then click on Repair your computer on the bottom left portion of the window.
Next click on Troubleshoot.
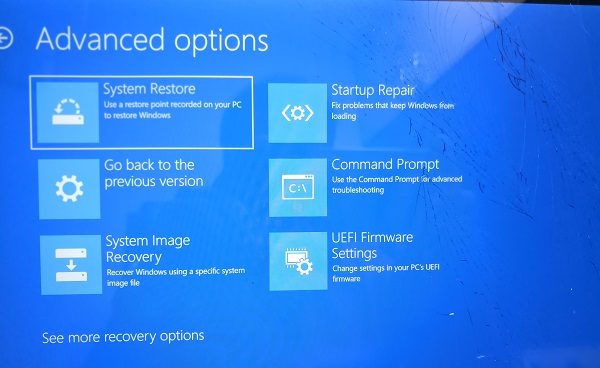
After that, select Advanced Options. And then, Command Prompt.
Now, once you have got the Command Prompt window open, enter the following commands one by one in the sequence that they are given to rebuild BCD and repair MBR:
bootrec /repairbcd
bootrec /osscan
bootrec /repairmbr
Finally, type in exit to close the Command Prompt window.
Reboot your computer for the changes to take effect.
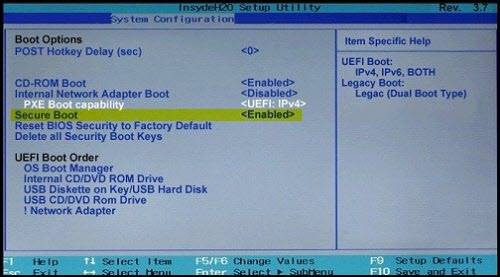
2] Disable Secure Boot
I would recommend disabling Secure Boot in the BIOS settings. Start by booting your computer into Windows 10 first. Then, Go to Settings > Windows Update, and check if you have anything to download, and install if you see any updates being offered. OEMs send and update the list of trusted hardware, drivers, and operating systems for your PC.
Once done, you need to go to the BIOS of your PC.
Go to Settings > Update & Security > Advanced Startup options. When you click on Restart Now, it will reboot your PC, and offer you all these advanced options.
Select Troubleshoot > Advanced Options. This screen offers further options which include System restore, Startup repair, Go back to the previous version, Command Prompt, System Image Recovery, and UEFI Firmware Settings.

Every OEM has their way of implementing the options. Secure Boot is usually available under Security > Boot > Authentication Tab. Set it to Disabled.

Also, set Legacy Support to On or Enabled.
Save changes and exit. The PC will now reboot.
3] Using System File Checker
Start by pressing WINKEY + X button combo or right-click on the Start button and click on Command Prompt (Admin) or just search for cmd in the Cortana search box, right-click on the Command Prompt icon and click on Run as Administrator. Click on Yes for the UAC or User Account Control prompt that you get. Then, the Command Prompt window will finally be open. Now, type in the following command to run System File Checker and then hit Enter.
sfc /scannow
Restart your system after the scan is completed.
You can also use our freeware FixWin to Run the System File Checker utility with a click.
Related: A required device isn’t connected or cannot be accessed.
4] Disable Early Launch Anti-Malware Protection
This is a fairly simple fix. Start by selecting Restart in the Start Menu while you press and hold the Shift key on your keyboard.

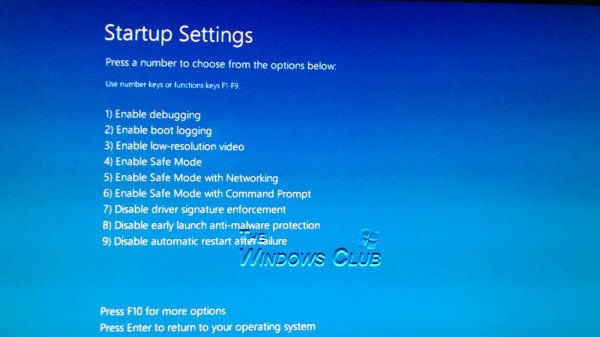
It will reboot your computer to Startup Settings.
Next, make sure that the 8th option says Disable early launch anti-malware protection.
Now, press the F8 key because the option mentioned above is listed at number 8.
Finally, it will launch and load Windows on your computer with Early Anti-malware protection turned off only for that session when you can try to carry out the same task and check if any of the conflicts are fixed for you.
Read: A component of the operating system has expired, Winload.exe error 0xc0000605
Let us know if this post helped you or if you have any other suggestions to offer.
Can I download the Winload.efi file from the internet?
It is not recommended to download the Winload.efi file from the internet could potentially contain malware or be an outdated version. Suppose you need to replace the Winload.efi file, it is recommended to use a copy from a Windows installation media or a system restore point. If your PC is not bootable, you can use the Bootable USB and then use the Command Prompt or options to open the Restore point.