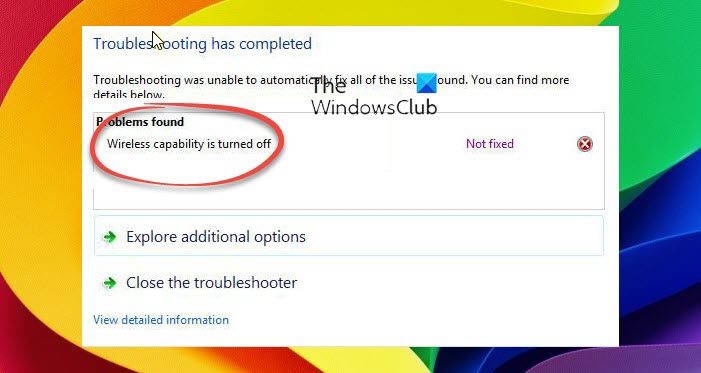
Many times, while connecting to a wireless device it is not shown in Windows 11/10/8/7 as a list of available devices. In fact, the status of Network and sharing center in the Notification Area shows it to be disabled. While troubleshooting, the error which is shown says that Wireless capability Turned Off. In such cases, it can not be enabled by Non-Administrator accounts. To resolve such issues follow the methods listed below.

WiFi is turned off & won’t turn on in Windows 11/10
If WiFi is not turned on or is not working, or maybe the Troubeshooter throws up error message Wireless capability is turned off, on your Windows 11/10, try these suggestions:
- Windows Network Diagnostics Troubleshooter
- Check physical switch
- Change adapter settings
- Install latest WiFi Driver
- Enable wireless adapter
- Use Network Reset.
Wireless capability is turned off
Let us see this in detail.
1] Windows Network Diagnostics Troubleshooter

If WiFi won’t turn on in Windows 11/10, first, run the Windows Network Diagnostics Troubleshooter and see if it can detect and fix the problem. Right-click the network icon in the notification area, and then click Troubleshoot problems.
Or you can open:
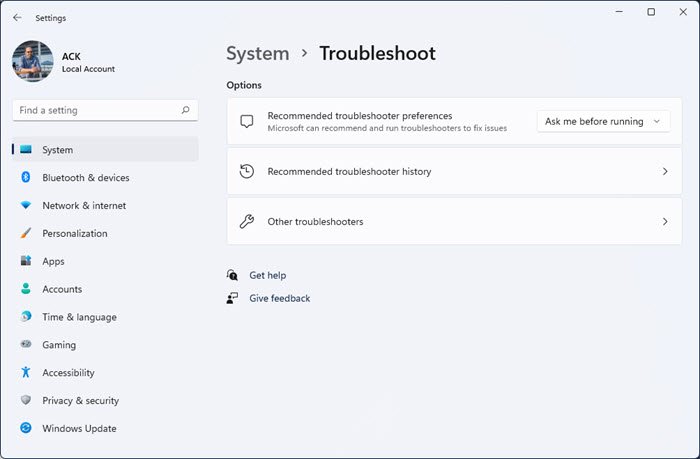
- Windows 11 Settings > System > Troubleshoot > Click on the Network Troubleshooter link.
- Windows 10 Settings > Network & Internet > Status and click on the Network Troubleshooter link.
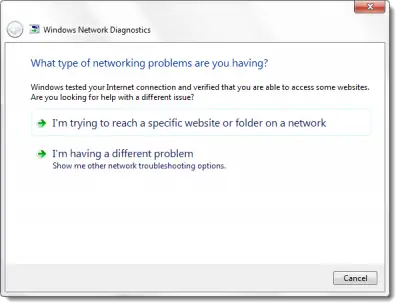
This will open the Network Troubleshooter or Windows Network Diagnostics tool.

If it does not help and you see Wireless Capability is turned off message here too, then try any of these methods.
2] Check physical switch
Most laptops have a tiny switch on the side (or front) of the laptop that turns the wireless ON/OFF. Make sure you’ve switched it on.
Read: WiFi option not showing in Windows 11
3] Change adapter settings
Do the following:
- Click Start, type network and sharing center in the Start search box and hit Enter.
- Click Change adapter settings.
- Right-click the connection and select Enable.
4] Install the latest WiFi Driver
By installing the latest driver for the wireless network adapter obtained from the manufacturer a majority of connection problems within Windows 10/8/7 have been solved. Download and install the Windows-compatible drivers from the support site of the manufacturer of your laptop and check if the issue gets fixed.
5] Enable wireless adapter
To enable the wireless adapter, go to the admin account by enabling it and there run the network troubleshooter and see if it can fix the problem.
To enable Admin account in Windows 11/10/8/7, open an elevated command prompt window, type the following and hit Enter:
netuser admin active:yes
Now log-off, and you can see a new Admin account at startup. Run the Network troubleshooter here. After getting admin privileges, it can auto fix the issue in most of the case.
5] Use Network Reset
If nothing works for you, you may use the Network Reset feature.
See this post if the troubleshooter gives The remote device or resource won’t accept the connection error message.
How to fix Network & Internet connection problems in Windows may also interest you!
Thanks.
i wanna how can turn on wireless capability when it turn off
wireless capability is turned off
thank you very very much
Method 1!! Didn’t even know that button was there.
I have turned off wifi while the hard drive was in my Sony laptop . but when I put my HD to my Toshiba laptop which dose not have on off button . I can’t switch it on . help help help . I have tryed almost everything . ..I need help
when i connect two laptop with lan my wireless capability is autometically off how to on wireless capability I use lenevo 3000 N100 Model
may laptop’s wireless capability was enabled, but still the laptop can’t recognize the connection. please help.
Thanks so much. Am glad!
got it thanks :)
I have this same issue….what’s the fix?
Wireless capability is turned off that is.
Me, too. Method 1!! Didn’t even know that button was there.
Thank you very much for your help.
Hey Wow, die einfache Method 1: “Most of the laptops have a tiny switch on the side” hat meinem alten Laptop nach 2 Jahren wieder WiFi beigebracht. Vielen Danke für diesen Tipp der so einfach ist das man es kaum glaubt.
I LOVE YOU. THANK YOU SO MUCH. GOD BLESA YOU. YOU AND YOUR ENTIRE FAMILY. I AM SO HAPPY RN!!!
There is a software issue preventing me from toggling off wireless mode to enable wifi. That is the problem with W10 Pro Creator Edition.