This post covers some of the best free video surveillance software for Windows 11/10. These free tools are useful for home users as well as others who want to monitor their places where they are not physically present. Once the tool is set up, you can easily keep an eye on the location you’ve chosen for surveillance.
There are different and interesting options in these tools like motion detection, recording sensitivity, multi-view mode, etc.
Free video surveillance software for Windows PC
Here are some of the best free video surveillance, video monitoring, motion detection & IP camera software for Windows 11/10 PC.
- ContaCam
- Netcam Studio
- Agent DVR
- Xeoma
- Security Eye.
Let’s check these tools.
1] ContaCam
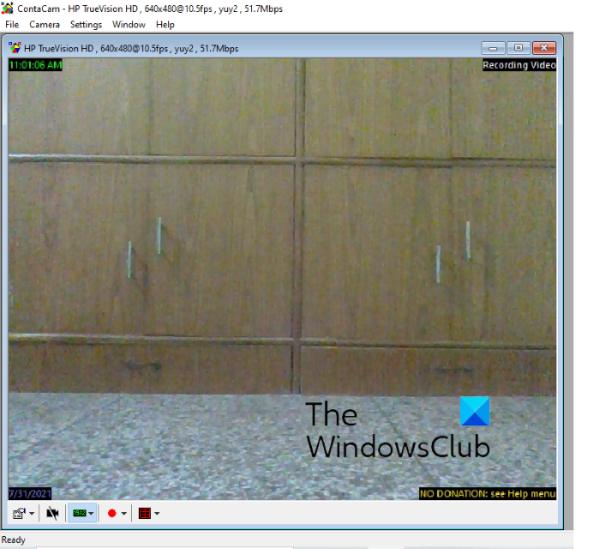
ContaCam is a nice video surveillance software for Windows 11 or 10. After installing it, you can access it from the Start menu.
This tool automatically detects all the cameras connected to your Windows 11/10 computer. Simply launch it, click on its Camera menu, and it will show you all the available cameras.
When you select a camera from the list, it will start video recording automatically. You can view all the recorded videos by clicking on the link provided in the software.
Features of ContaCam
ContaCam comes with some interesting features like:
- Annotation and text size: You can add an annotation to the recorded videos and vary the text size. Apart from this, you can also enable and disable the time frame stamps
- Recording sensitivity: ContaCam also lets you select the recording sensitivity within the range of 10 to 90
- Live stream: It creates a local host server for your computer for live monitoring. You can open the localhost server in your web browser by clicking on the link provided in the tool.
ContaCam Settings:
It comes with two settings options:
- Basic settings: Here, you can select whether to start the camera automatically, change the camera name, change the web interface language, select for how long you want to keep the recorded videos, etc. The recorded videos will be stored on your computer’s C Drive
- Advanced settings: Here, you can change the video frame rate, enable and disable the audio while recording the video, change video quality, etc.
Just configure the tool as per your requirements and start the video surveillance. When you have to view the recordings, just access the video storage folder by pressing the F4 key after starting the camera.
If you delete the videos from your computer, the videos will be deleted automatically from the localhost server also. Also, note that when your disk space gets full, it will automatically delete the old videos to store the newly recorded videos.
2] Netcam Studio
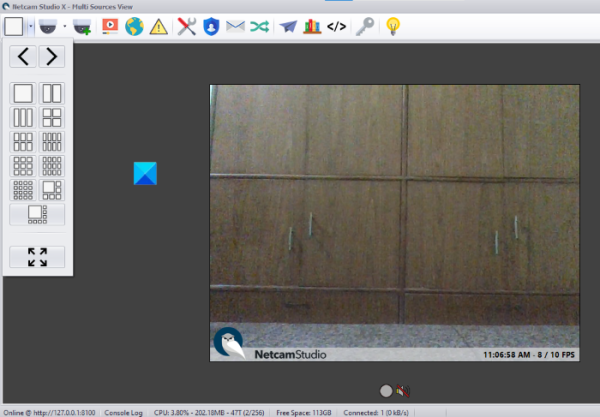
Netcam Studio is another useful video surveillance tool for Windows 11/10 computers. After installation, use the Start menu and click on the Netcam Studio X option to launch this tool. Now, you have to add a source camera. It detects all the webcams and network cameras connected to your computer automatically. You just have to add them one by one.
To add a camera, click on the Add Source button on the menu bar. Now, you will see multiple tabs to add a camera. Select the tab according to your camera type.
If you want to add audio to your recorded videos, you have to enable the Connect Audio checkbox while adding the camera. You can also give a name to the added source and select its maximum frame rate.
Features of Netcam Studio
Netcam Studio also offers some good features such as:
- Multi-View mode: If you have added more than one camera to the software, you can monitor all the locations on one screen
- Library: You can access all the recorded videos in the library. Here, you can also apply filters by date and view the recorded videos from a particular source or camera. To delete the videos, simply select them, and click on the Delete button
- Rule Manager: You can use this feature to create new rules and modify the existing ones. For example, push notification on app start and shutdown, push notification on low disk space, email on low disk space, etc
- Notifications & Synchronization: Here, you can manage the notifications and synchronization settings.
- Upload the recorded videos to your Google Drive account.
3] Agent DVR
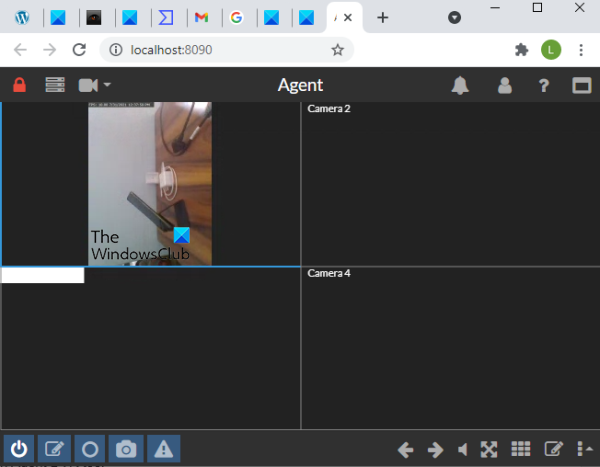
Agent DVR tool is another good tool to monitor your home or some other location locally. The tool will launch in your default web browser where you can record the videos.
It automatically detects all the cameras connected to your computer. However, you have to add these cameras to the software one by one. The below instructions will help you add a camera to the software for video surveillance:
- Launch Agent DVR tool
- Click on the Edit View button on the bottom right side of the interface
- Click on the Video Source
- Now, this tool will show you some options like Alerts, Record on Detect, Resize, etc. You can turn on these features as per your requirements
- Click OK. The tool will name the camera as Camera 1 by default. If you want, you can change this name
- Select the type of recording source from the Source Type drop-down menu, like DVR, Local Device, IP Camera, etc
- Turn on the Enabled button
- Select the Video Resolution and Audio source
- Click the OK button.
To start the video recording, click on the Power On button on the bottom left side or press the O key. This will turn on your camera. After that, click on the Start Recording button or press the R key.
Features of Agent DVR
Let’s have a look at some of the interesting features of this surveillance tool:
- Photo: You can capture photos while recording the videos by clicking on the Take Photo button or using the G key
- Toggle PTZ: This feature lets you zoom in and zoom out of the recording screen. Apart from that, you can also shift the recording screen by clicking on the arrow buttons. To use this feature, click on the Toggle PTZ key on the bottom right side or use the Z key
- View mode: There are 8 different View modes. You can add multiple cameras to each View mode. In addition to this, you can also set a particular video mode as a default.
To view the recorded videos, click on the Screen Menu on the top left side and select Recordings. In the Recordings section, you can play the recorded videos and download them.
TIP: SkyStudioPro is a free time-lapse and motion detection software.
4] Xeoma
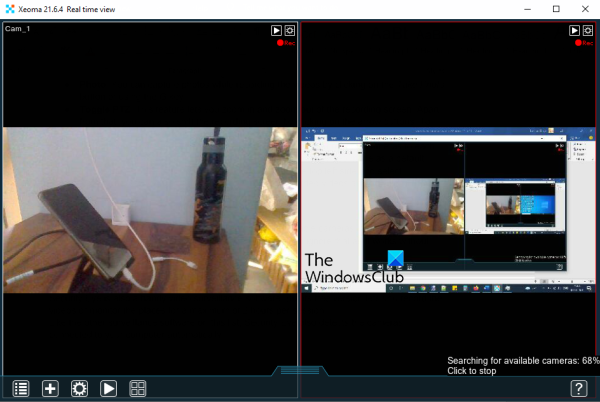
Xeoma is one of the best video surveillance tools on this list. Its free version lets you view up to 1000 cameras and it provides unlimited usage time. The free version contains a Please Activate appeal but you can ignore that as it works without activation.
When you launch this tool, it automatically searches for available cameras. You can also add new cameras (IP or WiFi Camera, USB Camera, etc.) manually using the + button available on the bottom left part of its interface. For each camera, you can also set modules/features.
Features of Xeoma
- You can add a random world camera. It will show live streaming from any of the CCTV cameras around the world
- Motion Detector feature is also present. The sensitivity threshold for the motion detector for each camera can also be adjusted using a slider. You can also turn on/off this feature as per your needs
- A Visitor Counter feature is also there that counts the number of visitors detected in the camera field
- You can also capture screenshots for each camera separately using the camera icon present on the bottom middle part
- A computer microphone can also be used as an audio source for a camera.
Just grab the tool and launch it. It might take some time to understand its settings. But, once you will start using it regularly, it can turn out to be a very good surveillance tool.
5] Security Eye
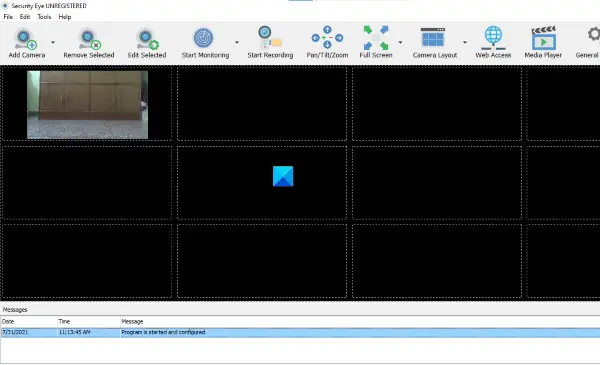
Security Eye is also a handy video surveillance software. But its free version lets you record the videos or monitor the places for a maximum of 2 hours per session.
Like the other surveillance software on this list, Security Eye also automatically detects the cameras connected to your computer.
You can grab this tool security-eye-software.com. When you launch the tool, it will show you two options:
- Network (IP) camera
- USB camera built-in or other webcams.
You can select one of the above options according to the type of camera you have. You can also select the display resolution from the drop-down menu or left it to the default selection for USB or webcam. After that, click Next. This will turn on the camera.
Now, you have to give a name to your camera. Once done, use the Next button. This will open a new window where you will get a lot of customization options for the selected camera. We are listing here these customization options:
- Detection: Here, you can vary the sensitivity for motion detection by moving the slider. You can also enable masking for a particular area. The program will ignore movement detection in the masked area. However, the entire image is always recorded
- Privacy: You can hide a particular area on a video in the Privacy tab
- Recording: Here, you will get different options to customize the recording. You can select whether to record sound along with the video, take snapshots on motion detection, etc
- Alarm: When this tool detects any motion, it will play a sound. By default, this option is enabled. But you can turn it off from the Alarm tab
- Notifications: If you want to receive emails on every motion detection, you can turn it on from the Notifications tab. It also has an SMS notification service; but for this, you should have a valid API key
- Scheduler: This feature will let you schedule video recording and monitoring for a particular date and time
- Effects: Here, you can change the brightness, contrast, saturation level, etc., for the video recording. You can also rotate a video at a particular angle, make it greyscale, invert its colors, and flip it in horizontal and vertical directions.
Using this tool, you can monitor a maximum of 8 places on a single screen. For this, you have to click on the Camera Layout button and select the desired option.
By default, it saves the recorded video on the C drive. But you can change this location by clicking on the General Settings option. To view the recorded video, click on the Media Player option.
Hope these tools will be useful.
Bonus TIP: You can also use GoPro as a Security Camera.
How can I use my computer as a surveillance camera?
You can use your computer or laptop as a surveillance camera. Almost all laptops come with a built-in camera, commonly known as a webcam. You can use this webcam for monitoring purposes.
If you are a desktop user, you need an external webcam. Download any of the free surveillance software that we have listed in this article and run them on your laptop or desktop computer. These surveillance tools detect your webcam automatically. You just need to configure them and start recording the video.
What is the best IP Camera Software?
Most of the software covered above supports IP Cameras too. So, you can give a try to any of those software like Agent DVR, Xeoma, or Security Eye. As Security Eye software has session limitations in the free edition, so you should use Agent DVR or Xeoma as IP Camera software.
There also exist some good free IP Camera apps for Windows and Android that you can try which are helpful to use a mobile phone as a webcam for PC.
Leave a Reply