Microsoft has enhanced several functionalities and add many new settings in the Windows 11/10 Settings app. If you open the Settings panel, you will notice that there is a new option added in the Settings panel called Gaming. Under the Gaming category, there is an option called Game Mode. In simple words, Game Mode helps users to optimize their system and play any game more smoothly. According to Microsoft, users can play almost any game with a smoother experience using Game Mode.
Windows Game Mode
Game Mode is a term coined by Microsoft for computer gamers. This mode improves Windows 11 performance and helps users use most of the system resources for the game so that the gamer can get a much better user experience. This mode has been introduced in Windows 11/10 to get rid of unwanted lagging, frame rate issues, etc.
After enabling Game Mode, your computer will use most of the CPU and GPU power to play the game. Unwanted and non-priority background processes will be stopped automatically. Unwanted background processes include random anti-virus scans, etc. – unfortunately, there is no option for a user to stop or run a particular background process while having Game Mode enabled.
Game Mode optimizes your computer to play games efficiently and without any lag. If you are a staunch gamer, you should immediately start using the Game Mode. That’s why in this article, we are going to see how to enable or disable Game Mode in Windows 11/10.
Enable or Disable Game Mode in Windows 11

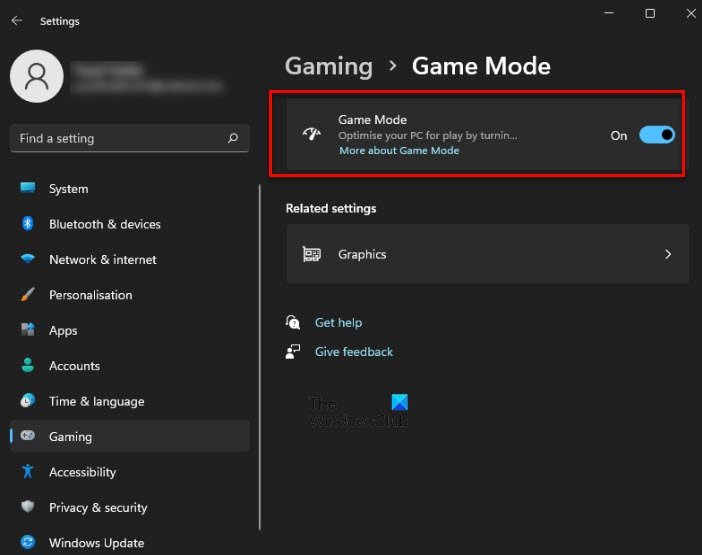
Depending on your OEM, the Game Mode might be enabled on your computer by default, or you have to enable it manually. If you don’t know how to do the same, follow the given steps to enable or disable Game Mode in Windows 11.
- Open Settings by Win + I or from the Start Menu.
- Click Gaming.
- Now, go to Game Mode.
- Finally, use the toggle to enable or disable the Game Mode.
This is quite simple. If you want to know more about this setting, you can click on More about Game mode from the same section.
Finally, launch the game of your choice and start playing.
Read: Tips to improve PC gaming performance
Enable and use Game Mode in Windows 10
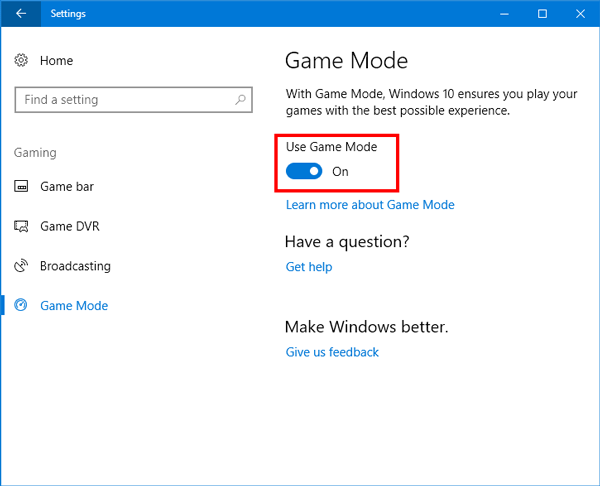
To enable Game Mode in Windows 10, open the Settings Panel and go to the Gaming section. On the left-hand side, you will see the Game Mode option. Click on it and toggle the button to enable Game Mode right away.

After enabling Game Mode from Settings Panel, you need to activate it in the individual game. For this, you have to enable Game Bar, which can be found on the same screen where you found Game Mode. Open the Game Bar section and enable the option called Record game clips, screenshots, and broadcast using Game Bar.
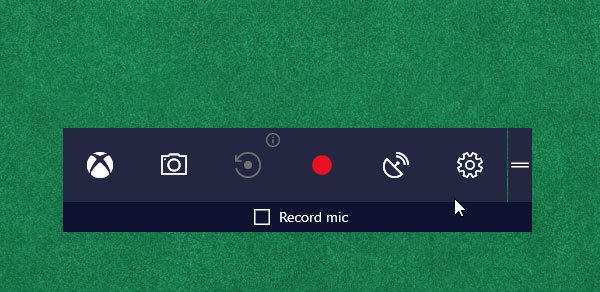
Now open any game and press Win + G to show the Game bar. In the Game bar, you will find a settings gear icon. Click on it.

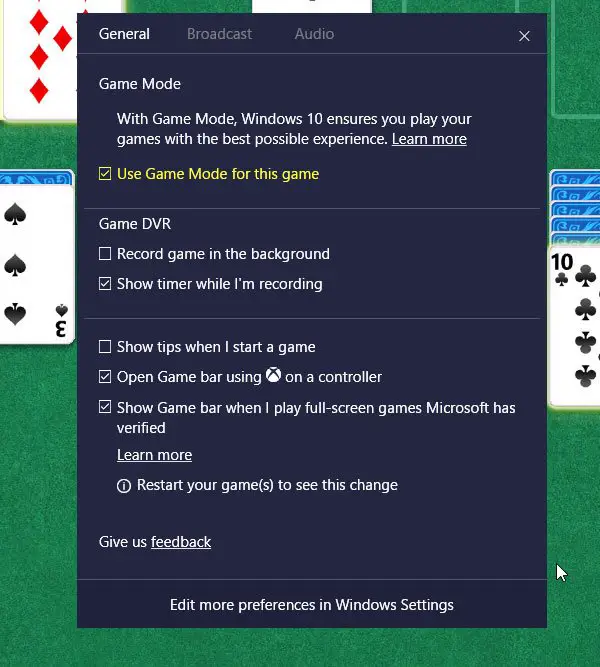
Following that, you can will an option called Use Game Mode for this game under the General tab. You have to select the checkbox.

The Game Mode will now be turned on for that particular game.
If you want to disable Game Mode for any game, go to the same screen and uncheck the box.
TIP: This post will help you if Windows Game Mode toggle is missing.
Let us know if you find it useful and if it makes a difference.
Should I disable Game Mode in Windows?
Game Mode was built to improve your computer’s performance, but sometimes, you might not even notice any speed bump, depending on the hardware you’re running your Windows on. But in most cases, it doesn’t cause any tantrums such that you have to disable it.
However, there have been instances where users have reported that Game Mode is causing the system and app to crash, among other peculiar things. We have a reason for this. To allocate more system resources to a game, Game Mode tends to some of the background tasks with the utmost importance, causing system issues; hence, if you see such issues while gaming, it is better to turn off Game Mode and retry.
Read next: TruePlay anti-cheat feature in Windows.
It should be mentioned that the Game Bar will only show on a normal (non-UWP) game if the game is running in windowed mode.
I dont even have game mode in the settings. Already installed the update
Game bar wont work for me -.- even if i run it on windowed mode
Same for me. It actually worked for Asphalt 8, but that’s all.
well try to check you have installed windows 10 fall creator update win10 1709v
nice article
this pc supports game mode
thats what i see when i try to enter in game mode
Same here
THANK YOU!!!!!!!!!! SOLID 60 FPS EVERYWHERE!!!!!!!!! NO STUTTERS AT ALL!!!!