This article lists solutions to fix a problem where a printer keeps printing pages with the “Get/eSCL/ScannerStatus HTTP/1.1 Host: localhost” message. Most of the affected users reported that this problem started occurring after upgrading their systems from Windows 10 to Windows 11. This error causes the wastage of paper. If you experience such an issue, the solutions provided here will help you.
Some users also reported that this issue occurs only when the printer is connected to the USB cable. The problem does not appear when the printer is connected via the WiFI network.
Get/eSCL/ScannerStatus HTTP/1.1 Host: localhost Printer error
If your printer keeps printing pages with the error message “Get/eSCL/ScannerStatus HTTP/1.1 Host: localhost,” the solutions provided below will help you. Before you proceed, we suggest you check for Windows Updates manually and install them (if available).
- Restart your computer and printer
- Run Printer Troubleshooter
- Update your printer firmware
- Clear print spooler
- Disable Airprint
- Change Print Server properties
- Uninstall and reinstall your printer driver
- Remove your printer and add it again
- Install the printer driver in compatibility mode
- Reset your printer
Let’s see all these fixes in detail.
1] Restart your computer and printer
This error can also be the result of a glitch. Hence, we suggest you restart your computer and printer. Turn off your computer and printer, then disconnect all the connections from both devices, including the power cord. After that, wait for a few minutes, then turn them on again. This trick has worked for some users.
2] Run Printer Troubleshooter
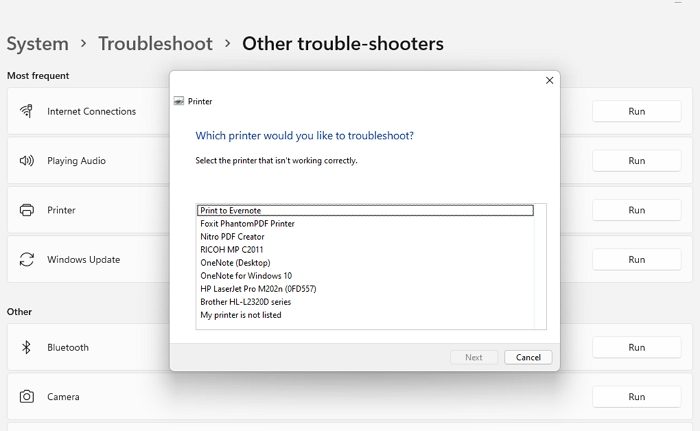
Windows 11/10 Printer Troubleshooter fixes printing-related issues. We suggest you run the Printer Troubleshooter and see if it helps. You can launch it from Windows 11/10 Settings. In the future, the troubleshooter will be redirected to the Get Help app on Windows 11 devices with 22H2 and later versions.
3] Update your printer firmware
One possible cause of this issue is the outdated printer firmware. We suggest you update your printer firmware and see if it brings any changes. Refer to the user manual of your printer to know how to update your printer firmware.
4] Clear print spooler
Because the printer is continuously printing the pages with the “Get/eSCL/ScannerStatus HTTP/1.1 Host: localhost” message, clearing the print spooler can help. To do so, you have to stop the Print Spooler service. The Print Spooler service is responsible for handling print jobs and managing the interaction of your computer with the printer.
Open the Services Manager. Now, scroll down and locate the Print Spooler service. Once you find it, right-click on it and select Stop. After stopping the Print Spooler service, go to the following location in your File Explorer.
C:\Windows\System32\spool
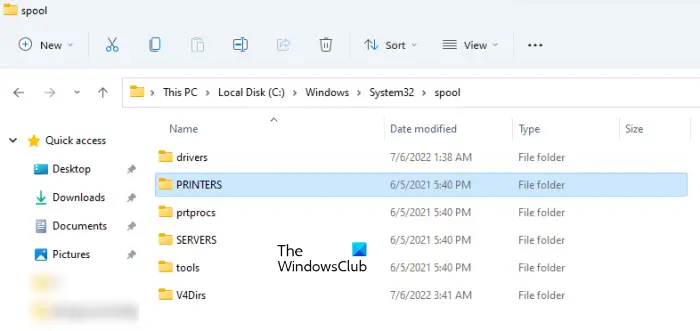
If you receive a prompt, click Continue. Now, open the PRINTERS folder and delete all the files inside it. Do not delete the PRINTERS folder. After deleting the files, restart the Print Spooler service via the Services Manager. To do so, right-click on it and select Start.
5] Disable Airprint
Airprint is a technology from Apple that is embedded in printers. It allows Apple devices to easily find the printer without installing a printer driver. Some users reported that the issue was occurring because Airprint was enabled on their printers. When they disabled this feature, the problem was fixed. Check and disable Airprint on your printer.
6] Change Print Server properties
If the issue still persists, changing the Print Server properties may help. The steps to do this are as follows:
- Open Settings on your Windows computer.
- Go to “Bluetooth & devices > Printers & scanners.”
- Scroll down and click Print server properties under the Related settings section.
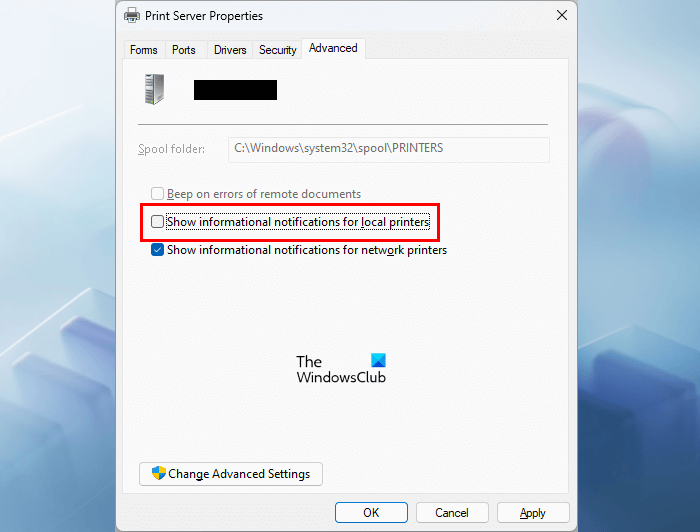
- The Print Server Properties window will appear. Now, go to the Advanced tab.
- Uncheck the Show informational notifications for local printers checkbox.
- Click Apply and then click OK.
Read: Printer cannot be contacted over the network.
7] Uninstall and reinstall your printer driver
The problem may also be the result of an outdated or corrupted printer driver. Updating or reinstalling your printer driver may help. The following steps will help you with that:
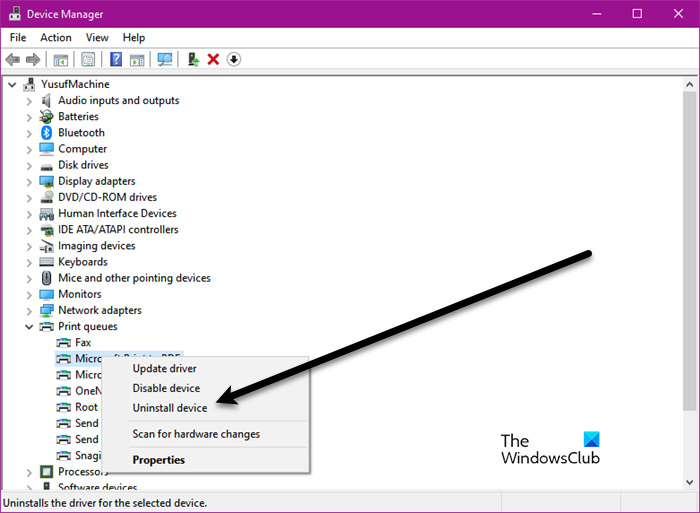
- Open the Device Manager.
- Expand the Print queues branch.
- Right-click on your printer driver and select Uninstall device.
- Restart your computer and download the latest version of your printer driver from the manufacturer’s website.
- Install the printer driver manually.
See if the issue persists.
8] Remove your printer and add it again
If uninstalling and reinstalling your printer driver did not help, remove your printer and then add it again. Follow the steps written below:
- Disconnect your printer from your computer.
- Uninstall the printer software from your system (if applicable). You can do so via Windows 11/10 Settings or the Control Panel.
- Open the Device Manager and uninstall the printer driver. Now, click on the View tab and select Show hidden devices in the Device Manager. Uninstall all the hidden printer drivers.
- Remove your printer via Windows 11/10 Settings or the Control Panel.
- Download the latest version of your printer driver from the manufacturer’s website.
- Extract the driver folder (if it is downloaded as a Zip file). Right-click on the printer driver and select Run as administrator.
- Follow the on-screen instructions to install the printer driver.
- Now, add your printer again.
9] Install the printer driver in compatibility mode
According to most affected users, the issue occurred after upgrading their systems from Windows 10 to Windows 11. They stated that their printers were working fine on Windows 10. In such a case, you can try one thing. Install the printer driver under the compatibility mode.
- First, uninstall the printer driver using the steps described earlier in this article.
- Now, right-click on the printer driver that you have downloaded from the manufacturer’s website.
- Select Properties.
- Go to the Compatibility tab.
- Enable the “Run this program in compatibility mode for” checkbox.
- Select Windows 8 in the drop-down.
- Click Apply and then click OK.
- Now, install the printer driver.
10] Reset your printer
If none of the above fixes resolved your issue, reset your printer.
Read: Printer keeps pausing during printing.
Why is my printer in error state Windows 11?
The “Printer is in Error State” error is not associated with the printer of a particular brand. You can see this error on any printer. There are multiple causes of this error, like the printer running on low ink, wrong placement of cartridges in a printer, paper being jammed, etc.
Why is the printer not responding?
There are several reasons why your printer is not responding. If it is a wired printer, make sure that you have connected it properly. Also, check the USB cable. If it is a wireless printer, check if it is connected to the same network. Sometimes, print jobs get stuck due to which the printer does not respond. In this case, clearing the Print Spooler fixes the issue.
Read next: Print jobs say deleting but not deleting.