If you are using both macOS and Windows, you might have observed that the font in the Mac looks different than the fonts in the Windows system. The text in the Windows system appears smaller and less sharp as compared to the Mac system. Some also prefer the color representation in Mac rather than in Windows. It may, therefore, appear to some that, unlike Mac, the texts in Windows aren’t optimized for reading long-form articles.
Windows Font vs Mac Font
The way the fonts appear on your machine depends on the software called Font renderer. Apple cares about Mac’s aesthetic and puts in a lot of effort to the stuff like modern UI and font rendering that distinguishes Mac from other systems like Windows. Windows uses DirectWrite technology to render fonts and Mac, on the other hand, uses Free-Type font rendering that has better font smoothing capability than Windows.
As of now, Microsoft offers ClearType software technology for the recent Windows version to improve the text readability on laptop screens and flat LCD monitors. A simple tweak on ClearType’s settings,s improves the readability of text and attempts to smooth the fonts on your monitor. However, most of the users, like designers and artists, still prefer using Mac’s Freestyle rather than Clear Type technology. If your work involves constantly switching between Mac OS and Windows systems, you may wish to have a smooth Mac-like font on a Windows machine.
Read: How to make Windows 10 look like Mac.
Get Mac font for Windows 11/10
While some Windows users, such as developers and web designers, simply love the way Windows renders the font, some might prefer Apple fonts as the texts look sharper, nicer, and easier to read. In this article, we explain how to replace your Windows font with a Mac-like smooth font using free programs like MacType and GDIPP.
1] MacType installs Mac font on Windows

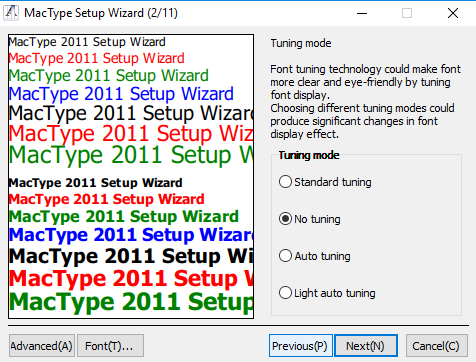
As the name suggests, MacType is a powerful program which aims to provide Mac like smooth fonts on Windows 11/10. The latest version of MacType is fully compatible with Windows 11/10 and is easy to use with additional customization options. Follow the below steps to use MacType on Windows 11/10.
Download the latest version of MacType here. Run the installer file and during installation choose complete install.

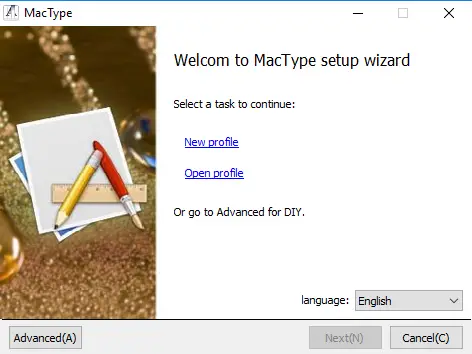
Once the MacType is installed, Launch the program and select the language as English.
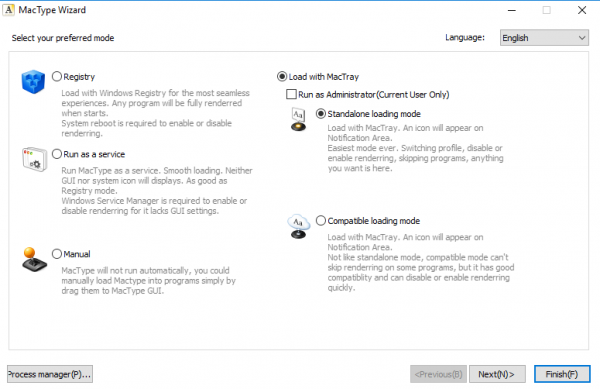
In the MacType Wizard window, Click on the radio button with option Load with MacTray.

Check the box with option Run as Administrator and click radio button with option Standalone loading mode.
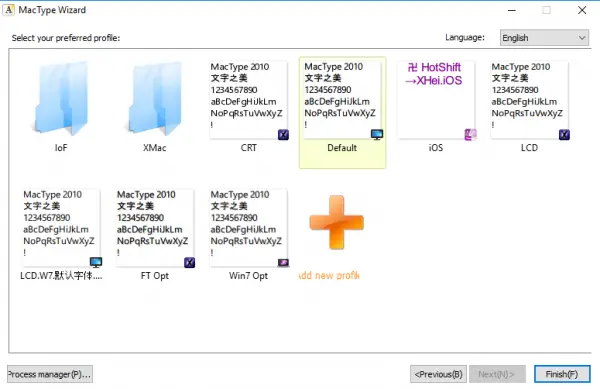
Click the Next button. Choose the MacType default font smoothing profile labeled in Chinese and click Finish button.

Click OK in the confirmation dialogue box to apply the changes.
The Font profile determines the components involved in the font smoothing process. You can create a new font profile or edit the existing font profile using MacType Control Panel which will be created as your desktop shortcut soon after installation is complete.
Read: How to add Custom Fonts to Command Prompt in Windows.
2] GDIPP for Windows

GDIPP is a simple program that aims to provide you with the effect of Windows text appearing like Mac OS. It is extremely easy to use and can be easily customized on both 32-bit version Windows and 64-bit Windows It allows you to install 32-bit components and 64-bit components separately. However, both these components share the same setting file. Once the program is installed, the 32-bit processes will only render 32-bit applications, and 64-bit components will only render 64-bit applications in 64-bit Windows version.
Download the latest version of GDIPP here. Run the downloaded installer.
Once the installation is complete, you will have the smooth Mac-like fonts on your Windows machine.
Read next: Convert Mac font to Windows-compatible font using DfontSplitter.
Leave a Reply