For many PC gamers, there will come a time when they’ll have to monitor their GPUs to get an idea of the performance, among other things. To get this task done, PC gamers have many tools to choose from, but today, we’re going to focus on the new kid on the block. Have you ever heard of Geeks3D GPU Shark? It’s one of the latest Windows programs for monitoring your GPU. However, it’s only limited by NVIDIA GeForce and AMD Radeon cards.
Some might view this as disappointing, but remember that those two cards are the primary cards for gaming, and all others are just not as good. Now, we should point out that GPU Shark is portable. Therefore, users have nothing to install.
Monitor NVIDIA & AMD GPU using GPU Shark
Checking your GPU data is very important if you’re a PC gamer, but it’s always as simple as it might sound. This is why we like to recommend the use of GPU Shark because it works and does so quite well. Here’s how to use GPU Shark:
- From simplified to detailed
- All the information you need
- Second GPU
- Copy GPU data.
1] From simplified to detailed

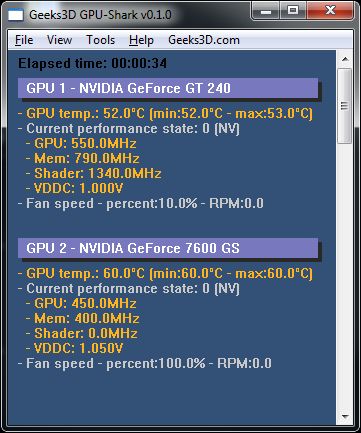
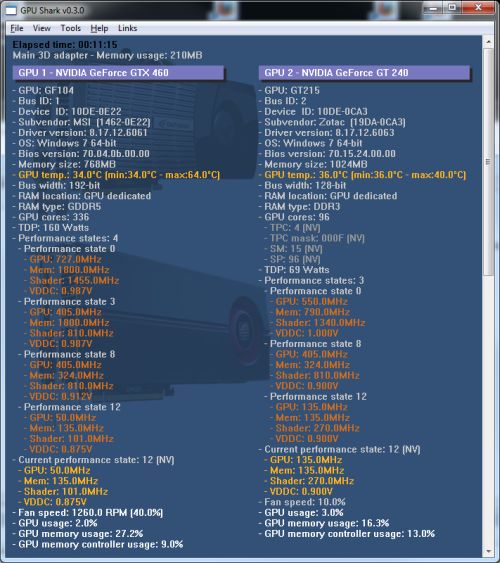
First thing you’ll want to do is to decide if you want to have a simplified or detailed view. We suggest the default simplified view because it’s not overwhelming. However, if you want everything at your fingertips, then the detailed view is the best choice.
To switch between options, click on View, then make the necessary selection from there.
2] All the information you need
When it comes down to seeing all the data for your particular GPU, the user only needs to launch the program. Most things are shown on a single screen, which is pretty awesome from our point of view.
The tool will show the name of the GPU, and some hardware information related to the computer you’re using. Not only that, but it will show the current temperature in real-time as it changes along with the performance state.
For those who are interested in keeping up with the fan speed, GPU percent usage, memory usage, and memory controller usage, then it’s all here. Now, bear in mind that GPU Shark is not an overclocking tool. Therefore, users won’t be able to make any big changes.
3] Second GPU

One of the things we like about this program is its ability to showcase information on a second GPU if one is in play. Hardcore PC gamers tend to power their computers with two GPUs to get the most out of their games.
It’s quite expensive to do this, but for those who can, they’ll fall in love with GPU Shark. It will, in no doubt, show information on both GPUs in real time, so users will always know what’s up. Similar tools do the same, but we’re not discussing those right now.
Read: How to check the GPU Temperature in Windows.
4] Copy GPU data
One of the coolest features of GPU Shark is the ability to copy GPU data to the clipboard. Not everyone needs to own this data, but for the ones who do, just click on View, then the option that says Copy GPU Data to Clipboard.
Now, folks will realize there’s not much to do here with GPU Shark. We’d love a little bit more in terms of features, but that’s alright. You can download GPU Shark directly from the official website.
Leave a Reply