Group Policy Editor can be your best companion when you want to enable or disable certain features or options that are not available in the GUI form. No matter whether it is for security, personalization, customization, or anything else. That is why we have consolidated some of the most important Group Policy settings for preventing security breaches on Windows 11/10 computers.
Before getting started with the full-length list, you should know what we are going to talk about. There are certain areas that need to be covered when you want to make a full-proof home computer for you or your family members. They are:
- Software installation
- Password restrictions
- Network access
- Logs
- USB support
- Command-line script execution
- Computer shut down and restart
- Windows Security
Some of the settings need to be turned on, whereas some of them need the exact opposite thing.
Most important Group Policy settings for preventing Security Breaches
The most important Group Policy settings for preventing security breaches are:
- Turn off Windows Installer
- Prohibit use of Restart Manager
- Always install with elevated privileges
- Run only specified Windows applications
- Password must meet complexity requirements
- Account lockout threshold and duration
- Network Security: Do not store LAN Manager hash value on next password change
- Network Access: Do not allow anonymous enumeration of SAM accounts and shares
- Network Security: Restrict NTLM: Audit NTLM authentication in this domain
- Block NTLM
- Audit system events
- All Removable Storage classes: Deny all access
- All Removable Storage: Allow direct access in remote sessions
- Turn on Script Execution
- Prevent access to registry editing tools
- Prevent access to the command prompt
- Turn on script scanning
- Windows Defender Firewall: Do not allow exceptions
To learn more about these settings, continue reading.
1] Turn off Windows Installer
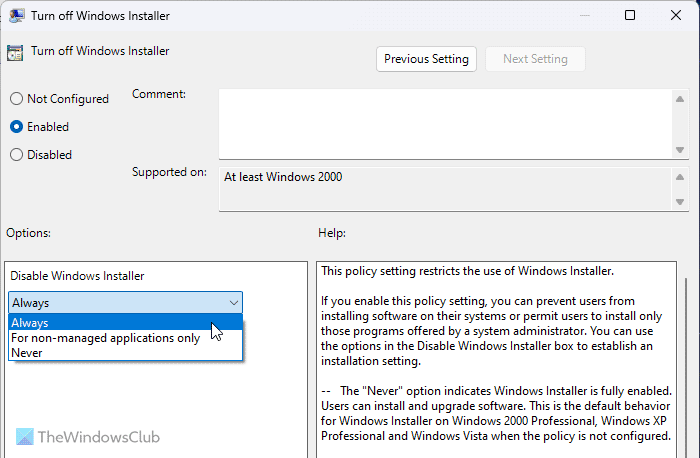
Computer Configuration > Administrative Templates > Windows Components > Windows Installer
It is the foremost security setting that you need to check when you are handing over your computer to your kid or someone who doesn’t know how to check whether a program or the source of the program is legit or not. It blocks all kinds of software installation on your computer instantly. You need to choose the Enabled and Always option from the drop-down list.
Read: How to block users from installing or running programs in Windows
2] Prohibit use of Restart Manager
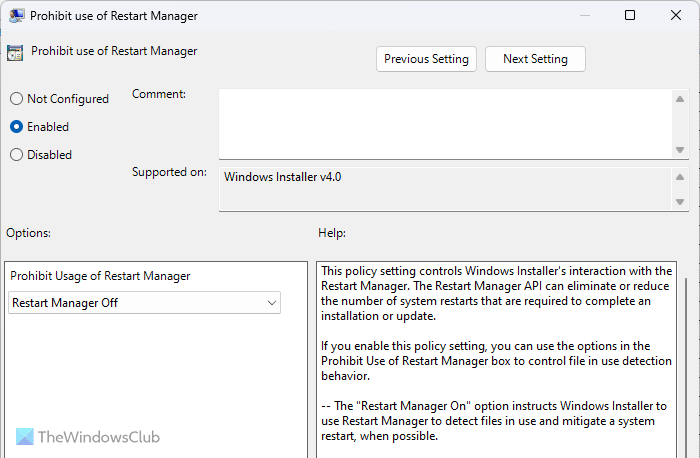
Computer Configuration > Administrative Templates > Windows Components > Windows Installer
Some programs need a restart to start working fully on your computer or complete the installation process. If you do not want to use unauthorized programs to be used on your computer by a third party, you can use this setting to disable the Restart Manager for Windows Installer. You need to choose the Restart Manager Off option from the drop-down menu.
3] Always install with elevated privileges
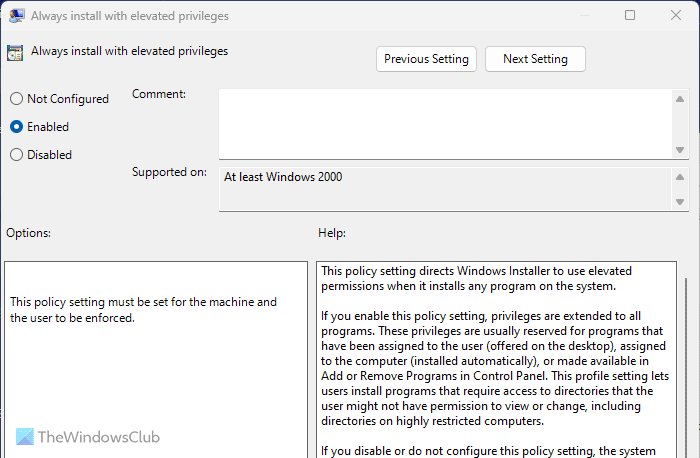
Computer Configuration > Administrative Templates > Windows Components > Windows Installer
User Configuration > Administrative Templates > Windows Components > Windows Installer
Some executable files need admin permission to be installed, whereas others do not need such a thing. Attackers often use such programs to secretly install apps on your computer remotely. That is why you need to turn on this setting. One important thing to know that you must enable this setting from Computer Configuration as well as Use Configuration.
4] Run only specified Windows applications
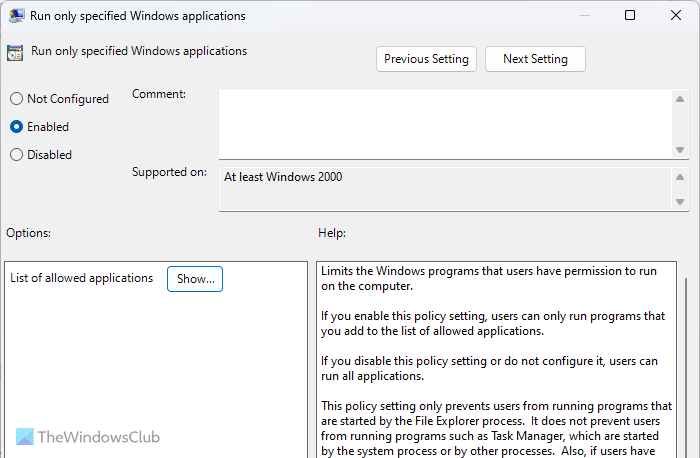
User Configuration > Administrative Templates > System
If you do not want to run apps in the background without your prior permission, this setting is for you. You can allow your computer users to run only predefined apps on your computer. For that, you can enable this setting and click the Show button to enlist all the apps you want to run.
5] Password must meet complexity requirements
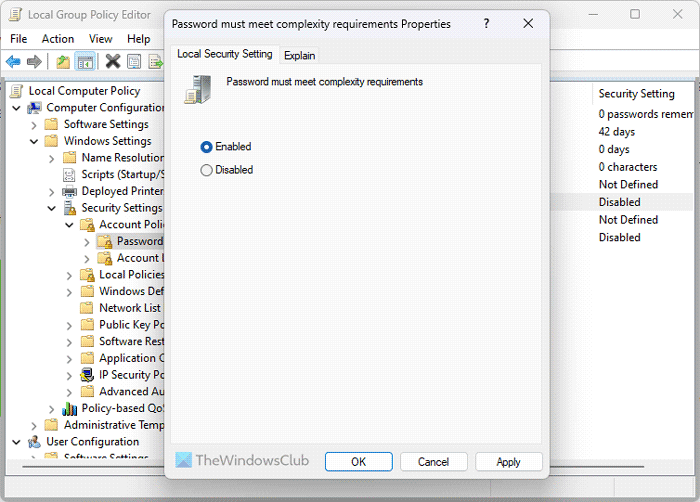
Computer Configuration > Windows Settings > Security Settings > Account Policies > Password Policy
Having a strong password is the first thing you need to use to protect your computer from security breaches. By default, Windows 11/10 users can use almost anything as the password. However, if you have enabled some specific requirements for the password, you can turn on this setting to enforce it.
Read: How to customize the Password Policy in Windows
6] Account lockout threshold and duration
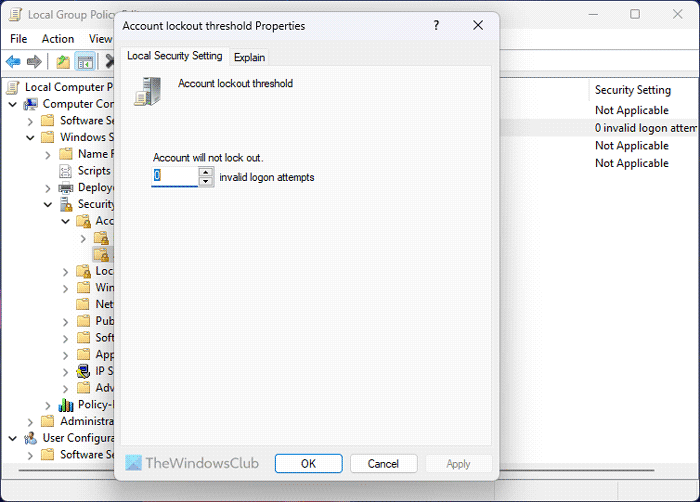
Computer Configuration > Windows Settings > Security Settings > Account Policies > Account Lockout Policy
There are two settings named Account lockout threshold and Account lockout duration that should be enabled. The first one helps you lockdown your computer after a specific number of failed logons. The second setting helps you determine how long the lockout will stay.
7] Network Security: Do not store LAN Manager hash value on next password change
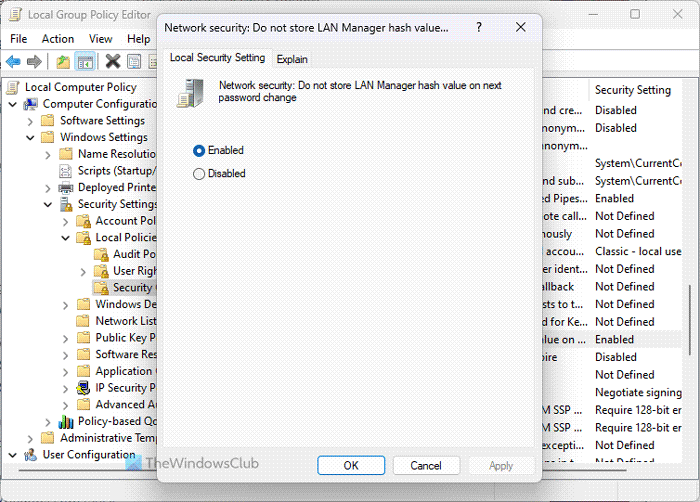
Computer Configuration > Windows Settings > Security Settings > Local Policies > Security Options
As LAN Manager or LM is comparatively weak in terms of security, you need to enable this setting so that your computer doesn’t store the hash value of the new password. Windows 11/10 generally stores the value on the local computer, and that is why it increases the chance of security breach. By default, it is turned on, and it needs to be enabled all the time for security purposes.
8] Network Access: Do not allow anonymous enumeration of SAM accounts and shares
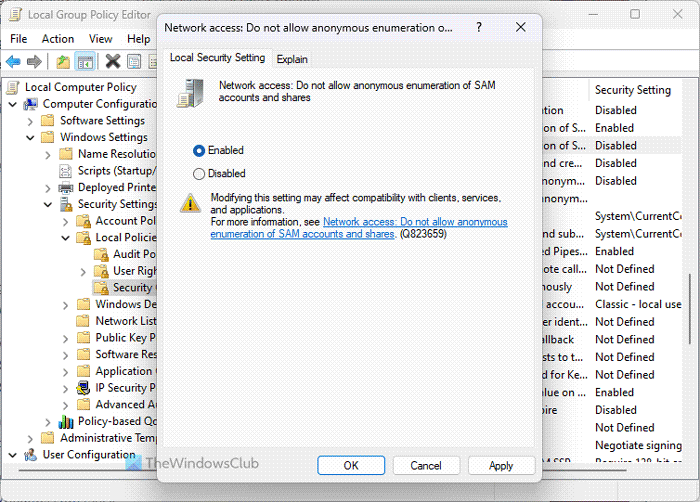
Computer Configuration > Windows Settings > Security Settings > Local Policies > Security Options
By default, Windows 11/10 allows unknown or anonymous users to execute various things. If, as an administrator, you do not want to allow it on your computer/s, you can turn on this setting by choosing the Enable value. One thing is to keep in mind that it may affect some clients and apps.
9] Network Security: Restrict NTLM: Audit NTLM authentication in this domain
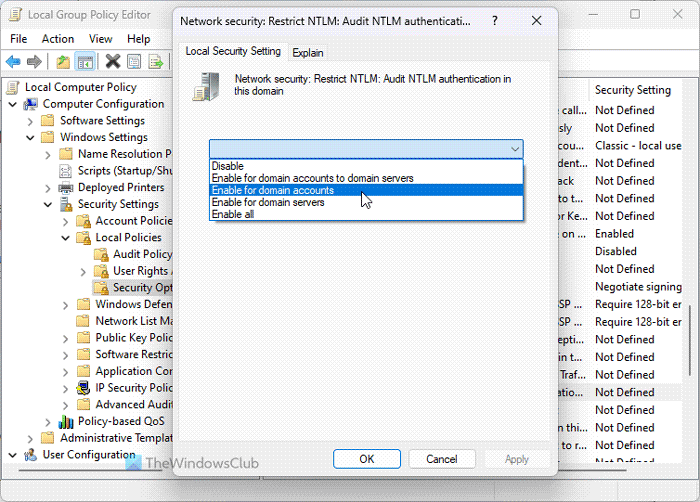
Computer Configuration > Windows Settings > Security Settings > Local Policies > Security Options
This setting lets you enable, disable, and customize the audit of the authentication by NTLM. As NTML is mandatory to recognize and protect the confidentiality of shared network and remote network users, you must modify this setting. For deactivation, choose the Disable option. However, as per our experience, you should choose Enable for domain accounts if you have a home computer.
10] Block NTLM
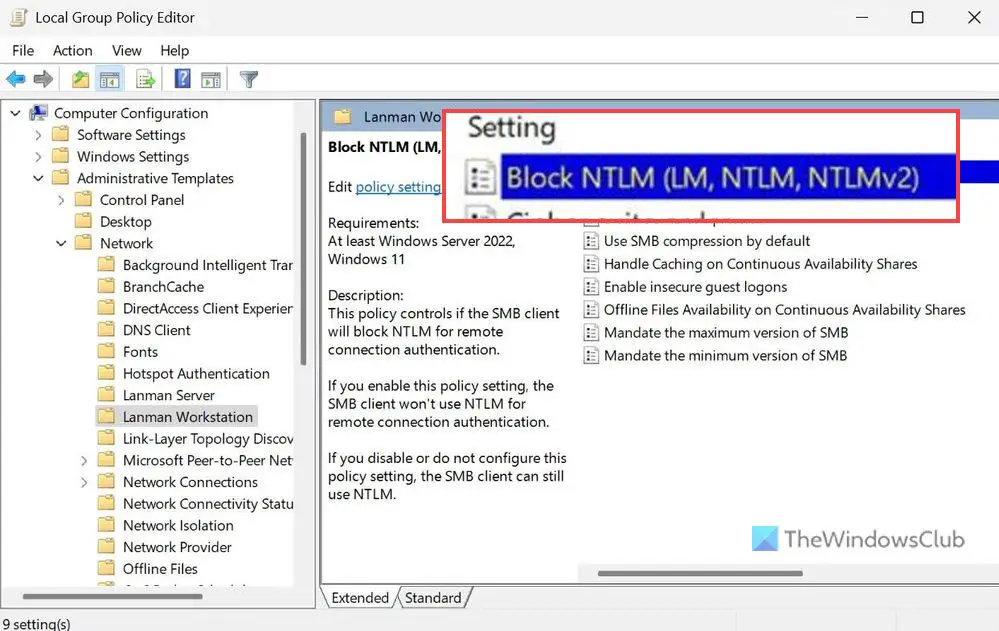
Computer Configuration > Administrative Templates > Network > Lanman Workstation
This security setting helps you block NTLM attacks over SMB or Server Message Block, which is very common nowadays. Although you can enable it using PowerShell, Local Group Policy Editor also has the same setting. You need to choose the Enabled option to get the job done.
11] Audit system events
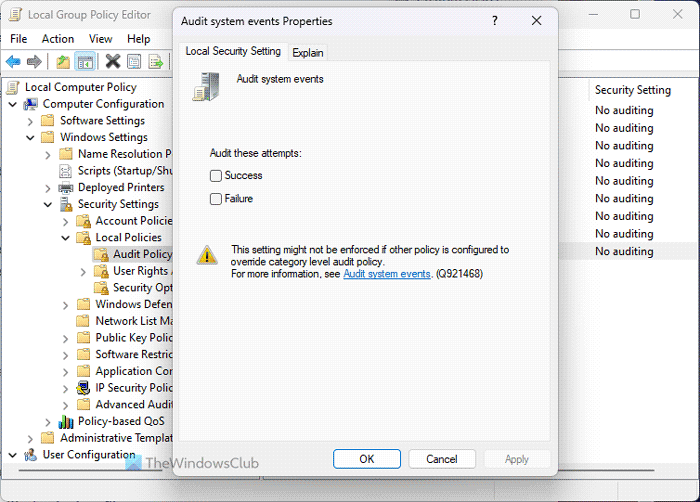
Computer Configuration > Windows Settings > Security Settings > Local Policies > Audit Policy
By default, your computer doesn’t log several events such as system time change, shutdown/startup, loss of system auditing files and failures, etc. If you want to store all of them in the log, you must enable this setting. It helps you analyze whether a third-party program has any of those things or not.
12] All Removable Storage classes: Deny all access
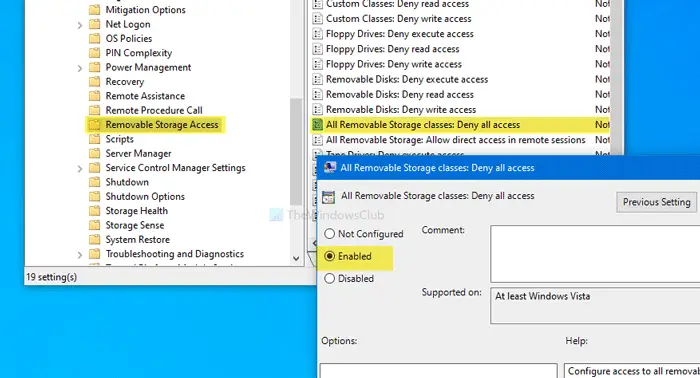
Computer Configuration > Administrative Templates > System > Removable Storage Access
This Group Policy setting lets you disable all the USB classes and ports at once. If you often leave your personal computer in an office or so, you must check this setting so that others cannot use USB devices to gain read or write access.
13] All Removable Storage: Allow direct access in remote sessions
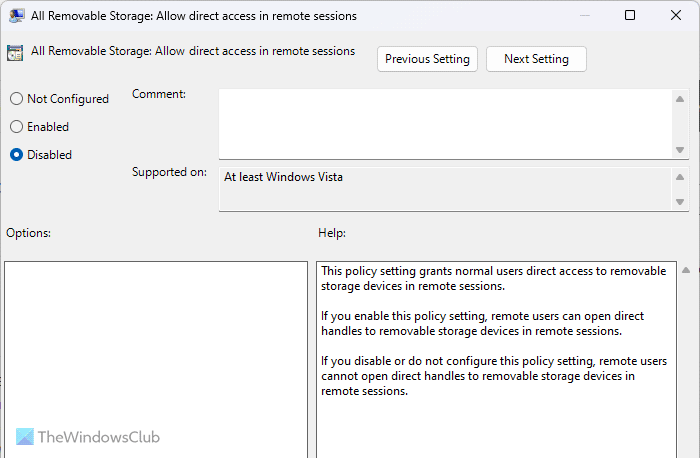
Computer Configuration > Administrative Templates > System > Removable Storage Access
Remote sessions are somehow the most vulnerable thing when you do not have any knowledge and connect your computer to an unknown person. This setting helps you disable all the direct removable device access in all remote sessions. In that case, you will have an option to approve or reject any unauthorized access. For your information, this setting needs to be Disabled.
14] Turn on Script Execution
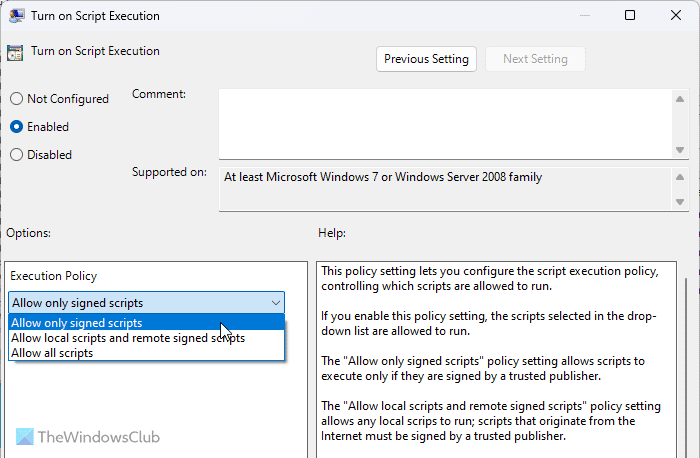
Computer Configuration > Administrative Templates > Windows Components > Windows PowerShell
If you enable this setting, your computer can execute scripts through Windows PowerShell. In that case, you should choose the Allow only signed scripts option. However, it would be best if you do not allow script execution or select the Disabled option.
Read: How to turn on or off PowerShell script execution
15] Prevent access to registry editing tools
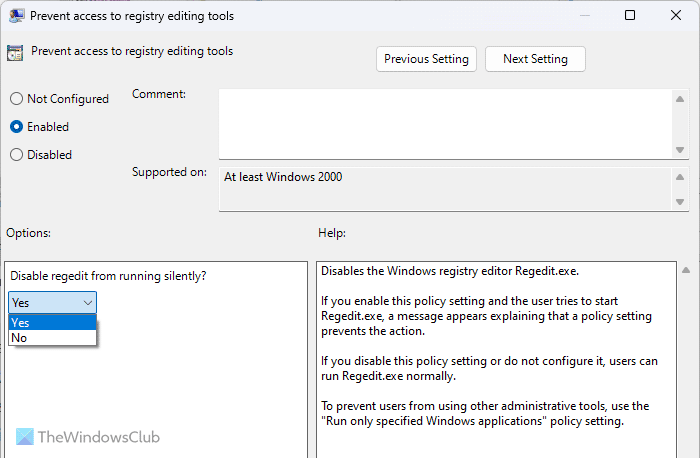
User Configuration > Administrative Templates > System
Registry Editor is such a thing that can change almost any setting on your computer, even if there is no trace of a GUI option in the Windows Settings or Control Panel. Some attackers often change Registry files to spread malware. That is why you need to enable this setting to block users from accessing Registry Editor.
16] Prevent access to the command prompt
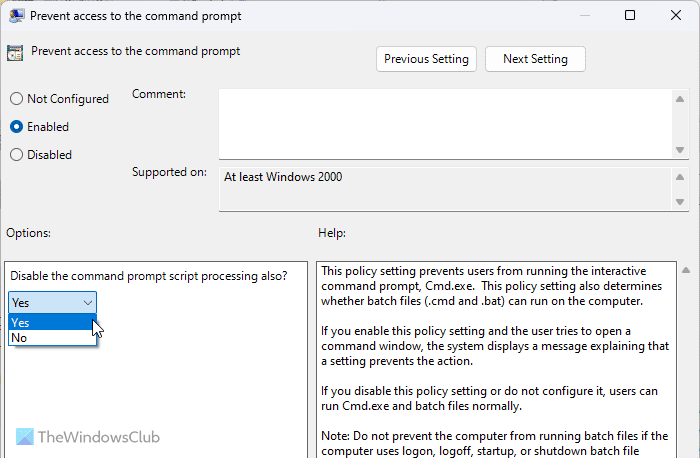
User Configuration > Administrative Templates > System
Like the Windows PowerShell scripts, you can run various scripts through Command Prompt as well. That is why you need to turn on this Group Policy setting. After selecting the Enabled option, expand the drop-down menu and select the Yes option. It will disable the Command Prompt script processing also.
Read: Enable or Disable Command Prompt using Group Policy or Registry
17] Turn on script scanning
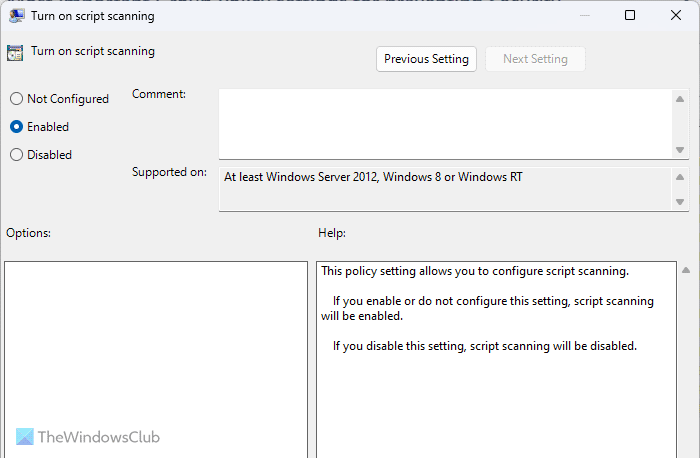
Computer Configuration > Administrative Templates > Windows Components > Microsoft Defender Antivirus > Real-time Protection
By default, Windows Security doesn’t scan all kinds of scripts for malware or so. That is why it is recommended to enable this setting so that your security shield can scan all the scripts stored on your computer. As scripts can be used to inject malicious codes into your computer, this setting remains important all the time.
18] Windows Defender Firewall: Do not allow exceptions
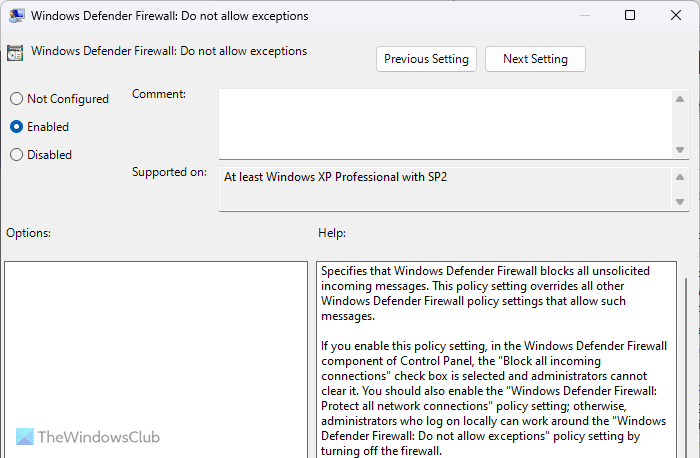
Computer Configuration > Administrative Templates > Network > Network Connections > Windows Defender Firewall > Domain Profile
Computer Configuration > Administrative Templates > Network > Network Connections > Windows Defender Firewall > Standard Profile
Windows Defender Firewall can often allow various incoming and outgoing traffic as per the user’s requirements. However, it is not suggested to do that unless or until you know the program very well. If you are not 100% sure about the outgoing or incoming traffic, you can turn on this setting.
Let us know if you have other recommendations.
Read: Desktop Background Group Policy is not applying in Windows
What are 3 best practices for GPOs?
Three of the best practices for GPO are – first, you should not tweak a setting unless or until you know what you are doing. Second, do not disable or enable any Firewall setting since it may welcome unauthorized traffic. Third, you should always force update the change manually if it doesn’t apply itself.
Which Group Policy setting should you configure?
As long as you have enough knowledge and experience, you can configure any setting in the Local Group Policy Editor. If you do not have such knowledge, let it be as it is. However, if you want to harden your computer security, you can go through this guide since here are some of the most important Group Policy security settings.
Read: How to reset all Local Group Policy settings to default in Windows.
Leave a Reply