If you want to change screen brightness when plugged in or on battery, here is how you can do that. It is quite straightforward to change the brightness of your screen when using Windows 11 or Windows 10. There are essentially three ways to adjust the brightness, and this article mentions all of them.
If you often watch movies or play games, you might need a bright screen as compared to doing regular work like browsing Facebook or reading articles. Let’s assume that you are working in a low light room and the bright screen is causing issues in your eyes. At such a moment, you can easily adjust or lower down the brightness so that it becomes more comfortable.
How to change Brightness when Laptop is Plugged in or on Battery
To change brightness when plugged in or on battery in Windows 11 or Windows 10 laptop, you can use one of these methods:
- Use keyboard buttons
- From Quick Settings
- Using Windows Settings
1] Use keyboard buttons

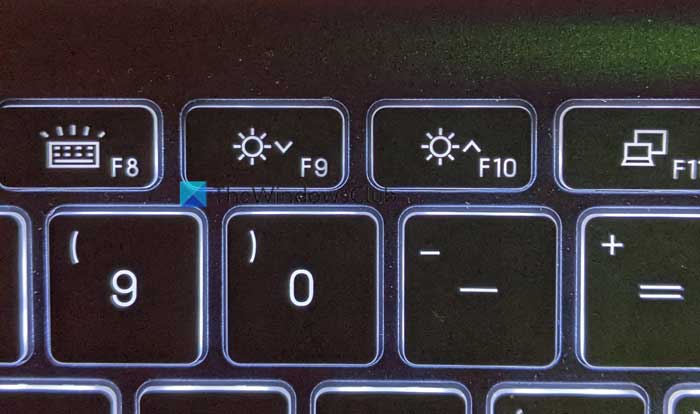
It is the easiest way to change or adjust the brightness irrespective of the power state. Almost all the Windows 11 and Windows 10 laptops come with two buttons to increase or decrease the brightness of the display. Assuming that your laptop has those keys, you can use the keyboard shortcut to get the job done.
You can find the keys that look like a light bulb, the sun, or something like that in most cases. For a better reference, check the aforementioned image.
2] From Quick Settings

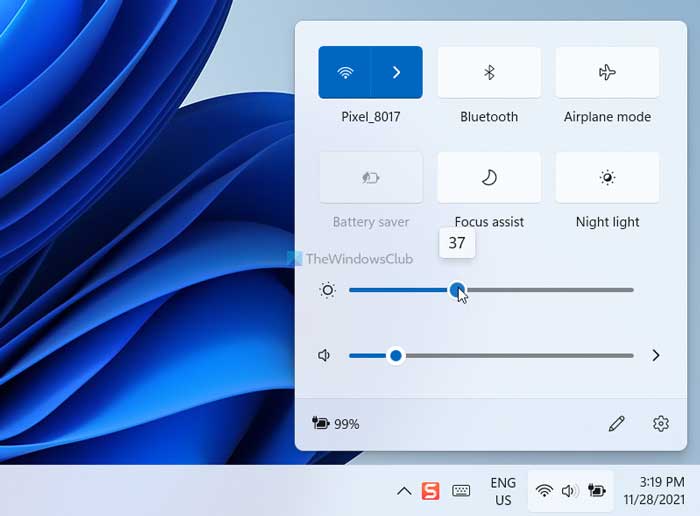
If you do not want to use the keyboard shortcuts, you can undoubtedly use the Quick Settings menu. Windows 11 displays a brightness slider in the Quick Settings panel that you can use to increase or decrease the screen brightness. To get started, open the Quick Settings panel, click on the brightness slider, and move it left or right to decrease or increase the brightness. To open the Quick Settings panel, you have two options. You can click on the volume/Ethernet/Wi-Fi icons or use the keyboard shortcut, Win+A. Either way, it opens the same thing on Windows 11 computer.
3] Using Windows Settings

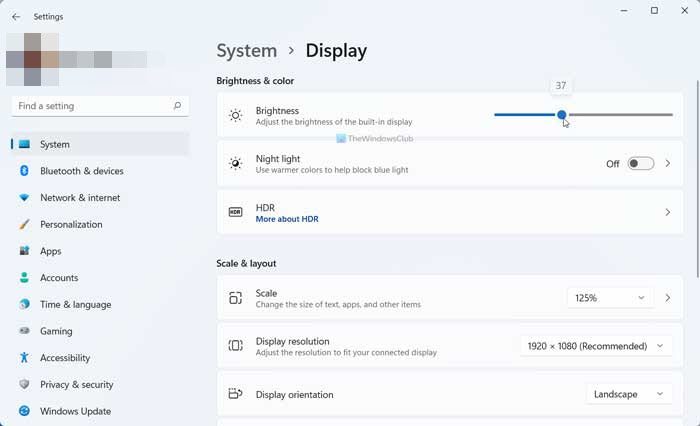
If you get some issues with the Quick Settings and are unable to change the brightness using the corresponding slider, you can use the Windows Settings to get the job done. However, many people often use the other two methods because it is quite thorough to change the brightness using Windows Settings panel.
For that, do the following:
- Press Win+I to open Windows Settings.
- Ensure that you are in the System tab.
- Click on the Display menu.
- Find out the Brightness slider.
- Move it to the left or right.
As you move the slider, you can find the change in the brightness.
How do I change the brightness on my laptop when charging?
To change the brightness on your laptop when it is charging, you have three options in your hands. The easiest way is to use the keyboard shortcut that almost all laptops come with. You can use those buttons to increase or decrease the brightness when on the battery or charging. The brightness control buttons look like a light bulb, sun, or something. Another way to automatically increase the level is by changing the power plan for your laptop when charging.
How do I lower brightness when charging?
To lower the brightness when charging, you can use the brightness slider available in Quick Settings. You can click on the system tray’s Wi-Fi, battery, or volume icon or press Win+A to open the Quick Settings panel. Following that, please find out the brightness slider and change it accordingly. If you are using an external monitor with your laptop, the monitor’s brightness settings will not change. Instead, you can use the buttons or monitor software to change the brightness.
Hope this guide helped you change the brightness when plugged in or on the battery.
Read: How to disable Content Adaptive Brightness Control (CABC) on Windows 11.