In this post, we will show you how to hide or show Filmstrip in the Photos app in Windows 11. Photos app is Windows’ built-in image viewer app that allows users to view and organize photos stored on their PC or in cloud storage. A new ‘Filmstrip‘ feature has been introduced to the Photos app that adds a series of thumbnails at the bottom of the photo preview. These thumbnails correspond to other photos and videos in the same folder or directory in which the main photo resides.
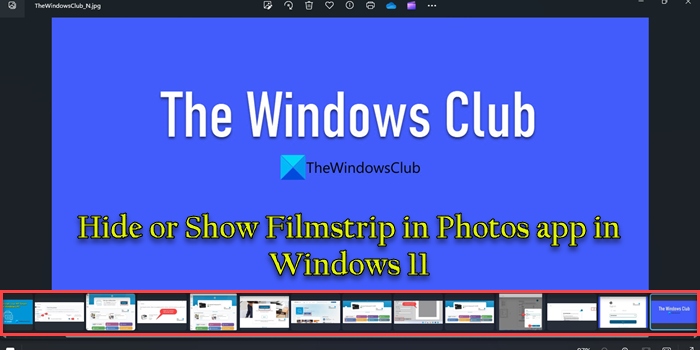
By default, filmstrip is disabled in the Photos app. You can enable it to quickly scroll through photo previews or compare photos side-by-side by selecting multiple photos at the same. The feature will soon be rolled out to all Windows versions.
Hide or Show Filmstrip in Photos app in Windows 11
You may follow these methods to hide or show Filmstrip in the Photos app on your Windows 11 PC:
- Use keyboard shortcut
- Use toolbar
- Use the context menu
- Use app settings
Let us see these in detail.
1] Use keyboard shortcut
There’s a hotkey that lets you quickly enable or disable the filmstrip while you’re previewing images in the Photos app.
Open the Photos app and use the left panel to navigate to the desired folder. You will see photo thumbnails in the right panel. Double-click on a thumbnail to open the photo in the Image Viewer. Click on the Maximize button in the top-right corner to expand the preview to full screen.
Now press the ‘F‘ key on your keyboard. The filmstrip will show up at the bottom of the image preview.
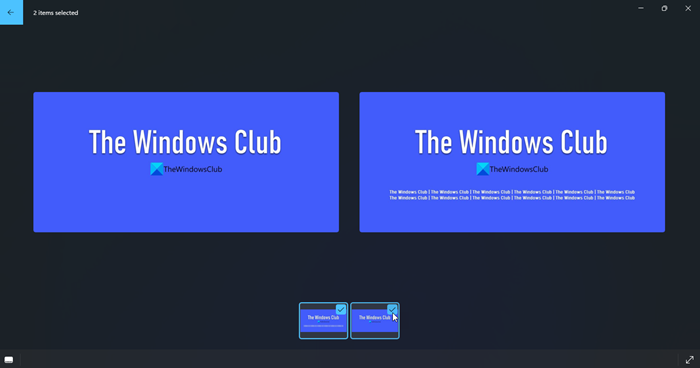
When enabled, it lets you easily scroll through all the images. You can quickly jump to the desired image to preview it in the Image Viewer or click on the checkboxes in the top-right corner of the thumbnails to select multiple images for comparison.
Use the ‘F’ key as a toggle to show or hide the filmstrip whenever required.
2] Use toolbar
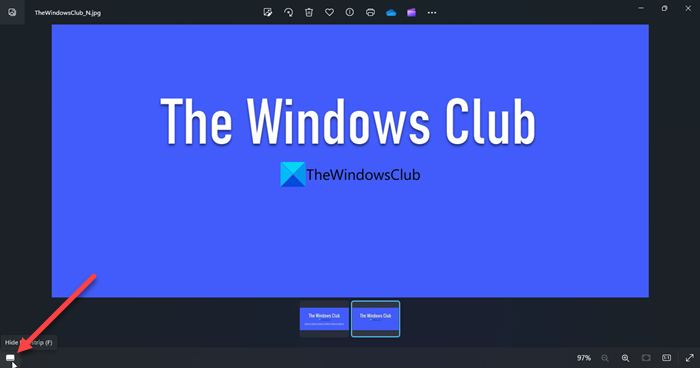
There’s a dedicated Show/Hide Filmstrip button in the toolbar at the bottom of the Image Viewer. You may use it to enable or disable the filmstrip feature as and when required.
Double-click on the desired photo in the Windows 11 Photos app. The photo will open in the Image Viewer window. Click on the Show Filmstrip icon in the bottom-left corner. The filmstrip will show up. Click on the icon again to hide the filmstrip.
3] Use the context menu
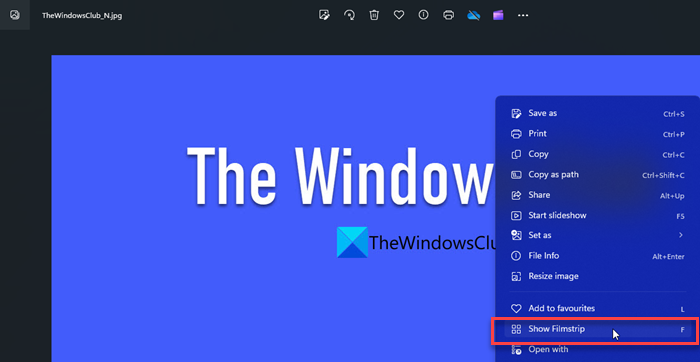
There’s also a context menu option that lets you easily show or hide the filmstrip feature on the Windows 11 Photos app.
Open the desired photo by double-clicking on it in the Photos app. Right-click on its preview in the Image Viewer window. You’ll see a Show Filmstrip option in the menu that appears. Click on it to enable the filmstrip. To disable the filmstrip, right-click on the image preview and select Hide Filmstrip.
4] Use app settings
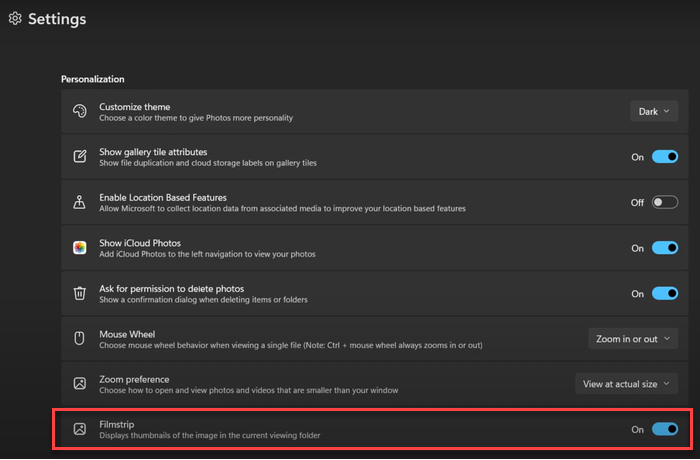
You can also show or hide the filmstrip in the Photos app from the app’s Settings page.
Open the Photos app and click on the gear icon in the top-right corner. App settings will appear. Scroll down to the Filmstrip option under Personalisation. You’ll see a toggle next to the option. Click on the toggle to show or hide the filmstrip in the Image Viewer window.
That’s all about it.
Read: How to use Microsoft Photos app in Windows 11.
How do I hide Photos in Windows 11 Photos app?
Open File Explorer and navigate to the folder containing photos that you want to hide. Right-click on it and select Properties. Select the ‘Hidden‘ option next to Attributes under the General tab. In the confirmation prompt, select Apply changes to this folder, subfolders, and files. Click OK to save changes. Restart the Photos app; the folder will no longer appear in the app’s gallery.
To view the hidden folder in File Explorer, select View > Show > Hidden items.
How do I hide a filmstrip in Lightroom?
To hide the filmstrip in Adobe Lightroom, click on the Show/Hide Filmstrip icon (a small triangle icon at the very bottom of the screen). Alternatively, click on the Window menu on top and select Panels. Then deselect the Show Filmstrip option. You can also press the F6 key on your keyboard to hide the filmstrip.
Read Next: Photos App Slideshow option missing in Windows 11.
Leave a Reply