VirtualBox failed to launch a virtual machine, and when investigating a bit, we found that vbox.log throws either of the following error messages.
{timestamp} HM: HMR3Init: Attempting fall back to NEM: VT-x is not available
{timestamp} NEM: WHvCapabilityCodeHypervisorPresent is TRUE, so this might work…
or
{timestamp} HM: HMR3Init: Attempting fall back to NEM: AMD-V is not available {timestamp} NEM: WHvCapabilityCodeHypervisorPresent is TRUE, so this might work…
This can be due to various reasons, however, this error is mostly triggered when Hyper-V is enabled on the device. Do keep in mind that Windows 11 Home users also encountered this issue even though Hyper-V is absent on it by default. In this post, we are going to address everything and see what you can do to resolve it.
Fix HMR3Init: Attempting fall back to NEM: VT-x is not available on VirtualBox
If Vbox.log says, “Fix HMR3Init: Attempting fall back to NEM: VT-x is not available on VirtualBox”, follow the solutions mentioned below to resolve the issue with ease.
- Turn off Hyper-V
- Enable Hardware Virtualization
- Make VirtualBox compatible with Hyper-V
- Disable Windows Memory Integrity security feature
- Reset BIOS
Let us talk about them in detail.
1] Turn off Hyper-V

As you may already know, it is not easy to run Hyper-V and VirtualBox on the same machine. Both hypervisors use hardware virtualization features like Intel VT-x or AMD-V, which can cause conflicts when running simultaneously. Hyper-V, being a Type 1 hypervisor, takes control of the virtualization hardware, making it unavailable for other hypervisors like VirtualBox. Due to this, you will encounter the error in question. To resolve it, you need to follow the steps mentioned below.
- Open the Command Prompt as an administrator and then run the following command.
bcdedit /set hypervisorlaunchtype off - Now, open the Control Panel.
- Go to Programs > Programs and Features.
- Click on Turn Windows feature on or off.
- Disable Windows Hypervisor Platform and Hyper-V.
- Finally, click on Ok to save the changes you have made.
Once done, reboot your host computer, and once the computer starts, open the VirtualBox and boot up the machine, hopefully, it will run without any error.
2] Enable Hardware Virtualization
Hardware virtualization is a technology that lets one physical computer run multiple virtual machines (VMs) by using its hardware resources in a flexible way. This allows different operating systems and applications to run at the same time on the same computer, each in its own separate environment. Depending on your OEM, the method to enable the hardware virtualization would differ. However, usually, you need to boot into your BIOS, look for virtualization, and set it to Enabled. We recommend you go through our guide on how to turn on hardware virtualization, as we have tried covering all the major OEMs there.
3] Make VirtualBox compatible with Hyper-V

A recent update enabled VirtualBox to configure Hyper-V as its backend. This feature allows you to run both at the same time. However, this is still a little unstable, so you can make some other changes to aid this. This solution is for users who can not keep Hyper-V disabled.
First of all, you need to enable Hyper-V (follow the aforementioned steps). Once done, follow the steps mentioned below.
- Open VirtualBox.
- Right-click on your virtual machine and select Settings.
- Now, go to System > Acceleration.
- Set the Paravirtualization interface to Hyper-V.
- Click Ok to save changes.
Finally, check if the issue is resolved.
You can also use the following commands to turn the feature on and off quickly if this doesn’t work for you.
- To disable Hyper-V: bcdedit /set hypervisorlaunchtype off
- To enable Hyper-V: bcdedit /set hypervisorlaunchtype auto
Finally, check if the issue is resolved.
4] Disable Windows Memory Integrity security feature
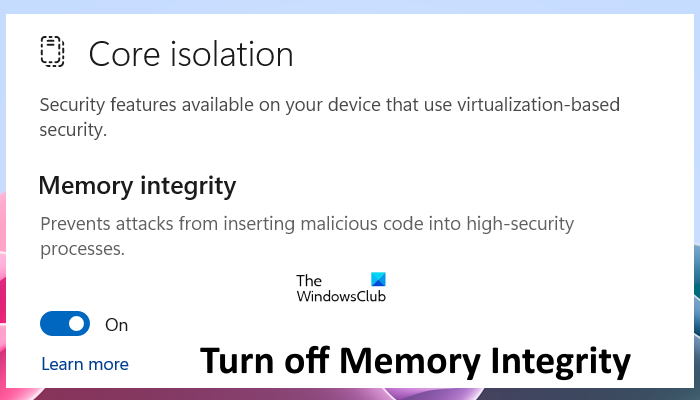
Memory Integrity, also known as Hypervisor-protected Code Integrity (HVCI), is a security feature in Windows that helps protect your system from malicious code by running core processes in a virtualized environment. This can interfere with VirtualBox’s security feature and cause issues. To disable it, follow the steps mentioned below.
- Open Windows Security from the Start Search Option.
- Now, go to Device Security > Core Isolation Details.
- You then have to turn off Memory Integrity.
Finally, reboot your machine to save the changes.
5] Reset BIOS
If all else fails, our last resort is to reset our BIOS settings to the default values. Once done, you need to check if the issue persists.
Hopefully, you will be able to resolve the issue using the solutions mentioned in this post.
Read: How to Install Windows 11 on Oracle VM VirtualBox
How do I enable VT X in VirtualBox?
To enable VT-x in VirtualBox, first, ensure that virtualization is enabled in your computer’s BIOS/UEFI settings. Restart your computer and enter the BIOS/UEFI by pressing the appropriate key (usually F2, F10, or Delete). You then have to find the virtualization setting and enable it, and finally, save and exit the BIOS/UEFI. Then, open VirtualBox, go to the settings of your virtual machine, and then check the box associated with Enable Nested VT-x/AMD-V under the System > Processor tab.
Read: How to speed up a VirtualBox Virtual Machine and make it run faster
Does VirtualBox require VT-X?
VirtualBox requires VT-x. It improves performance and is necessary for 64-bit guest operating systems. VT-x is a hardware virtualization feature that allows better resource allocation and efficiency. Without VT-x, you might face limitations and reduced performance.
Also Read: Use Windows Sandbox and VMWare or VirtualBox together.