This tutorial will show you how to create or make a rotating, revolving, or spinning 3D Globe animation with Illustrator and Photoshop. Illustrator and Photoshop are two top graphics software from Adobe. Both have some similarities and differences. You may wonder what the differences are. As you use both you will realize that they are both good at different things.

How make a spinning 3D Globe animation with Illustrator and Photoshop
Illustrator and Photoshop may have their differences, but they work well together. They both have their weak points and strengths. Creating the 3D revolving globe with Illustrator and Photoshop will use the strengths of each to make a wonderful piece of art. Illustrator will be used for the 3D part of the Globe and the map added to it, and Photoshop will be responsible for the GIF animated portion.
- Add map to symbols
- Create 3D sphere
- Add the map to the sphere
- Capture pictures of different angles of the globe
- Animate pictures in photoshop
- Save
1] Add map to symbols
The step in making the globe requires that a map of the world be added to a sphere. To achieve this, the map of the world will have to be added to the symbols pallet. Find a map of the world and open it with Illustrator, hold and drag it into the Symbols pallet. Give the symbol a name if you wish and press OK to close.
2] Create 3D sphere
Creating the sphere that will contain the map of the world is the next step. Use the Ellipse tool in Illustrator to create a perfect circle
3] Add the map to the sphere
The next step is to add the map of the world to the sphere.
4] Capture pictures of different angles of the globe
The next step is to capture pictures of different sides of the globe. This is important because the different sides will be needed to add Photoshop to make the revolving animated GIF. To capture the images, you will need to decide how detailed you want the revolving globe to look. The more details you want, the more pictures you will need to capture. The more pictures you want to capture the more time-consuming the process will become. This article will not go through getting all the pictures, just a few will be collected to give you an idea of how it is done.
Capture pictures
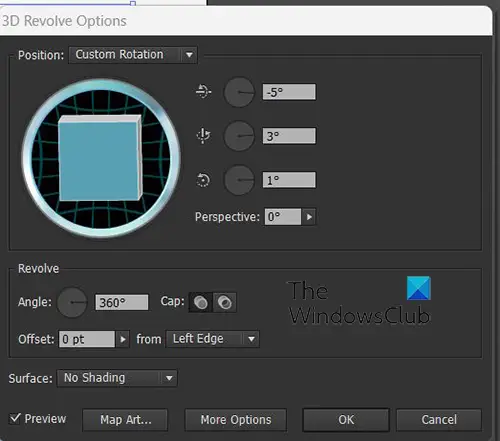
While still in the 3D revolve option, you will see a 3D cube, you will notice that each time you turn it, the globe will turn and show a different side. If you want more pictures and you are patient and your hand is steady, you can rotate the cube, pausing at each side, closing the 3D revolve option (press ok), and go to File then Export, choose a file name that tells which side and the order, choose PNG as the file type and then press Save. The PNG file type will ensure that the background is not saved.
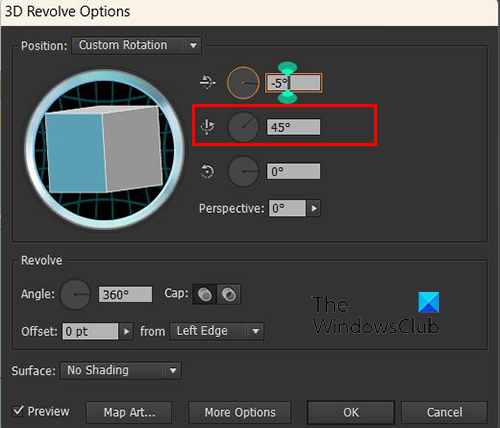
When you were changing the sides using the 3D box, you notice that the value in the second rotation position kept changing. The other values changed too but the second box from the top controls the side view rotation.
Note that if you want a more detailed rotating globe, you will need to capture more images. You can get more faces more accurately by typing the values in the second box from the top. Make the first value 18 degrees and when you have saved that picture, keep increasing by 18 degrees until you get to 360. This means that you will have a total of Twenty values to put in and export Twenty images to use for the animated GIF in Photoshop.
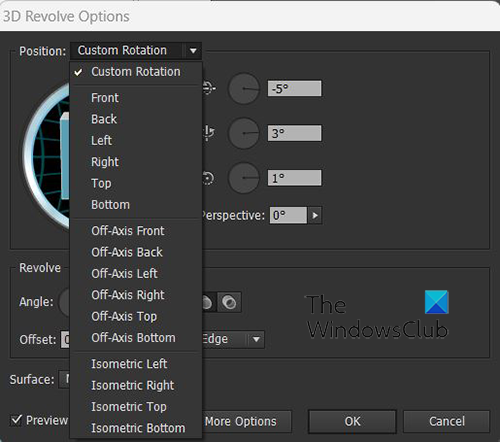
If you want to just show a few sides you can click the drop-down arrow up by Position. A drop-down menu with all the preset positions will appear, click one of the positions and the sphere will turn. You then press ok each time then go to File then Export, choose a file name that tells which side and the order, choose PNG as the file type, and then press Save. The PNG file type will ensure that the background is not saved.
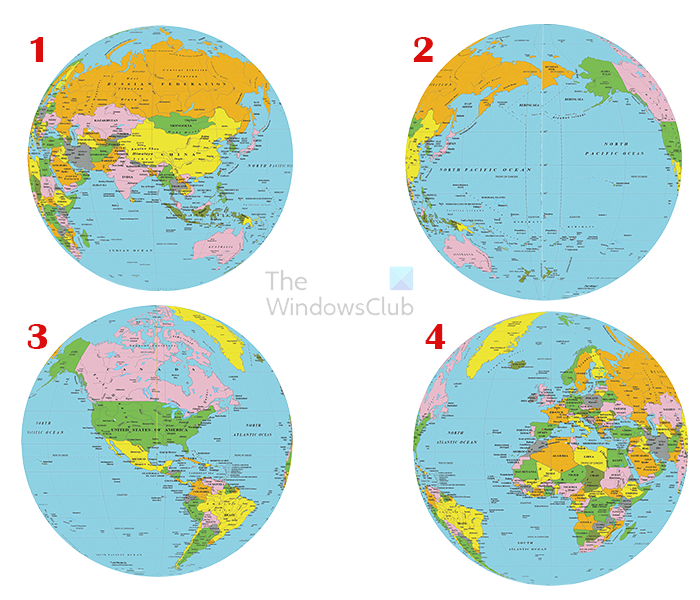 If you are just going to do four perspectives of the globe, to get it to rotate accurately, make the pictures be Front then Right, then Back then Left. Give them numbers in the order they are to be placed on the timeline in photoshop. This is how it would look Front 1 then Right 2, then Back 3 then Left 4. In the 3D perspective, go to the Position and chose the four. Use this order for the setup in Photoshop for the GIF.
5] Animate pictures in photoshop
Now that you have created the globe and saved the images, it is now time to do the animation in Photoshop. This will require you to make an animated GIF by using Photoshop’s Timeline to make a form of stop motion video. This is like making the drawings in the physical book and then flipping the pages to animate the images. This Photoshop timeline works the same way, it uses the layers and the timing to give the effect of movement. The file will be saved as a GIF, GIF supports animation.
Turn on timeline
This is the time to get the images into Photoshop. Open Photoshop and create a new document with your desired dimensions. The new document is opened by going to File then New or pressing Ctrl + N. The New document options window will appear, choose your options then press Ok to confirm them. You then go to Window then Timeline and the Timeline interface will appear at the bottom of the canvas area. The document that is created will be the first frame on the timeline.
 It is now time to place the images into Photoshop. It is important to place the images in the proper order on the timeline. The order they are in is the order they will play in. you can get the image into Photoshop by either going to File then Place and searching for the image, click on it, and pressing Place. With the Place command, the image will be placed on the canvas. You can also open the image by going to File then Open then searching for the image, selecting it, and pressing Open. This method will open the image in a new document and you will have to click and drag it into the document you want it in.
The first image will get the first place on the timeline. Ensure that this image is the first one that will start the animation. The image will also be visible in the layers panel. The second image can now be placed into Photoshop, follow the steps to place it in photoshop. Before placing the image, go to the Timeline, press the Duplicate selected layer icon. The selected layer will be duplicated with the image on it and a layer called Frame 2 will be placed in the layers panel. You will place the new image on Frame 2. Follow these steps for each image. Ensure that the images are the same size and that the last one covers the previous image completely unless you are doing a special effect. When all the images have been placed into photoshop on the timeline, observe that they are aligned properly. Do a test run of the animation by pressing the Play animation button and you will see how well they are aligned. Don’t worry about the timing at this point, you are just trying to observe the alignment and watch out for size differences.
Troubleshoot
You may have an issue where the previous images are affecting the images that come after and show up where they are not supposed to. This can be fixed by looking for the menu button at the extreme right of the Timeline, clicking the menu, and then unchecking New layer visible in all frames. In that same menu is the option to toggle on and off Create new layer for each new frame. Turn these on or off and see how they affect the outcome.
If the thumbnails in the Timeline view are too small, click the menu button on the timeline and choose Panel options. The Animation panel options will open, and you will see the thumbnail size options. Small, Medium, and Large. The medium size is the default size. You can choose the size that is comfortable for you.
Add background color (optional)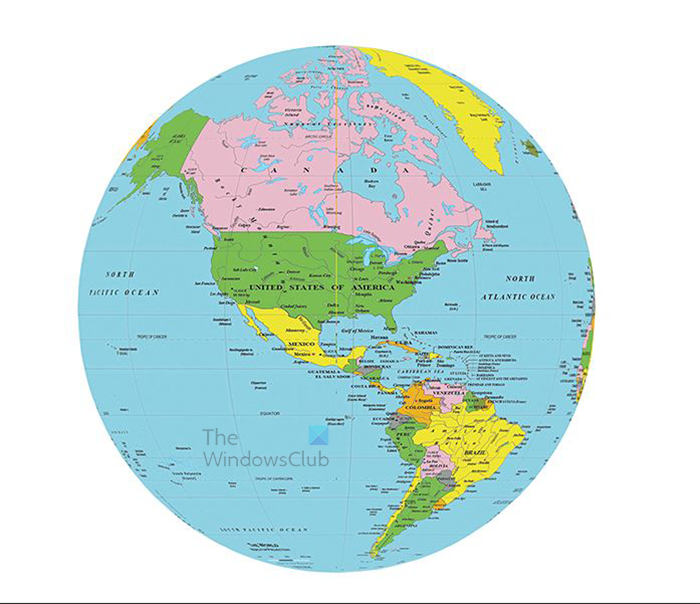
This is the image on a white background.
You can make the animation look even better by adding some additional things, you can add background color to make the globe stand out. To add the background color go to the layers panel and click on the background layer, go to the bottom of the layers panel and click the Create new fill or adjustment layer icon. Choose Solid color, gradient, or Pattern. This article will use the Solid color option. Use a nice color that will make the globe stand out. You can also use a dark color to imitate space and add some stars using the Brush tool. When you add the background color, you will have to click on each frame and enable the color layer.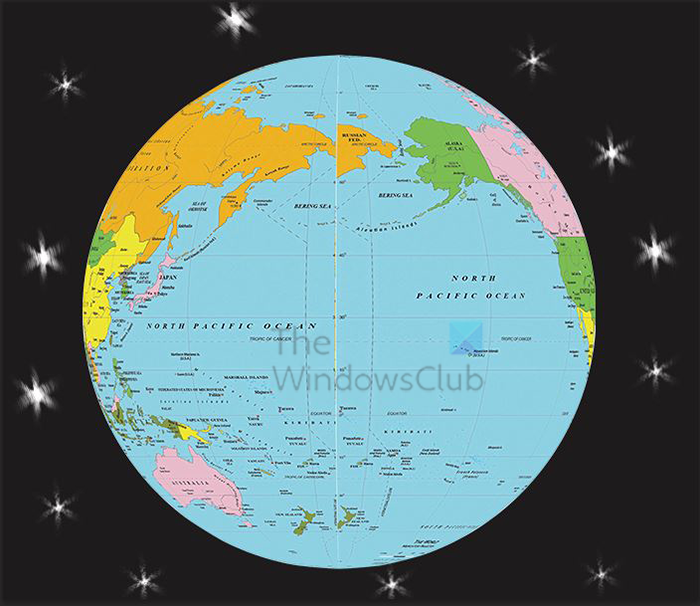
This is the image on a black background with stars.
Adjust time
This is the part where you will control the speed of the animation. If the animation is too fast it will be hard to look on. If it is too slow it will get boring to watch. Find a time that is not too fast and not too slow. Choose an appropriate time depending on what else may be on the animation. If there is information to read, make the animation time slow enough to allow adequate time to read.
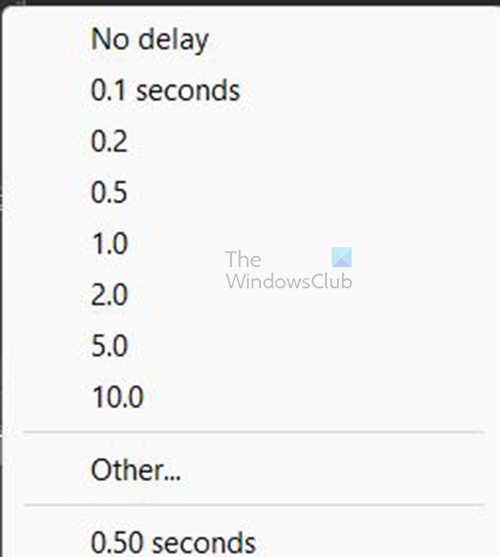
To adjust the time, go to each frame and click on the dropdown arrow where you see the seconds displayed. A pop-up menu will appear with different time options. You may have to select different times and experiment until you find the right one. You can also make each frame have a different time.
You can also choose how many times the animation will repeat before it stops.
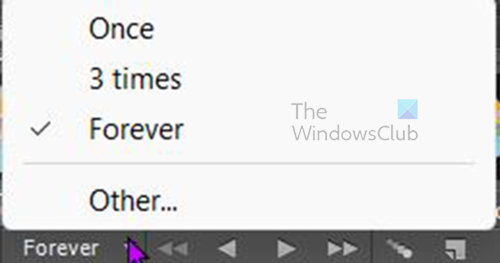
Look below the frames and you will see the word Forever. This is the default time, click on the drop-down arrow to bring up the menu where you can choose a different number of times. Once, three times and Forever are the preset number of times, if you want to choose a different number of times other than those, choose Other and you will be given the option to type in the preferred number of times you want.
6] Save
To save as GIF go to File, Save for Web, and a dialogue box will appear. You can just choose to preview the GIF or press ok if you do not need to make any changes. The animated GIF will play in any web browser. In the Save for Web dialogue box, there is a preview button, this will preview the GIF and show a copy of the HTML code.
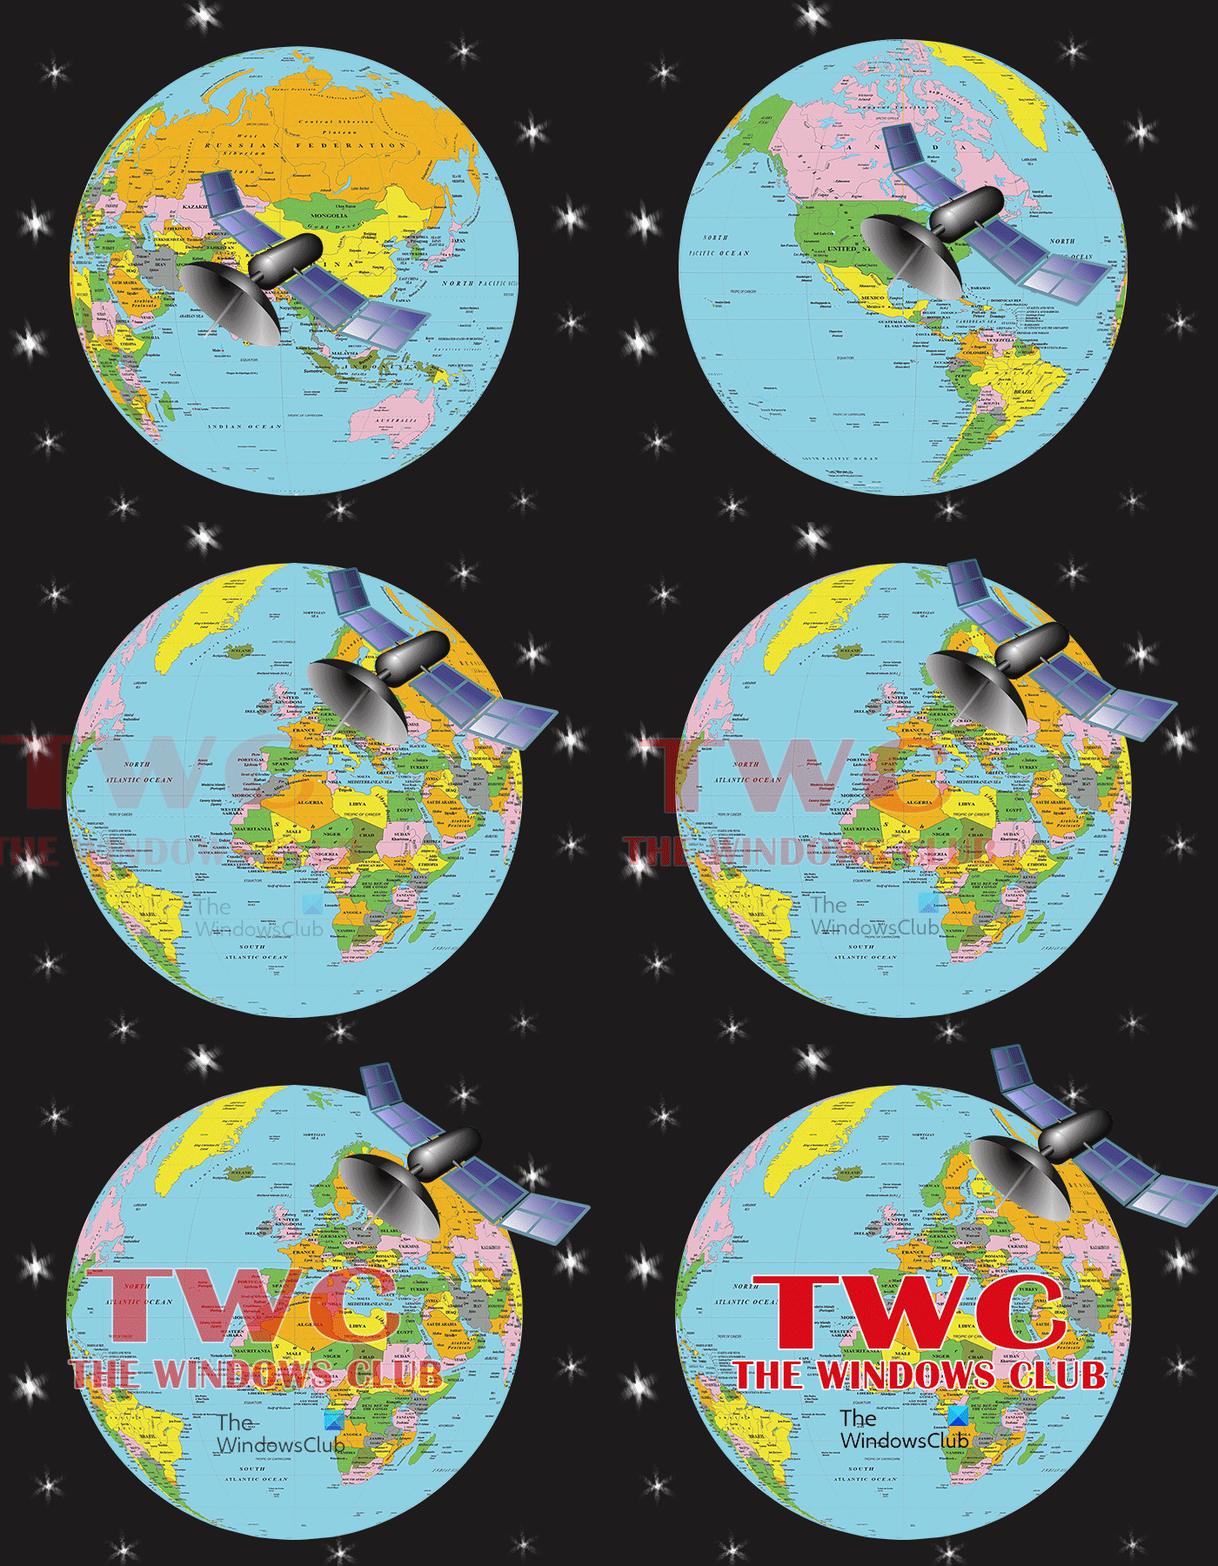
This is the animated rotating globe. If you need it to be smoother it will need to have more images to make the turns smoother. There are other effects and features added to enhance the artwork. You can be creative and add whatever else you want.
Read: How to create Pattern using Custom Shape Tool in Photoshop
How do I create a 3D shape in Illustrator?
Lots of shapes can be made to look 3D in Illustrator, in some cases you have to just experiment. If you want a 3D sphere just create a circle in Illustrator, cut it in half and delete the left side then use the 3D revolve effect. You can then add other effects to the 3D sphere.
How do I create a 3D cone in illustrator?
Creating a 3D cone in illustrator is quite easy, simply use the Line tool. Draw a line then go to the Effect then 3D then Revolve, click Preview and you will see the line change to a 3D cone. You can click Ok to close and confirm changes
Leave a Reply