If you want to add a border or frame to an image in Microsoft PowerPoint or PowerPoint Online, you need to follow this detailed guide. Whether you want to add a black, dotted, white border, you can do everything in PowerPoint. For that, you do not need to use additional add-in or anything else.
At times, you might want to add a border to the inserted image in PowerPoint to make it stand out. The best way to differentiate between multiple pictures is by using a frame. As you are talking about PowerPoint, you do not need to use third-party apps since Microsoft included a few couples of options to add a border.
Note: Microsoft PowerPoint and PowerPoint Online provide the same option to insert an image and add a border or frame. However, PowerPoint Online comes with few options than the desktop version in terms of customization.
How to add Border to Image in PowerPoint
To add a border to image in PowerPoint, follow these steps:
- Open PowerPoint and insert the image.
- Click on the image to select and go to the Picture Format tab.
- Select a border you want to add.
- Expand the Picture Border section.
- Select the border color and type.
To learn more about these steps, continue reading.
To get started, you need to open Microsoft PowerPoint and insert the image. Then, click on the image to select and go to the Picture Format tab.
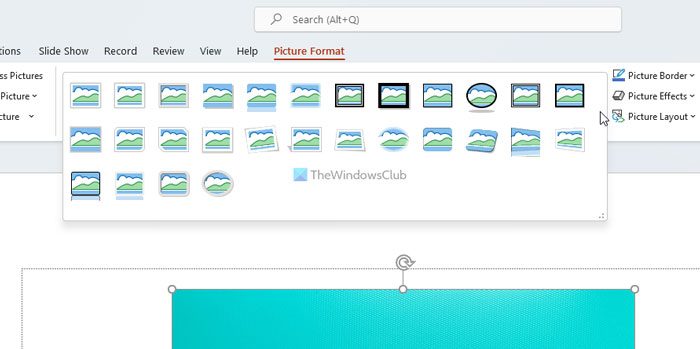
Next, you can see some borders or frames in the Picture Styles section. You need to choose a border as per your requirements.

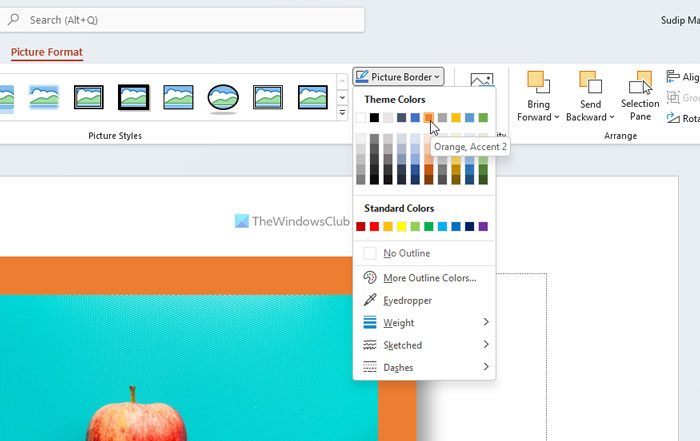
Once done, you can expand the Picture Border menu. It includes some options to customize the border.

For example, you can choose the color of the border. No matter which border or frame you selected, you can tweak the default color combination. If you cannot find the desired color, you can click on the Eyedropper option to pick a color from your screen.
The next option is Weight. It helps you select the border width. You can choose any of the given options or create something according to your requirements.
In that case, you must choose the More Lines option. Then, you can customize the border as you like.
By default, PowerPoint includes straight lines as the border. However, if you want, you can change that as well. To do so, select the Sketched option and choose a style that you like.

In case you cannot find the desired line in the preset list, you can click on the More Lines option and create your favorite line as per the requirements.
On the other hand, you can add dotted or dashed lines as well. For that, expand the Dashes menu and choose a type of line you want to add.
For your information, you can find almost all the options in PowerPoint Online. However, there are some limitations. For example, you can find the Eyedropper option to pick a color from the screen. Secondly, you cannot create manual dashed or dotted lines using the More Lines option. Otherwise, you have a fully functional menu that you can use to get the job done.
Read: How add a Color Frame around a Picture using Microsoft Word
How do I put a border around a picture in PowerPoint?
To put a border around a picture in PowerPoint, you need to follow the aforementioned guide. You can insert the image, as usual, click on it and go to the Picture Format tab. Then, you can choose a border or frame to use around the picture. Following that, you can choose the color, border type, width, etc.
Read: How to add a Border to an image in a Google Docs document
How do you put a border on a picture?
There are multiple tools available in the market to put a border on a picture in Windows 11/10. For example, you can use Microsoft Word, Microsoft PowerPoint, Google Docs, etc. The process to add a border on a picture in Word is same as the PowerPoint and PowerPoint Online. Therefore, you can use any of the guides to get the job done.
That’s all! Hope this guide helped.
Leave a Reply