An image with no borders can look a bit boring. Adding colorful borders to it is a great way to glorify things. That’s why, in this post, we will see how you can add a border to a picture or screenshot in Windows 11/10 using the Snipping Tool, ShareX or Paint.
How to add a border to Picture in Windows 11/10
If you want to add a border to a picture, image, or screenshot, follow any of these methods.
How to add borders to Snipping Tool captures
To add borders to Snipping Tool captures, you need to configure the tool. Once it is configured, borders will be added automatically to every screenshot you take using the tool. Follow these steps to automatically add borders to your Snipping Tool captures:
- Go to Snipping Tool Settings.
- Turn on Add border to each screenshot.
- Select a color for the border.
- Set border thickness.
Let us see this in detail.
1] Go to Snipping Tool Settings
Type ‘snip’ in the Windows Search bar and select Snipping Tool from the search results. The Snipping Tool window will appear. Click on the three-dots icon in the top-right corner and select Settings.

You can click on the maximize button above the three-dots icon if the Snipping Tool window doesn’t open in full-screen mode.
2] Turn on Add border to each screenshot
On the Settings page, locate the Add border to each screenshot option (the last option under the Snipping section).
You will see a toggle button next to the option. Click on the toggle to turn on the setting.
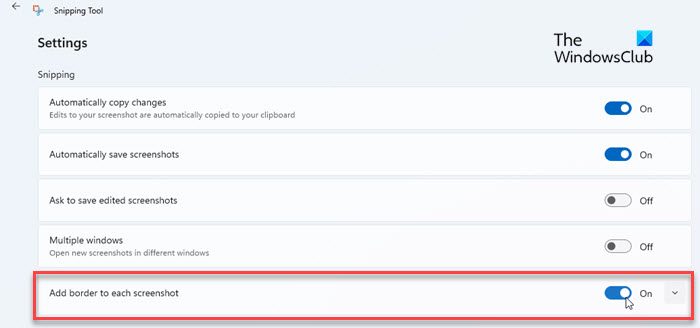
Now border will be applied to the captures, but wait! What about the border color and thickness? Click on the down arrow next to the toggle button. The section will expand and show options to set the border color and thickness.
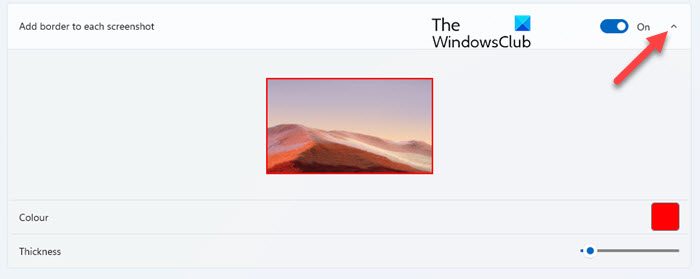
Note: To disable the setting, simply turn off the toggle.
3] Select a color for the border
By default, a red-colored border will be applied to the captures in size 2 thickness. However, this may not go well with the window (or part of the screen) you’re working on. A well-chosen border that compliments the style and theme of the screenshot can enhance the overall aesthetics of the image.
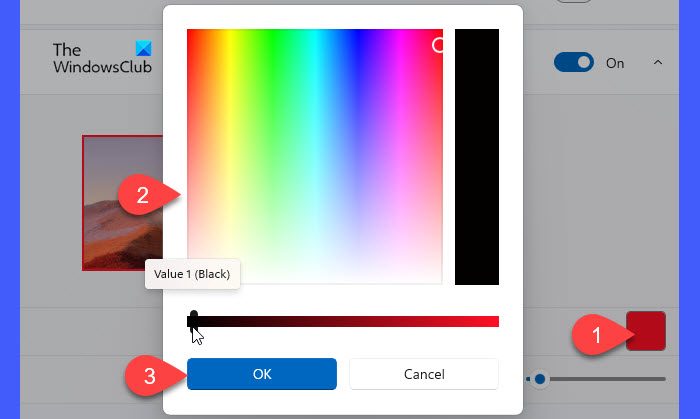
Click on the color square to select a different color for the borders. A color palette will appear. You can use your mouse pointer to pick a color from the palette and adjust its shade (or choose a similar color) using the available slider. Click on the OK button to save the changes.
4] Set border thickness
Use the slider next to the Thickness option to adjust the border’s thickness. You can choose a value from 1 to 24 to make the border thicker or thinner.
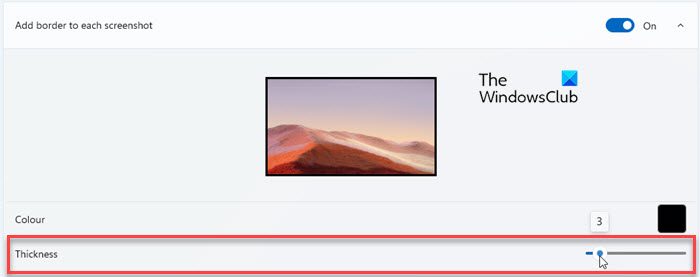
Once you’re done, return to the Snipping Tool and start taking the screenshots. They will start appearing outlined in the chosen border style.
Read: How to to Enable or Snipping Tool or Print Screen
2] Add a Border to a Picture using ShareX
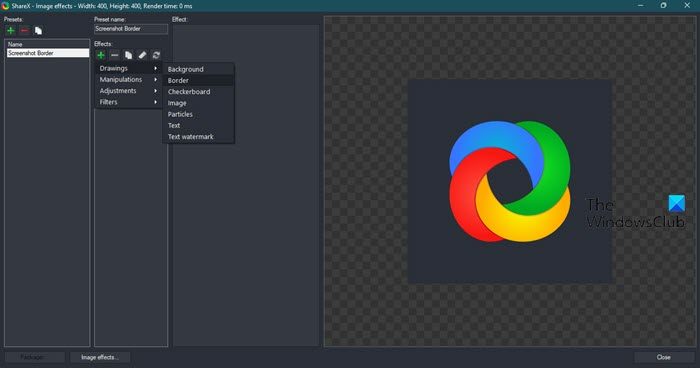
ShareX is a free tool that allows you to capture screenshots and make them look the way you want. To download the app, go to getsharex.com. You will see some buttons, click on Download to get this app.
Once the app is downloaded, go to File Explorer and run the installation package to install the software on your computer. You will have to follow the on-screen instruction to complete the installation.
Now, follow the prescribed steps to add a border to a screenshot using ShareX.
- In ShareX, go to Task settings.
- Select Effects and then click on Image effects configuration.
- Click on + from Presets and then type “Screenshot Border” in the Preset Name field.
- Click on + from Effects and select Drawing > Backgrounds.
- Now, adjust everything about the border, from length to color.
Now, every time you take a screenshot a border will be added.

There are various kinds of preset borders for you to choose from. If you want to take a look at them, go to ShareX > Task Settings > Effects > Image effects configuration > Image effects. Select a browser or it will open the file in your default browser.
You can select a border of your choice and download it. This is a great way to add a nice-looking touch to your screenshots.
Read: Fix Snipping Tool This app can’t open error.
3] Add a Border to an Image using Paint
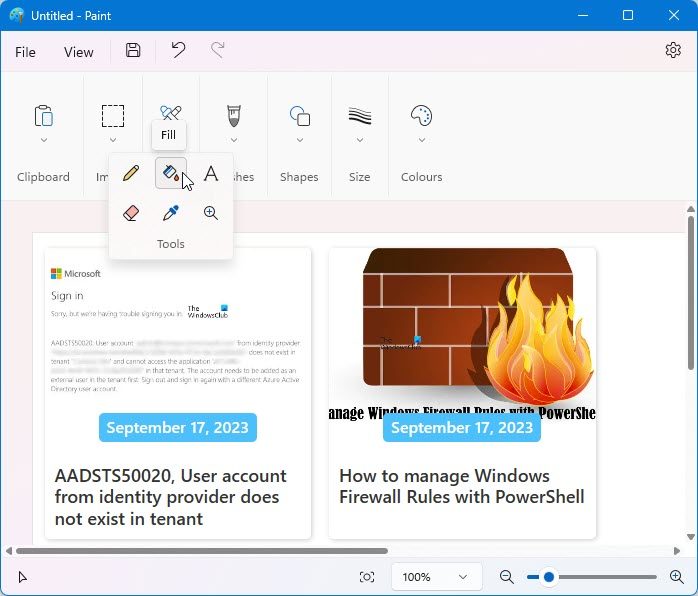
If you don’t want to overcomplicate things and want something that will put an aesthetical touch to your screenshots, then try using MS Paint. It is a free built-in program that’s there on your computer. If you want to use the tool, launch MS Paint. Then, paste the screenshot you took there, and select the image using the Selector. Extend the canvas to create a border, then from Tools, select Fill, select a color, and then add it.
Also read: Best Free Screen Capture Software for Windows.
How do I put a border around a screenshot in Word?

You don’t need an extra app to put a border around the screenshot, and MS Word can do the same for you.
We assume that you don’t have any other tool to take a screenshot and you just hit PrtSc (Print Screen) to take a screenshot and paste it wherever you want. Once you have pasted the screenshot in MS Word, follow the prescribed steps to put a border around a screenshot in Word.
- Select the image and click on Picture Format.
- Select a border from the available catalog.
- To edit the browser, click on Picture Border.
- Now, you can change color, dashes, weight, etc.
After making the adjustments, your image is ready.
How do I put a border around a screenshot?
You can easily put a border around a screenshot using any of the aforementioned methods. We have only mentioned free apps. So, you don’t have to buy anything. All you have to do is configure these apps to add a border to your screenshot.
How do I get a border Snipping Tool?
To get a border in Snipping Tool, you need to enable Snip Outline. It can be enabled from the settings of the Snipping Tool. Once you have enabled the feature and configured it, all your screenshots will have a border around them.
How do you use rectangle mode in Snipping Tool?
Launch the Snipping Tool app and click on the down arrow next to the Snipping Mode option (third option from the left). Select Rectangle to capture your screenshots in rectangular mode. Apart from this, you can select Window (to capture an application window), Full Screen (to capture the entire desktop screen), or Freeform mode (to capture a specific area while emitting anything you don’t require).
How do I put a border around a picture?
You can use any image editor app to add a border around a picture. If you want to add borders to your screen captures, the Snipping Tool app can help add them automatically. For other images, you can use MS Paint, Paint.NET, etc.
Leave a Reply