GNU Image Manipulation Program (GIMP) is a free open-source graphics software. Even though GIMP is free it has some cool features that you can use to make your artwork stand out. In this post, we will show you how to add a Glow to an Object in GIMP.
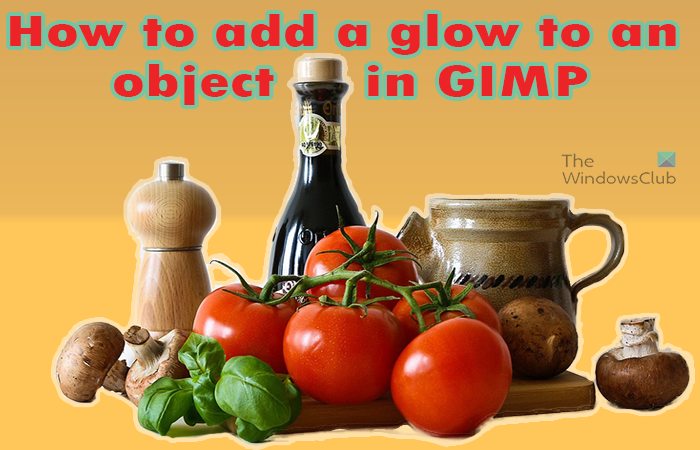
How to add a Glow to an Object in GIMP
GIMP allows you to manipulate objects to make your artwork have different characteristics. Adding a glow to an object can make it look shiny or make it stand out against a dark background. Glows can be different colors to mimic different items.
The first step is to open the object into GIMP so that the glow can be added. Select the image for the glow so that you can now add the glow.
The way that the image is in the GIMP document will decide what options will be available. If the image that you placed in GIMP is placed by itself and not on a background then it will be treated differently and the filter option will be different. This is usually the case if the Open with or the drag into GIMP options are used to add the image in GIMP. If the blank document was created then the image added to it the filter options will be different as well and the outcome will be slightly different. This is achieved when you open GIMP then create a new blank document then open and drag the image on the blank canvas. The differences will be shown below so that you can know what to expect.
Image with no separate background

This is the original image before the filter is added
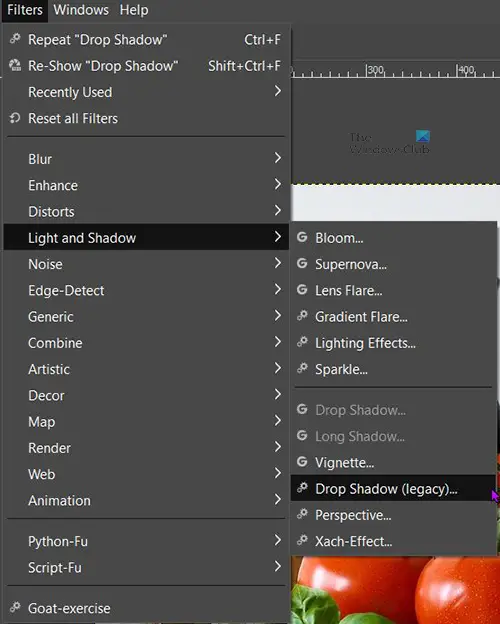
Select the image then go to the top menu bar and click Filters then Light and Shadow. Look at the options available, you will notice that Drop shadow is unavailable (grayed out), and only Drop shadow (legacy) is available.
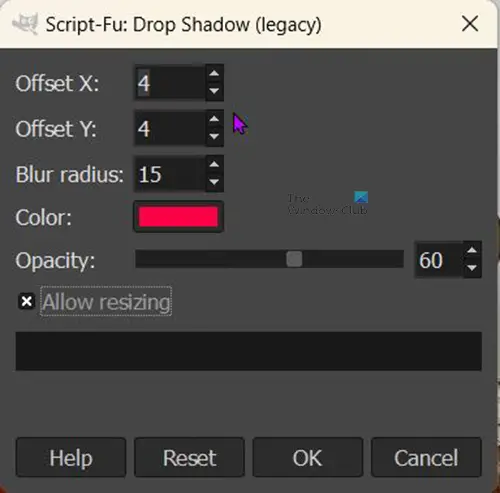
Click Drop shadow (legacy) and you will see the Drop shadow (legacy) options window open up.
The X value and the Y value simply change the direction/angle where the drop shadow will be placed. You can adjust them to place the shadow at different angles relative to the image.
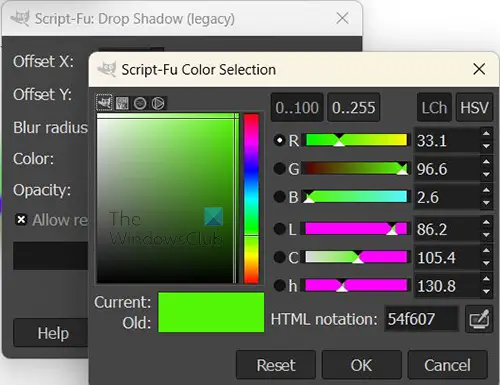
You can click on Color to bring up the color picker so that you can change the color of the glow. You should pick a color that will be different from the colors in your image. you can click the Eyedropper icon if you want to sample colors to use as the drop shadow.
The Allow resizing option will be checked by default, keep it checked. That is important for this particular method since this image does not have an independent background. If you add the drop shadow without allowing the image to resize, you will not see the glow as the glow will fall off the edge of the image. allowing resizing will make the image resize to show the drop shadow. The image will resize to show the side where the drop shadow/glow was placed.

This is the image in GIMP with the Allow resizing option checked. You notice that the drop shadow/glow is showing. If this option was not checked then the image would fill the canvas and the glow would fall off to where it cannot be seen. In this image, the X and Y values are the default values.
To save the image in a format that flattens the image and makes it easy to share go to File then click Export or Export as and choose the file name and the file destination. You will see another options window pop up with other options, you can just click Export to save and close without making changes there. You will notice that the default file type is .PNG. this is because the image did not have a background and the image was resized to show the glow. The background was left transparent as you see with the checkered colors behind the image in GIMP. The .PNG file format allows for the image to have that transparent background in some applications.

This is the image that was exported from GIMP as a .PNG file.
Image with a separate background
This is the original image before the filter is added. You can see that the image is on a white background. To place the image on the white background open GIMP then go to File then New. When the document options appear, choose the options you want then click Ok. This will create a blank canvas. To get the image on the canvas, find the image on your computer and drag it onto the canvas.
If the image is too big or too small on the background you can resize the image.
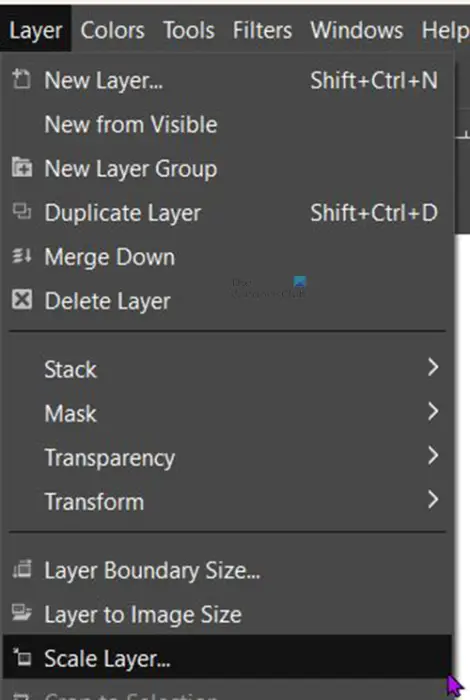
You can resize the image by going to the top menu bar then clicking Layers then Scale layer.
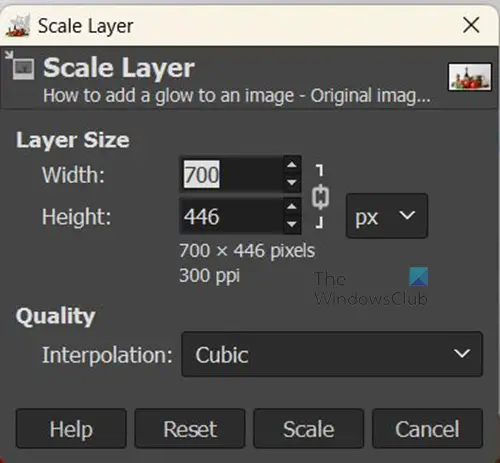
You will see the Scale layer options window for you to choose the new size of the image that you want. Enter the desired sizes in the value boxes then press Scale to change the size of the image.

You can also resize the image by clicking on it and then clicking Shift + S. you will handles appear around the image, click on any of the handles to resize the image. If you want to resize all four corners at the same rate, click and hold in the center of the image and move in or out.
Remember to leave canvas space around the image so that you will be able to see the glow around the image.
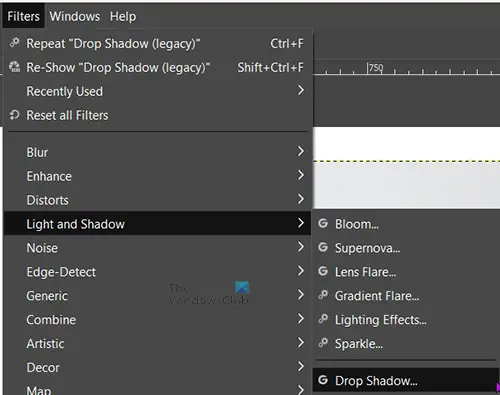
It is now time to add the glow around the image. Go to the top menu bar and click Filters then Light and shadow. You should see the regular Drop shadow available, if it is grayed out, you may need to change the size of the image.
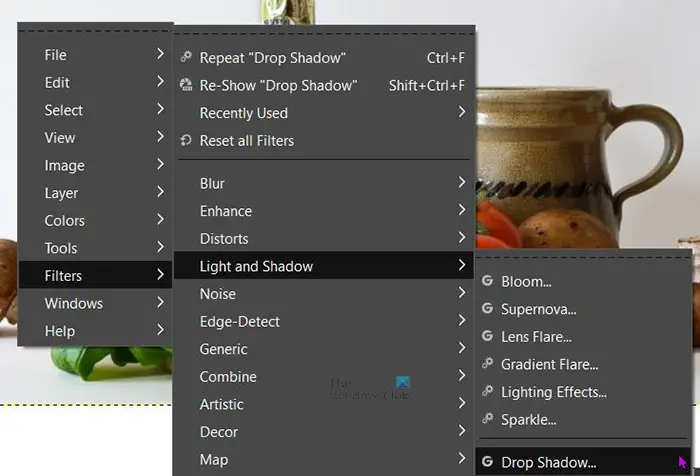
You can also get to Drop shadow by right-clicking on the image then pressing Filter then Light and shadow then Drop shadow. When you click on Drop shadow (not Drop shadow (legacy), you will get the Drop shadow options window.
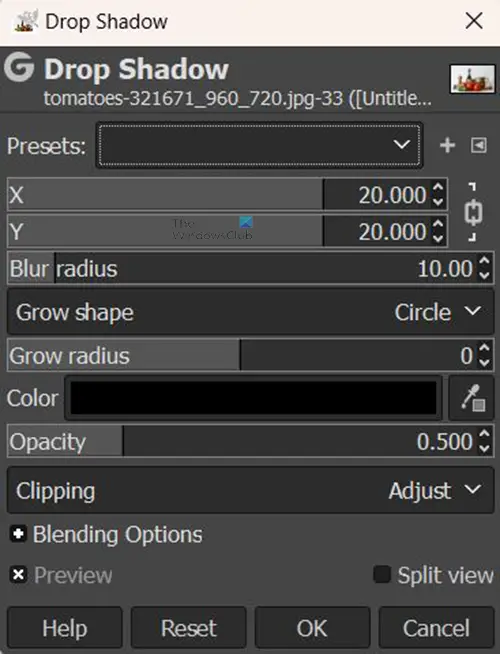
You will notice that this Drop shadow window has more options than the legacy drop shadow. You can experiment with the options and see how they turn out.

The default color of the shadow that will be the glow is black, you can change the color by clicking on the black color swatch beside the word color. This will bring up the color picker. You can then choose a color that you want.
You can also sample a color that you want from the image to use as the shadow/glow color. To sample the color click the Eyedropper symbol then click on the color that you want to sample. The Eyedropper tool is located beside the color swatch.
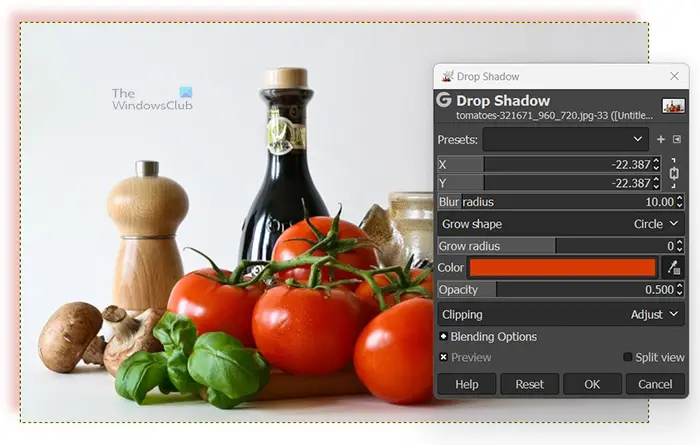
You can change the X and the Y values to make the angle of the shadow change from the default. The default drop shadow is created on the lower and right sides of the image. This one shows the change in the color sampling of the tomato and the X and Y values are -27 placing the drop shadow on the top and right sides of the image.

This is the final image with all the changes.
Read: How to make Stencil in GIMP?
Can a glow be added to text in GIMP?
Glow can be added to text just as it is added to images. Just select the text then go to the top menu bar and click Filters then Light and shadow then Drop shadow. When the drop shadow options box appears, choose the color you want and other options then press Ok to apply and keep the changes.
How can I add multiple colors glows to images or text in GIMP?
You can add multiple colors glows to images or text in GIMP. You would follow the above steps to add the first glow then press Ok to keep it. you then repeat the steps to add other color glows. You can make each glow have a different angle, opacity, color, and any other differences you want to add.
Leave a Reply