You can personalize the appearance of Microsoft Teams to show the apps that you use frequently. Also, you can pin them or change the order in which they appear. Today, in our post, we’ll see how to add an app to the Microsoft Teams App bar.
Add an app to Microsoft Teams App bar
Pinning apps lets you display apps that users in your group need, including those built by developers in your organization. To add an app to the Microsoft Teams sidebar, do the following.
- Login your Microsoft 365 account.
- Go to All Admin Center.
- Choose the Microsoft Teams Admin center.
- Choose Teams from the right-pane.
- Under Microsoft Teams Admin center Dashboard, choose Teams Apps > Setup Policies.
- Hit the Global (Org-wide default) link > Add Apps.
- Select an app to add or search it from the library.
- Hit the Save button to confirm the changes.
- Check if the app has been added or pinned to the Microsoft Teams app bar.
- Repeat the same to add more apps.
Let us cover the above steps in more detail!
Login your Microsoft 365 account, click on App Launcher, and select Admin Center.
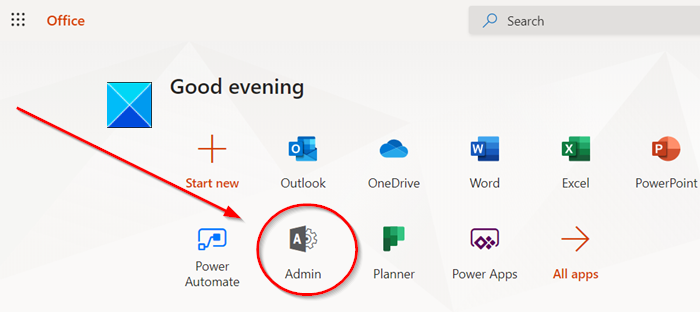
From the left navigation bar, choose All admin centers.
A new page will open on your right.
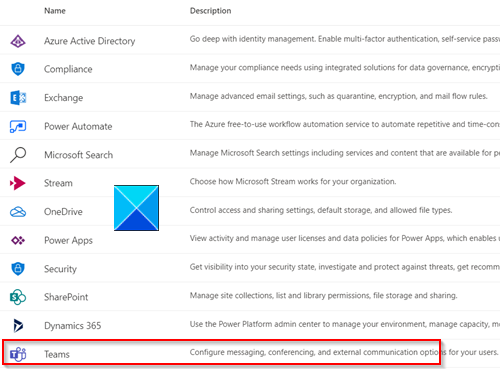
Scroll down to Teams to configure the desired options.
Click the option to go to Microsoft Teams Admin Center.
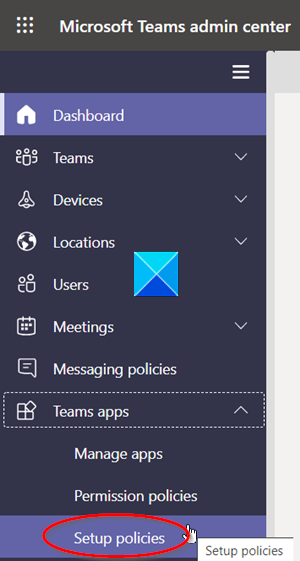
There, expand the Teams apps menu by clicking the drop-down arrow icon and from the list of options displayed select Setup Policies.
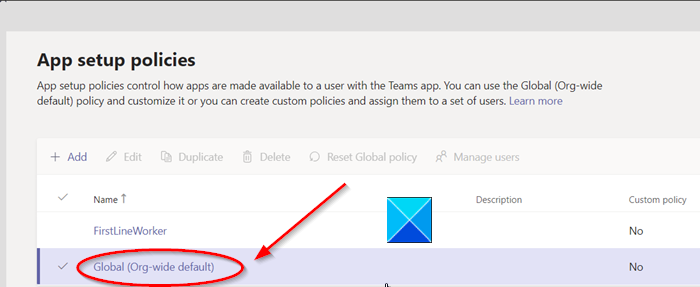
Under Add Setup policies heading, click the Global (Org-wide default) link as shown in the screenshot above.
Scroll down to the Pinned Apps section and click the Add Apps button (visible as a + sign).
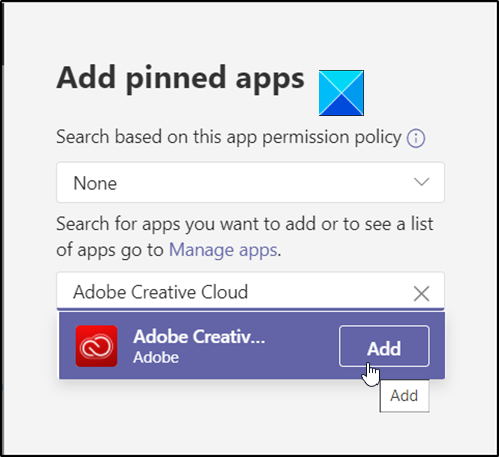
Enter the name of an app you would like to see to be added under Microsoft Teams’ sidebar. Hit the Add button.
Hit the Save button.

Instantly, the app should be pinned to the app bar, which is on the side of the Teams desktop client.
You can add an app to the Microsoft Teams App bar.
Also read: How to install an App and add it as a Tab in Microsoft Teams.
Leave a Reply